# Summary
# General
- [Getting Started](./getting-started.md)
- [System Requirements](./system-requirements.md)
- [Accounts](./accounts.md)
- [Linux](./linux.md)
- [Windows](./windows.md)
- [Telemetry](./telemetry.md)
- [Workspace Persistence](./workspace-persistence.md)
- [Additional Learning Materials](./additional-learning-materials.md)
# Configuration
- [Configuring Zed](./configuring-zed.md)
- [Configuring Languages](./configuring-languages.md)
- [Key bindings](./key-bindings.md)
- [Snippets](./snippets.md)
- [Themes](./themes.md)
- [Icon Themes](./icon-themes.md)
- [Visual Customization](./visual-customization.md)
- [Vim Mode](./vim.md)
# Using Zed
- [Multibuffers](./multibuffers.md)
- [Outline Panel](./outline-panel.md)
- [Code Completions](./completions.md)
- [Channels](./channels.md)
- [Collaboration](./collaboration.md)
- [Git](./git.md)
- [Debugger](./debugger.md)
- [Diagnostics](./diagnostics.md)
- [Tasks](./tasks.md)
- [Remote Development](./remote-development.md)
- [Environment Variables](./environment.md)
- [REPL](./repl.md)
# AI
- [Overview](./ai/overview.md)
- [Agent Panel](./ai/agent-panel.md)
- [Tools](./ai/tools.md)
- [Model Temperature](./ai/temperature.md)
- [Inline Assistant](./ai/inline-assistant.md)
- [Edit Prediction](./ai/edit-prediction.md)
- [Text Threads](./ai/text-threads.md)
- [Rules](./ai/rules.md)
- [Model Context Protocol](./ai/mcp.md)
- [Configuration](./ai/configuration.md)
- [Subscription](./ai/subscription.md)
- [Plans and Usage](./ai/plans-and-usage.md)
- [Billing](./ai/billing.md)
- [Models](./ai/models.md)
- [Privacy and Security](./ai/privacy-and-security.md)
- [AI Improvement](./ai/ai-improvement.md)
# Extensions
- [Overview](./extensions.md)
- [Installing Extensions](./extensions/installing-extensions.md)
- [Developing Extensions](./extensions/developing-extensions.md)
- [Language Extensions](./extensions/languages.md)
- [Debugger Extensions](./extensions/debugger-extensions.md)
- [Theme Extensions](./extensions/themes.md)
- [Icon Theme Extensions](./extensions/icon-themes.md)
- [Slash Command Extensions](./extensions/slash-commands.md)
- [MCP Server Extensions](./extensions/mcp-extensions.md)
# Language Support
- [All Languages](./languages.md)
- [Ansible](./languages/ansible.md)
- [AsciiDoc](./languages/asciidoc.md)
- [Astro](./languages/astro.md)
- [Bash](./languages/bash.md)
- [Biome](./languages/biome.md)
- [C](./languages/c.md)
- [C++](./languages/cpp.md)
- [C#](./languages/csharp.md)
- [Clojure](./languages/clojure.md)
- [CSS](./languages/css.md)
- [Dart](./languages/dart.md)
- [Deno](./languages/deno.md)
- [Diff](./languages/diff.md)
- [Docker](./languages/docker.md)
- [Elixir](./languages/elixir.md)
- [Elm](./languages/elm.md)
- [Emmet](./languages/emmet.md)
- [Erlang](./languages/erlang.md)
- [Fish](./languages/fish.md)
- [GDScript](./languages/gdscript.md)
- [Gleam](./languages/gleam.md)
- [GLSL](./languages/glsl.md)
- [Go](./languages/go.md)
- [Groovy](./languages/groovy.md)
- [Haskell](./languages/haskell.md)
- [Helm](./languages/helm.md)
- [HTML](./languages/html.md)
- [Java](./languages/java.md)
- [JavaScript](./languages/javascript.md)
- [Julia](./languages/julia.md)
- [JSON](./languages/json.md)
- [Jsonnet](./languages/jsonnet.md)
- [Kotlin](./languages/kotlin.md)
- [Lua](./languages/lua.md)
- [Luau](./languages/luau.md)
- [Makefile](./languages/makefile.md)
- [Markdown](./languages/markdown.md)
- [Nim](./languages/nim.md)
- [OCaml](./languages/ocaml.md)
- [PHP](./languages/php.md)
- [PowerShell](./languages/powershell.md)
- [Prisma](./languages/prisma.md)
- [Proto](./languages/proto.md)
- [PureScript](./languages/purescript.md)
- [Python](./languages/python.md)
- [R](./languages/r.md)
- [Rego](./languages/rego.md)
- [ReStructuredText](./languages/rst.md)
- [Racket](./languages/racket.md)
- [Roc](./languages/roc.md)
- [Ruby](./languages/ruby.md)
- [Rust](./languages/rust.md)
- [Scala](./languages/scala.md)
- [Scheme](./languages/scheme.md)
- [Shell Script](./languages/sh.md)
- [SQL](./languages/sql.md)
- [Svelte](./languages/svelte.md)
- [Swift](./languages/swift.md)
- [Tailwind CSS](./languages/tailwindcss.md)
- [Terraform](./languages/terraform.md)
- [TOML](./languages/toml.md)
- [TypeScript](./languages/typescript.md)
- [Uiua](./languages/uiua.md)
- [Vue](./languages/vue.md)
- [XML](./languages/xml.md)
- [YAML](./languages/yaml.md)
- [Yara](./languages/yara.md)
- [Yarn](./languages/yarn.md)
- [Zig](./languages/zig.md)
# Developing Zed
- [Developing Zed](./development.md)
- [macOS](./development/macos.md)
- [Linux](./development/linux.md)
- [Windows](./development/windows.md)
- [FreeBSD](./development/freebsd.md)
- [Local Collaboration](./development/local-collaboration.md)
- [Using Debuggers](./development/debuggers.md)
- [Release Process](./development/releases.md)
- [Debugging Crashes](./development/debugging-crashes.md)
# Accounts
Signing in to Zed is not a requirement. You can use most features you'd expect in a code editor without ever doing so. We'll outline the few features that do require signing in, and how to do so, here.
## What Features Require Signing In?
1. All real-time [collaboration features](./collaboration.md).
2. [LLM-powered features](./ai/overview.md), if you are using Zed as the provider of your LLM models. Alternatively, you can [bring and configure your own API keys](./ai/configuration.md#use-your-own-keys) if you'd prefer, and avoid having to sign in.
## Signing In
Zed uses GitHub's OAuth flow to authenticate users, requiring only the `read:user` GitHub scope, which grants read-only access to your GitHub profile information.
1. Open Zed and click the `Sign In` button in the top-right corner of the window, or run the `client: sign in` command from the command palette (`cmd-shift-p` on macOS or `ctrl-shift-p` on Windows/Linux).
2. Your default web browser will open to the Zed sign-in page.
3. Authenticate with your GitHub account when prompted.
4. After successful authentication, your browser will display a confirmation, and you'll be automatically signed in to Zed.
**Note**: If you're behind a corporate firewall, ensure that connections to `zed.dev` and `collab.zed.dev` are allowed.
## Signing Out
To sign out of Zed, you can use either of these methods:
- Click on the profile icon in the upper right corner and select `Sign Out` from the dropdown menu.
- Open the command palette and run the `client: sign out` command.
## Email Addresses {#email}
Your Zed account's email address is the address provided by GitHub OAuth. If you have a public email address then it will be used, otherwise your primary GitHub email address will be used. Changes to your email address on GitHub can be synced to your Zed account by [signing in to zed.dev](https://zed.dev/sign_in).
Stripe is used for billing, and will use your Zed account's email address when starting a subscription. Changes to your Zed account email address do not currently update the email address used in Stripe. See [Updating Billing Information](./ai/billing.md#updating-billing-info) for how to change this email address.
# Additional Learning Materials
- [Text Manipulation Kung Fu for the Aspiring Black Belt](https://zed.dev/blog/text-manipulation)
# Agent Panel
The Agent Panel provides you with a surface to interact with LLMs, enabling various types of tasks, such as generating code, asking questions about your codebase, and general inquiries like emails, documentation, and more.
To open it, use the `agent: new thread` action in [the Command Palette](../getting-started.md#command-palette) or click the ✨ (sparkles) icon in the status bar.
If you're using the Agent Panel for the first time, you need to have at least one LLM provider configured.
You can do that by:
1. [subscribing to our Pro plan](https://zed.dev/pricing), so you have access to our hosted models
2. or by [bringing your own API keys](./configuration.md#use-your-own-keys) for your desired provider
## Overview {#overview}
After you've configured one or more LLM providers, type at the message editor and hit `enter` to submit your prompt.
If you need extra room to type, you can expand the message editor with {#kb agent::ExpandMessageEditor}.
You should start to see the responses stream in with indications of [which tools](./tools.md) the model is using to fulfill your prompt.
### Editing Messages {#editing-messages}
Any message that you send to the AI is editable.
You can click on the card that contains your message and re-submit it with an adjusted prompt and/or new pieces of context.
### Checkpoints {#checkpoints}
Every time the AI performs an edit, you should see a "Restore Checkpoint" button to the top of your message, allowing you to return your code base to the state it was in prior to that message.
The checkpoint button appears even if you interrupt the thread midway through an edit attempt, as this is likely a moment when you've identified that the agent is not heading in the right direction and you want to revert back.
### Navigating History {#navigating-history}
To quickly navigate through recently opened threads, use the {#kb agent::ToggleNavigationMenu} binding, when focused on the panel's editor, or click the menu icon button at the top left of the panel to open the dropdown that shows you the six most recent threads.
The items in this menu function similarly to tabs, and closing them doesn’t delete the thread; instead, it simply removes them from the recent list.
To view all historical conversations, reach for the `View All` option from within the same menu or via the {#kb agent::OpenHistory} binding.
### Following the Agent {#following-the-agent}
Zed is built with collaboration natively integrated.
This approach extends to collaboration with AI as well.
To follow the agent reading through your codebase and performing edits, click on the "crosshair" icon button at the bottom left of the panel.
You can also do that with the keyboard by pressing the `cmd`/`ctrl` modifier with `enter` when submitting a message.
### Get Notified {#get-notified}
If you send a prompt to the Agent and then move elsewhere, thus putting Zed in the background, you can be notified of whether its response is finished either via:
- a visual notification that appears in the top right of your screen
- or a sound notification
Both notification methods can be used together or individually according to your preference.
You can customize their behavior, including turning them off entirely, by using the `agent.notify_when_agent_waiting` and `agent.play_sound_when_agent_done` settings keys.
### Reviewing Changes {#reviewing-changes}
Once the agent has made changes to your project, the panel will surface which files, and how many of them, have been edited.
To see which files specifically have been edited, expand the accordion bar that shows up right above the message editor or click the `Review Changes` button ({#kb agent::OpenAgentDiff}), which opens a multi-buffer tab with all changes.
You're able to reject or accept each individual change hunk, or the whole set of changes made by the agent.
Edit diffs also appear in individual buffers.
So, if your active tab had edits made by the AI, you'll see diffs with the same accept/reject controls as in the multi-buffer.
## Adding Context {#adding-context}
Although Zed's agent is very efficient at reading through your code base to autonomously pick up relevant files, directories, and other context, manually adding context is still encouraged as a way to speed up and improve the AI's response quality.
If you have a tab open while using the Agent Panel, that tab appears as a suggested context in form of a dashed button.
You can also add other forms of context by either mentioning them with `@` or hitting the `+` icon button.
You can even add previous threads as context by mentioning them with `@thread`, or by selecting the "New From Summary" option from the `+` menu to continue a longer conversation, keeping it within the context window.
Pasting images as context is also supported by the Agent Panel.
### Token Usage {#token-usage}
Zed surfaces how many tokens you are consuming for your currently active thread in the panel's toolbar.
Depending on how many pieces of context you add, your token consumption can grow rapidly.
With that in mind, once you get close to the model's context window, a banner appears below the message editor suggesting to start a new thread with the current one summarized and added as context.
You can also do this at any time with an ongoing thread via the "Agent Options" menu on the top right.
## Changing Models {#changing-models}
After you've configured your LLM providers—either via [a custom API key](./configuration.md#use-your-own-keys) or through [Zed's hosted models](./models.md)—you can switch between them by clicking on the model selector on the message editor or by using the {#kb agent::ToggleModelSelector} keybinding.
## Using Tools {#using-tools}
The new Agent Panel supports tool calling, which enables agentic editing.
Zed comes with [several built-in tools](./tools.md) that allow models to perform tasks such as searching through your codebase, editing files, running commands, and others.
You can also extend the set of available tools via [MCP Servers](./mcp.md).
### Profiles {#profiles}
Profiles act as a way to group tools.
Zed offers three built-in profiles and you can create as many custom ones as you want.
#### Built-in Profiles {#built-in-profiles}
- `Write`: A profile with tools to allow the LLM to write to your files and run terminal commands. This one essentially has all built-in tools turned on.
- `Ask`: A profile with read-only tools. Best for asking questions about your code base without the concern of the agent making changes.
- `Minimal`: A profile with no tools. Best for general conversations with the LLM where no knowledge of your code base is necessary.
You can explore the exact tools enabled in each profile by clicking on the profile selector button > `Configure Profiles…` > the one you want to check out.
#### Custom Profiles {#custom-profiles}
You can create a custom profile via the `Configure Profiles…` option in the profile selector.
From here, you can choose to `Add New Profile` or fork an existing one with a custom name and your preferred set of tools.
You can also override built-in profiles.
With a built-in profile selected, in the profile selector, navigate to `Configure Tools`, and select the tools you'd like.
Zed will store this profile in your settings using the same profile name as the default you overrode.
All custom profiles can be edited via the UI or by hand under the `assistant.profiles` key in your `settings.json` file.
### Tool Approval
Zed's Agent Panel surfaces the `agent.always_allow_tool_actions` setting that, if turned to `false`, will require you to give permission to any editing attempt as well as tool calls coming from MCP servers.
You can change that by setting this key to `true` in either your `settings.json` or via the Agent Panel's settings view.
### Model Support {#model-support}
Tool calling needs to be individually supported by each model and model provider.
Therefore, despite the presence of tools, some models may not have the ability to pick them up yet in Zed.
You should see a "No tools" label if you select a model that falls into this case.
We want to support all of them, though!
We may prioritize which ones to focus on based on popularity and user feedback, so feel free to help and contribute to fast-track those that don't fit this bill.
All [Zed's hosted models](./models.md) support tool calling out-of-the-box.
### MCP Servers {#mcp-servers}
Similarly to the built-in tools, some models may not support all tools included in a given MCP Server.
Zed's UI will inform about this via a warning icon that appears close to the model selector.
## Text Threads {#text-threads}
["Text threads"](./text-threads.md) present your conversation with the LLM in a different format—as raw text.
With text threads, you have full control over the conversation data.
You can remove and edit responses from the LLM, swap roles, and include more context earlier in the conversation.
For users who have been with us for some time, you'll notice that text threads are our original assistant panel—users love it for the control it offers.
We do not plan to deprecate text threads, but it should be noted that if you want the AI to write to your code base autonomously, that's only available in the newer, and now default, "Threads".
## Errors and Debugging {#errors-and-debugging}
In case of any error or strange LLM response behavior, the best way to help the Zed team debug is by reaching for the `agent: open thread as markdown` action and attaching that data as part of your issue on GitHub.
You can also open threads as Markdown by clicking on the file icon button, to the right of the thumbs down button, when focused on the panel's editor.
## Feedback {#feedback}
Every change we make to Zed's system prompt and tool set, needs to be backed by a thorough eval with good scores.
Every time the LLM performs a weird change or investigates a certain topic in your code base incorrectly, it's an indication that there's an improvement opportunity.
> Note that rating responses will send your data related to that response to Zed's servers.
> See [AI Improvement](./ai-improvement.md) and [Privacy and Security](./privacy-and-security.md) for more information about Zed's approach to AI improvement, privacy, and security.
> **_If you don't want data persisted on Zed's servers, don't rate_**. We will not collect data for improving our Agentic offering without you explicitly rating responses.
The best way you can help influence the next change to Zed's system prompt and tools is by rating the LLM's response via the thumbs up/down buttons at the end of every response.
In case of a thumbs down, a new text area will show up where you can add more specifics about what happened.
You can provide feedback on the thread at any point after the agent responds, and multiple times within the same thread.
# Zed AI Improvement
## Agent Panel
### Opt-In
When using the Agent Panel, whether through Zed's hosted AI service or via connecting a non-Zed AI service via API key, Zed does not persistently store user content or use user content to evaluate and/or improve our AI features, unless it is explicitly shared with Zed. Each share is opt-in, and sharing once will not cause future content or data to be shared again.
> Note that rating responses will send your data related to that response to Zed's servers.
> **_If you don't want data persisted on Zed's servers, don't rate_**. We will not collect data for improving our Agentic offering without you explicitly rating responses.
When using upstream services through Zed AI, we require assurances from our service providers that your user content won't be used for training models. For example, usage of Anthropic Claude 3.5 via Zed AI in the Assistant is governed by the [Anthropic Commercial Terms](https://www.anthropic.com/legal/commercial-terms) which includes the following:
> "Anthropic may not train models on Customer Content from paid Services."
We also have a [zero-data retention agreement](https://privacy.anthropic.com/en/articles/8956058-i-have-a-zero-data-retention-agreement-with-anthropic-what-products-does-it-apply-to) with Anthropic.
When you directly connect Zed with a non Zed AI service (e.g., via API key) Zed does not have control over how your data is used by that service provider.
You should reference your agreement with each service provider to understand what terms and conditions apply.
### Data we collect
For prompts you have explicitly shared with us, Zed may store copies of those prompts and other data about the specific use of the Agent Panel.
This data includes:
- The prompt given to the Agent
- Any commentary you include
- Product telemetry about the agentic thread
- Metadata about your Zed installation
### Data Handling
Collected data is stored in Snowflake, a private database where we track other metrics. We periodically review this data to improve our overall agentic approach and refine the product via our system prompt, tool use, etc. We ensure any included data is anonymized and contains no sensitive information (access tokens, user IDs, email addresses, etc).
## Edit Predictions
By default, when using Zed Edit Predictions, Zed does not persistently store user content or use user content for training of its models.
### Opt-in
Users who are working on open source licensed projects may optionally opt-in to providing model improvement feedback. This opt-in occurs on a per-project basis. If you work on multiple open source projects and wish to provide model improvement feedback you will have to opt-in for each individual project.
When working on other projects where you haven't opted-in, Zed will not persistently store user content or use user content for training of its models.
You can see exactly how Zed detects open source licenses in: [license_detection.rs](https://github.com/zed-industries/zed/blob/main/crates/zeta/src/license_detection.rs).
### Exclusions
Zed will intentionally exclude certain files from Predictive Edits entirely, even when you have opted-in to model improvement feedback.
You can inspect this exclusion list by opening `zed: open default settings` from the command palette:
```json
{
"edit_predictions": {
// A list of globs representing files that edit predictions should be disabled for.
// There's a sensible default list of globs already included.
// Any addition to this list will be merged with the default list.
"disabled_globs": [
"**/.env*",
"**/*.pem",
"**/*.key",
"**/*.cert",
"**/*.crt",
"**/secrets.yml"
]
}
}
```
Users may explicitly exclude additional paths and/or file extensions by adding them to [`edit_predictions.disabled_globs`](https://zed.dev/docs/configuring-zed#edit-predictions) in their Zed settings.json:
```json
{
"edit_predictions": {
"disabled_globs": ["secret_dir/*", "**/*.log"]
}
}
```
### Data we collect
For open source projects where you have opted-in, Zed may store copies of requests and responses to the Zed AI Prediction service.
This data includes:
- the edit prediction
- a portion of the buffer content around the cursor
- a few recent edits
- the current buffer outline
- diagnostics (errors, warnings, etc) from language servers
### Data Handling
Collected data is stored in Snowflake, a private database where we track other metrics. We periodically review this data to select training samples for inclusion in our model training dataset. We ensure any included data is anonymized and contains no sensitive information (access tokens, user IDs, email addresses, etc). This training dataset is publicly available at [huggingface.co/datasets/zed-industries/zeta](https://huggingface.co/datasets/zed-industries/zeta).
### Model Output
We then use this training dataset to fine-tune [Qwen2.5-Coder-7B](https://huggingface.co/Qwen/Qwen2.5-Coder-7B) and make the resulting model available at [huggingface.co/zed-industries/zeta](https://huggingface.co/zed-industries/zeta).
## Applicable terms
Please see the [Zed Terms of Service](https://zed.dev/terms-of-service) for more.
# Billing
We use Stripe as our billing and payments provider. All Pro plans require payment via credit card.
For invoice-based billing, a Business plan is required. Contact sales@zed.dev for more information.
## Settings {#settings}
You can access billing settings at [zed.dev/account](https://zed.dev/account).
Clicking the button under Account Settings will navigate you to Stripe’s secure portal, where you can update all billing-related settings and configuration.
## Billing Cycles {#billing-cycles}
Zed is billed on a monthly basis based on the date you initially subscribe.
We’ll also bill in-month for additional prompts used beyond your plan’s prompt limit, if usage exceeds $20 before month end. See [usage-based pricing](./plans-and-usage.md#ubp) for more.
## Invoice History {#invoice-history}
You can access your invoice history by navigating to [zed.dev/account](https://zed.dev/account) and clicking "Manage" on your subscription.
From Stripe’s secure portal, you can download all current and historical invoices.
## Updating Billing Information {#updating-billing-info}
You can update your payment method, company name, address, and tax information through the billing portal.
Please note that changes to billing information will **only** affect future invoices — **we cannot modify historical invoices**.
# Configuration
There are various aspects about the Agent Panel that you can customize.
All of them can be seen by either visiting [the Configuring Zed page](../configuring-zed.md#agent) or by running the `zed: open default settings` action and searching for `"agent"`.
Alternatively, you can also visit the panel's Settings view by running the `agent: open configuration` action or going to the top-right menu and hitting "Settings".
## LLM Providers
Zed supports multiple large language model providers.
Here's an overview of the supported providers and tool call support:
| Provider | Tool Use Supported |
| ----------------------------------------------- | --------------------------------------------------------------------------------------------------------------------------------------------------------------------------- |
| [Amazon Bedrock](#amazon-bedrock) | Depends on the model |
| [Anthropic](#anthropic) | ✅ |
| [DeepSeek](#deepseek) | ✅ |
| [GitHub Copilot Chat](#github-copilot-chat) | For some models ([link](https://github.com/zed-industries/zed/blob/9e0330ba7d848755c9734bf456c716bddf0973f3/crates/language_models/src/provider/copilot_chat.rs#L189-L198)) |
| [Google AI](#google-ai) | ✅ |
| [LM Studio](#lmstudio) | ✅ |
| [Mistral](#mistral) | ✅ |
| [Ollama](#ollama) | ✅ |
| [OpenAI](#openai) | ✅ |
| [OpenAI API Compatible](#openai-api-compatible) | 🚫 |
| [OpenRouter](#openrouter) | ✅ |
| [Vercel](#vercel-v0) | ✅ |
| [xAI](#xai) | ✅ |
## Use Your Own Keys {#use-your-own-keys}
While Zed offers hosted versions of models through [our various plans](./plans-and-usage.md), we're always happy to support users wanting to supply their own API keys.
Below, you can learn how to do that for each provider.
> Using your own API keys is _free_—you do not need to subscribe to a Zed plan to use our AI features with your own keys.
### Amazon Bedrock {#amazon-bedrock}
> ✅ Supports tool use with models that support streaming tool use.
> More details can be found in the [Amazon Bedrock's Tool Use documentation](https://docs.aws.amazon.com/bedrock/latest/userguide/conversation-inference-supported-models-features.html).
To use Amazon Bedrock's models, an AWS authentication is required.
Ensure your credentials have the following permissions set up:
- `bedrock:InvokeModelWithResponseStream`
- `bedrock:InvokeModel`
- `bedrock:ConverseStream`
Your IAM policy should look similar to:
```json
{
"Version": "2012-10-17",
"Statement": [
{
"Effect": "Allow",
"Action": [
"bedrock:InvokeModel",
"bedrock:InvokeModelWithResponseStream",
"bedrock:ConverseStream"
],
"Resource": "*"
}
]
}
```
With that done, choose one of the two authentication methods:
#### Authentication via Named Profile (Recommended)
1. Ensure you have the AWS CLI installed and configured with a named profile
2. Open your `settings.json` (`zed: open settings`) and include the `bedrock` key under `language_models` with the following settings:
```json
{
"language_models": {
"bedrock": {
"authentication_method": "named_profile",
"region": "your-aws-region",
"profile": "your-profile-name"
}
}
}
```
#### Authentication via Static Credentials
While it's possible to configure through the Agent Panel settings UI by entering your AWS access key and secret directly, we recommend using named profiles instead for better security practices.
To do this:
1. Create an IAM User that you can assume in the [IAM Console](https://us-east-1.console.aws.amazon.com/iam/home?region=us-east-1#/users).
2. Create security credentials for that User, save them and keep them secure.
3. Open the Agent Configuration with (`agent: open configuration`) and go to the Amazon Bedrock section
4. Copy the credentials from Step 2 into the respective **Access Key ID**, **Secret Access Key**, and **Region** fields.
#### Cross-Region Inference
The Zed implementation of Amazon Bedrock uses [Cross-Region inference](https://docs.aws.amazon.com/bedrock/latest/userguide/cross-region-inference.html) for all the models and region combinations that support it.
With Cross-Region inference, you can distribute traffic across multiple AWS Regions, enabling higher throughput.
For example, if you use `Claude Sonnet 3.7 Thinking` from `us-east-1`, it may be processed across the US regions, namely: `us-east-1`, `us-east-2`, or `us-west-2`.
Cross-Region inference requests are kept within the AWS Regions that are part of the geography where the data originally resides.
For example, a request made within the US is kept within the AWS Regions in the US.
Although the data remains stored only in the source Region, your input prompts and output results might move outside of your source Region during cross-Region inference.
All data will be transmitted encrypted across Amazon's secure network.
We will support Cross-Region inference for each of the models on a best-effort basis, please refer to the [Cross-Region Inference method Code](https://github.com/zed-industries/zed/blob/main/crates/bedrock/src/models.rs#L297).
For the most up-to-date supported regions and models, refer to the [Supported Models and Regions for Cross Region inference](https://docs.aws.amazon.com/bedrock/latest/userguide/inference-profiles-support.html).
### Anthropic {#anthropic}
> ✅ Supports tool use
You can use Anthropic models by choosing it via the model dropdown in the Agent Panel.
1. Sign up for Anthropic and [create an API key](https://console.anthropic.com/settings/keys)
2. Make sure that your Anthropic account has credits
3. Open the settings view (`agent: open configuration`) and go to the Anthropic section
4. Enter your Anthropic API key
Even if you pay for Claude Pro, you will still have to [pay for additional credits](https://console.anthropic.com/settings/plans) to use it via the API.
Zed will also use the `ANTHROPIC_API_KEY` environment variable if it's defined.
#### Custom Models {#anthropic-custom-models}
You can add custom models to the Anthropic provider by adding the following to your Zed `settings.json`:
```json
{
"language_models": {
"anthropic": {
"available_models": [
{
"name": "claude-3-5-sonnet-20240620",
"display_name": "Sonnet 2024-June",
"max_tokens": 128000,
"max_output_tokens": 2560,
"cache_configuration": {
"max_cache_anchors": 10,
"min_total_token": 10000,
"should_speculate": false
},
"tool_override": "some-model-that-supports-toolcalling"
}
]
}
}
}
```
Custom models will be listed in the model dropdown in the Agent Panel.
You can configure a model to use [extended thinking](https://docs.anthropic.com/en/docs/about-claude/models/extended-thinking-models) (if it supports it) by changing the mode in your model's configuration to `thinking`, for example:
```json
{
"name": "claude-sonnet-4-latest",
"display_name": "claude-sonnet-4-thinking",
"max_tokens": 200000,
"mode": {
"type": "thinking",
"budget_tokens": 4_096
}
}
```
### DeepSeek {#deepseek}
> ✅ Supports tool use
1. Visit the DeepSeek platform and [create an API key](https://platform.deepseek.com/api_keys)
2. Open the settings view (`agent: open configuration`) and go to the DeepSeek section
3. Enter your DeepSeek API key
The DeepSeek API key will be saved in your keychain.
Zed will also use the `DEEPSEEK_API_KEY` environment variable if it's defined.
#### Custom Models {#deepseek-custom-models}
The Zed agent comes pre-configured to use the latest version for common models (DeepSeek Chat, DeepSeek Reasoner).
If you wish to use alternate models or customize the API endpoint, you can do so by adding the following to your Zed `settings.json`:
```json
{
"language_models": {
"deepseek": {
"api_url": "https://api.deepseek.com",
"available_models": [
{
"name": "deepseek-chat",
"display_name": "DeepSeek Chat",
"max_tokens": 64000
},
{
"name": "deepseek-reasoner",
"display_name": "DeepSeek Reasoner",
"max_tokens": 64000,
"max_output_tokens": 4096
}
]
}
}
}
```
Custom models will be listed in the model dropdown in the Agent Panel.
You can also modify the `api_url` to use a custom endpoint if needed.
### GitHub Copilot Chat {#github-copilot-chat}
> ✅ Supports tool use in some cases.
> Visit [the Copilot Chat code](https://github.com/zed-industries/zed/blob/9e0330ba7d848755c9734bf456c716bddf0973f3/crates/language_models/src/provider/copilot_chat.rs#L189-L198) for the supported subset.
You can use GitHub Copilot Chat with the Zed agent by choosing it via the model dropdown in the Agent Panel.
1. Open the settings view (`agent: open configuration`) and go to the GitHub Copilot Chat section
2. Click on `Sign in to use GitHub Copilot`, follow the steps shown in the modal.
Alternatively, you can provide an OAuth token via the `GH_COPILOT_TOKEN` environment variable.
> **Note**: If you don't see specific models in the dropdown, you may need to enable them in your [GitHub Copilot settings](https://github.com/settings/copilot/features).
To use Copilot Enterprise with Zed (for both agent and inline completions), you must configure your enterprise endpoint as described in [Configuring GitHub Copilot Enterprise](./edit-prediction.md#github-copilot-enterprise).
### Google AI {#google-ai}
> ✅ Supports tool use
You can use Gemini models with the Zed agent by choosing it via the model dropdown in the Agent Panel.
1. Go to the Google AI Studio site and [create an API key](https://aistudio.google.com/app/apikey).
2. Open the settings view (`agent: open configuration`) and go to the Google AI section
3. Enter your Google AI API key and press enter.
The Google AI API key will be saved in your keychain.
Zed will also use the `GEMINI_API_KEY` environment variable if it's defined. See [Using Gemini API keys](Using Gemini API keys) in the Gemini docs for more.
#### Custom Models {#google-ai-custom-models}
By default, Zed will use `stable` versions of models, but you can use specific versions of models, including [experimental models](https://ai.google.dev/gemini-api/docs/models/experimental-models). You can configure a model to use [thinking mode](https://ai.google.dev/gemini-api/docs/thinking) (if it supports it) by adding a `mode` configuration to your model. This is useful for controlling reasoning token usage and response speed. If not specified, Gemini will automatically choose the thinking budget.
Here is an example of a custom Google AI model you could add to your Zed `settings.json`:
```json
{
"language_models": {
"google": {
"available_models": [
{
"name": "gemini-2.5-flash-preview-05-20",
"display_name": "Gemini 2.5 Flash (Thinking)",
"max_tokens": 1000000,
"mode": {
"type": "thinking",
"budget_tokens": 24000
}
}
]
}
}
}
```
Custom models will be listed in the model dropdown in the Agent Panel.
### LM Studio {#lmstudio}
> ✅ Supports tool use
1. Download and install [the latest version of LM Studio](https://lmstudio.ai/download)
2. In the app press `cmd/ctrl-shift-m` and download at least one model (e.g., qwen2.5-coder-7b). Alternatively, you can get models via the LM Studio CLI:
```sh
lms get qwen2.5-coder-7b
```
3. Make sure the LM Studio API server is running by executing:
```sh
lms server start
```
Tip: Set [LM Studio as a login item](https://lmstudio.ai/docs/advanced/headless#run-the-llm-service-on-machine-login) to automate running the LM Studio server.
### Mistral {#mistral}
> ✅ Supports tool use
1. Visit the Mistral platform and [create an API key](https://console.mistral.ai/api-keys/)
2. Open the configuration view (`agent: open configuration`) and navigate to the Mistral section
3. Enter your Mistral API key
The Mistral API key will be saved in your keychain.
Zed will also use the `MISTRAL_API_KEY` environment variable if it's defined.
#### Custom Models {#mistral-custom-models}
The Zed agent comes pre-configured with several Mistral models (codestral-latest, mistral-large-latest, mistral-medium-latest, mistral-small-latest, open-mistral-nemo, and open-codestral-mamba).
All the default models support tool use.
If you wish to use alternate models or customize their parameters, you can do so by adding the following to your Zed `settings.json`:
```json
{
"language_models": {
"mistral": {
"api_url": "https://api.mistral.ai/v1",
"available_models": [
{
"name": "mistral-tiny-latest",
"display_name": "Mistral Tiny",
"max_tokens": 32000,
"max_output_tokens": 4096,
"max_completion_tokens": 1024,
"supports_tools": true,
"supports_images": false
}
]
}
}
}
```
Custom models will be listed in the model dropdown in the Agent Panel.
### Ollama {#ollama}
> ✅ Supports tool use
Download and install Ollama from [ollama.com/download](https://ollama.com/download) (Linux or macOS) and ensure it's running with `ollama --version`.
1. Download one of the [available models](https://ollama.com/models), for example, for `mistral`:
```sh
ollama pull mistral
```
2. Make sure that the Ollama server is running. You can start it either via running Ollama.app (macOS) or launching:
```sh
ollama serve
```
3. In the Agent Panel, select one of the Ollama models using the model dropdown.
#### Ollama Context Length {#ollama-context}
Zed has pre-configured maximum context lengths (`max_tokens`) to match the capabilities of common models.
Zed API requests to Ollama include this as the `num_ctx` parameter, but the default values do not exceed `16384` so users with ~16GB of RAM are able to use most models out of the box.
See [get_max_tokens in ollama.rs](https://github.com/zed-industries/zed/blob/main/crates/ollama/src/ollama.rs) for a complete set of defaults.
> **Note**: Token counts displayed in the Agent Panel are only estimates and will differ from the model's native tokenizer.
Depending on your hardware or use-case you may wish to limit or increase the context length for a specific model via settings.json:
```json
{
"language_models": {
"ollama": {
"api_url": "http://localhost:11434",
"available_models": [
{
"name": "qwen2.5-coder",
"display_name": "qwen 2.5 coder 32K",
"max_tokens": 32768,
"supports_tools": true,
"supports_thinking": true,
"supports_images": true
}
]
}
}
}
```
If you specify a context length that is too large for your hardware, Ollama will log an error.
You can watch these logs by running: `tail -f ~/.ollama/logs/ollama.log` (macOS) or `journalctl -u ollama -f` (Linux).
Depending on the memory available on your machine, you may need to adjust the context length to a smaller value.
You may also optionally specify a value for `keep_alive` for each available model.
This can be an integer (seconds) or alternatively a string duration like "5m", "10m", "1h", "1d", etc.
For example, `"keep_alive": "120s"` will allow the remote server to unload the model (freeing up GPU VRAM) after 120 seconds.
The `supports_tools` option controls whether the model will use additional tools.
If the model is tagged with `tools` in the Ollama catalog, this option should be supplied, and the built-in profiles `Ask` and `Write` can be used.
If the model is not tagged with `tools` in the Ollama catalog, this option can still be supplied with the value `true`; however, be aware that only the `Minimal` built-in profile will work.
The `supports_thinking` option controls whether the model will perform an explicit "thinking" (reasoning) pass before producing its final answer.
If the model is tagged with `thinking` in the Ollama catalog, set this option and you can use it in Zed.
The `supports_images` option enables the model's vision capabilities, allowing it to process images included in the conversation context.
If the model is tagged with `vision` in the Ollama catalog, set this option and you can use it in Zed.
### OpenAI {#openai}
> ✅ Supports tool use
1. Visit the OpenAI platform and [create an API key](https://platform.openai.com/account/api-keys)
2. Make sure that your OpenAI account has credits
3. Open the settings view (`agent: open configuration`) and go to the OpenAI section
4. Enter your OpenAI API key
The OpenAI API key will be saved in your keychain.
Zed will also use the `OPENAI_API_KEY` environment variable if it's defined.
#### Custom Models {#openai-custom-models}
The Zed agent comes pre-configured to use the latest version for common models (GPT-3.5 Turbo, GPT-4, GPT-4 Turbo, GPT-4o, GPT-4o mini).
To use alternate models, perhaps a preview release or a dated model release, or if you wish to control the request parameters, you can do so by adding the following to your Zed `settings.json`:
```json
{
"language_models": {
"openai": {
"available_models": [
{
"name": "gpt-4o-2024-08-06",
"display_name": "GPT 4o Summer 2024",
"max_tokens": 128000
},
{
"name": "o1-mini",
"display_name": "o1-mini",
"max_tokens": 128000,
"max_completion_tokens": 20000
}
],
"version": "1"
}
}
}
```
You must provide the model's context window in the `max_tokens` parameter; this can be found in the [OpenAI model documentation](https://platform.openai.com/docs/models).
OpenAI `o1` models should set `max_completion_tokens` as well to avoid incurring high reasoning token costs.
Custom models will be listed in the model dropdown in the Agent Panel.
### OpenAI API Compatible {#openai-api-compatible}
Zed supports using [OpenAI compatible APIs](https://platform.openai.com/docs/api-reference/chat) by specifying a custom `api_url` and `available_models` for the OpenAI provider. This is useful for connecting to other hosted services (like Together AI, Anyscale, etc.) or local models.
To configure a compatible API, you can add a custom API URL for OpenAI either via the UI (currently available only in Preview) or by editing your `settings.json`.
For example, to connect to [Together AI](https://www.together.ai/) via the UI:
1. Get an API key from your [Together AI account](https://api.together.ai/settings/api-keys).
2. Go to the Agent Panel's settings view, click on the "Add Provider" button, and then on the "OpenAI" menu item
3. Add the requested fields, such as `api_url`, `api_key`, available models, and others
Alternatively, you can also add it via the `settings.json`:
```json
{
"language_models": {
"openai": {
"api_url": "https://api.together.xyz/v1",
"api_key": "YOUR_TOGETHER_AI_API_KEY",
"available_models": [
{
"name": "mistralai/Mixtral-8x7B-Instruct-v0.1",
"display_name": "Together Mixtral 8x7B",
"max_tokens": 32768,
"supports_tools": true
}
]
}
}
}
```
### OpenRouter {#openrouter}
> ✅ Supports tool use
OpenRouter provides access to multiple AI models through a single API. It supports tool use for compatible models.
1. Visit [OpenRouter](https://openrouter.ai) and create an account
2. Generate an API key from your [OpenRouter keys page](https://openrouter.ai/keys)
3. Open the settings view (`agent: open configuration`) and go to the OpenRouter section
4. Enter your OpenRouter API key
The OpenRouter API key will be saved in your keychain.
Zed will also use the `OPENROUTER_API_KEY` environment variable if it's defined.
#### Custom Models {#openrouter-custom-models}
You can add custom models to the OpenRouter provider by adding the following to your Zed `settings.json`:
```json
{
"language_models": {
"open_router": {
"api_url": "https://openrouter.ai/api/v1",
"available_models": [
{
"name": "google/gemini-2.0-flash-thinking-exp",
"display_name": "Gemini 2.0 Flash (Thinking)",
"max_tokens": 200000,
"max_output_tokens": 8192,
"supports_tools": true,
"supports_images": true,
"mode": {
"type": "thinking",
"budget_tokens": 8000
}
}
]
}
}
}
```
The available configuration options for each model are:
- `name` (required): The model identifier used by OpenRouter
- `display_name` (optional): A human-readable name shown in the UI
- `max_tokens` (required): The model's context window size
- `max_output_tokens` (optional): Maximum tokens the model can generate
- `max_completion_tokens` (optional): Maximum completion tokens
- `supports_tools` (optional): Whether the model supports tool/function calling
- `supports_images` (optional): Whether the model supports image inputs
- `mode` (optional): Special mode configuration for thinking models
You can find available models and their specifications on the [OpenRouter models page](https://openrouter.ai/models).
Custom models will be listed in the model dropdown in the Agent Panel.
### Vercel v0 {#vercel-v0}
> ✅ Supports tool use
[Vercel v0](https://vercel.com/docs/v0/api) is an expert model for generating full-stack apps, with framework-aware completions optimized for modern stacks like Next.js and Vercel.
It supports text and image inputs and provides fast streaming responses.
The v0 models are [OpenAI-compatible models](/#openai-api-compatible), but Vercel is listed as first-class provider in the panel's settings view.
To start using it with Zed, ensure you have first created a [v0 API key](https://v0.dev/chat/settings/keys).
Once you have it, paste it directly into the Vercel provider section in the panel's settings view.
You should then find it as `v0-1.5-md` in the model dropdown in the Agent Panel.
### xAI {#xai}
> ✅ Supports tool use
Zed has first-class support for [xAI](https://x.ai/) models. You can use your own API key to access Grok models.
1. [Create an API key in the xAI Console](https://console.x.ai/team/default/api-keys)
2. Open the settings view (`agent: open configuration`) and go to the **xAI** section
3. Enter your xAI API key
The xAI API key will be saved in your keychain. Zed will also use the `XAI_API_KEY` environment variable if it's defined.
> **Note:** While the xAI API is OpenAI-compatible, Zed has first-class support for it as a dedicated provider. For the best experience, we recommend using the dedicated `x_ai` provider configuration instead of the [OpenAI API Compatible](#openai-api-compatible) method.
#### Custom Models {#xai-custom-models}
The Zed agent comes pre-configured with common Grok models. If you wish to use alternate models or customize their parameters, you can do so by adding the following to your Zed `settings.json`:
```json
{
"language_models": {
"x_ai": {
"api_url": "https://api.x.ai/v1",
"available_models": [
{
"name": "grok-1.5",
"display_name": "Grok 1.5",
"max_tokens": 131072,
"max_output_tokens": 8192
},
{
"name": "grok-1.5v",
"display_name": "Grok 1.5V (Vision)",
"max_tokens": 131072,
"max_output_tokens": 8192,
"supports_images": true
}
]
}
}
}
```
## Advanced Configuration {#advanced-configuration}
### Custom Provider Endpoints {#custom-provider-endpoint}
You can use a custom API endpoint for different providers, as long as it's compatible with the provider's API structure.
To do so, add the following to your `settings.json`:
```json
{
"language_models": {
"some-provider": {
"api_url": "http://localhost:11434"
}
}
}
```
Where `some-provider` can be any of the following values: `anthropic`, `google`, `ollama`, `openai`.
### Default Model {#default-model}
Zed's hosted LLM service sets `claude-sonnet-4` as the default model.
However, you can change it either via the model dropdown in the Agent Panel's bottom-right corner or by manually editing the `default_model` object in your settings:
```json
{
"agent": {
"version": "2",
"default_model": {
"provider": "zed.dev",
"model": "gpt-4o"
}
}
}
```
### Feature-specific Models {#feature-specific-models}
If a feature-specific model is not set, it will fall back to using the default model, which is the one you set on the Agent Panel.
You can configure the following feature-specific models:
- Thread summary model: Used for generating thread summaries
- Inline assistant model: Used for the inline assistant feature
- Commit message model: Used for generating Git commit messages
Example configuration:
```json
{
"agent": {
"version": "2",
"default_model": {
"provider": "zed.dev",
"model": "claude-sonnet-4"
},
"inline_assistant_model": {
"provider": "anthropic",
"model": "claude-3-5-sonnet"
},
"commit_message_model": {
"provider": "openai",
"model": "gpt-4o-mini"
},
"thread_summary_model": {
"provider": "google",
"model": "gemini-2.0-flash"
}
}
}
```
### Alternative Models for Inline Assists {#alternative-assists}
You can configure additional models that will be used to perform inline assists in parallel.
When you do this, the inline assist UI will surface controls to cycle between the alternatives generated by each model.
The models you specify here are always used in _addition_ to your [default model](#default-model).
For example, the following configuration will generate two outputs for every assist.
One with Claude 3.7 Sonnet, and one with GPT-4o.
```json
{
"agent": {
"default_model": {
"provider": "zed.dev",
"model": "claude-sonnet-4"
},
"inline_alternatives": [
{
"provider": "zed.dev",
"model": "gpt-4o"
}
],
"version": "2"
}
}
```
### Default View
Use the `default_view` setting to set change the default view of the Agent Panel.
You can choose between `thread` (the default) and `text_thread`:
```json
{
"agent": {
"default_view": "text_thread"
}
}
```
### Edit Card
Use the `expand_edit_card` setting to control whether edit cards show the full diff in the Agent Panel.
It is set to `true` by default, but if set to false, the card's height is capped to a certain number of lines, requiring a click to be expanded.
```json
{
"agent": {
"expand_edit_card": "false"
}
}
```
This setting is currently only available in Preview.
It should be up in Stable by the next release.
### Terminal Card
Use the `expand_terminal_card` setting to control whether terminal cards show the command output in the Agent Panel.
It is set to `true` by default, but if set to false, the card will be fully collapsed even while the command is running, requiring a click to be expanded.
```json
{
"agent": {
"expand_terminal_card": "false"
}
}
```
This setting is currently only available in Preview.
It should be up in Stable by the next release.
# Edit Prediction
Edit Prediction is Zed's native mechanism for predicting the code you want to write through AI.
Each keystroke sends a new request to our [open source, open dataset Zeta model](https://huggingface.co/zed-industries/zeta) and it returns with individual or multi-line suggestions that can be quickly accepted by pressing `tab`.
## Configuring Zeta
Zed's Edit Prediction was initially introduced via a banner on the title bar.
Clicking on it would take you to a modal with a button ("Enable Edit Prediction") that sets `zed` as your `edit_prediction_provider`.
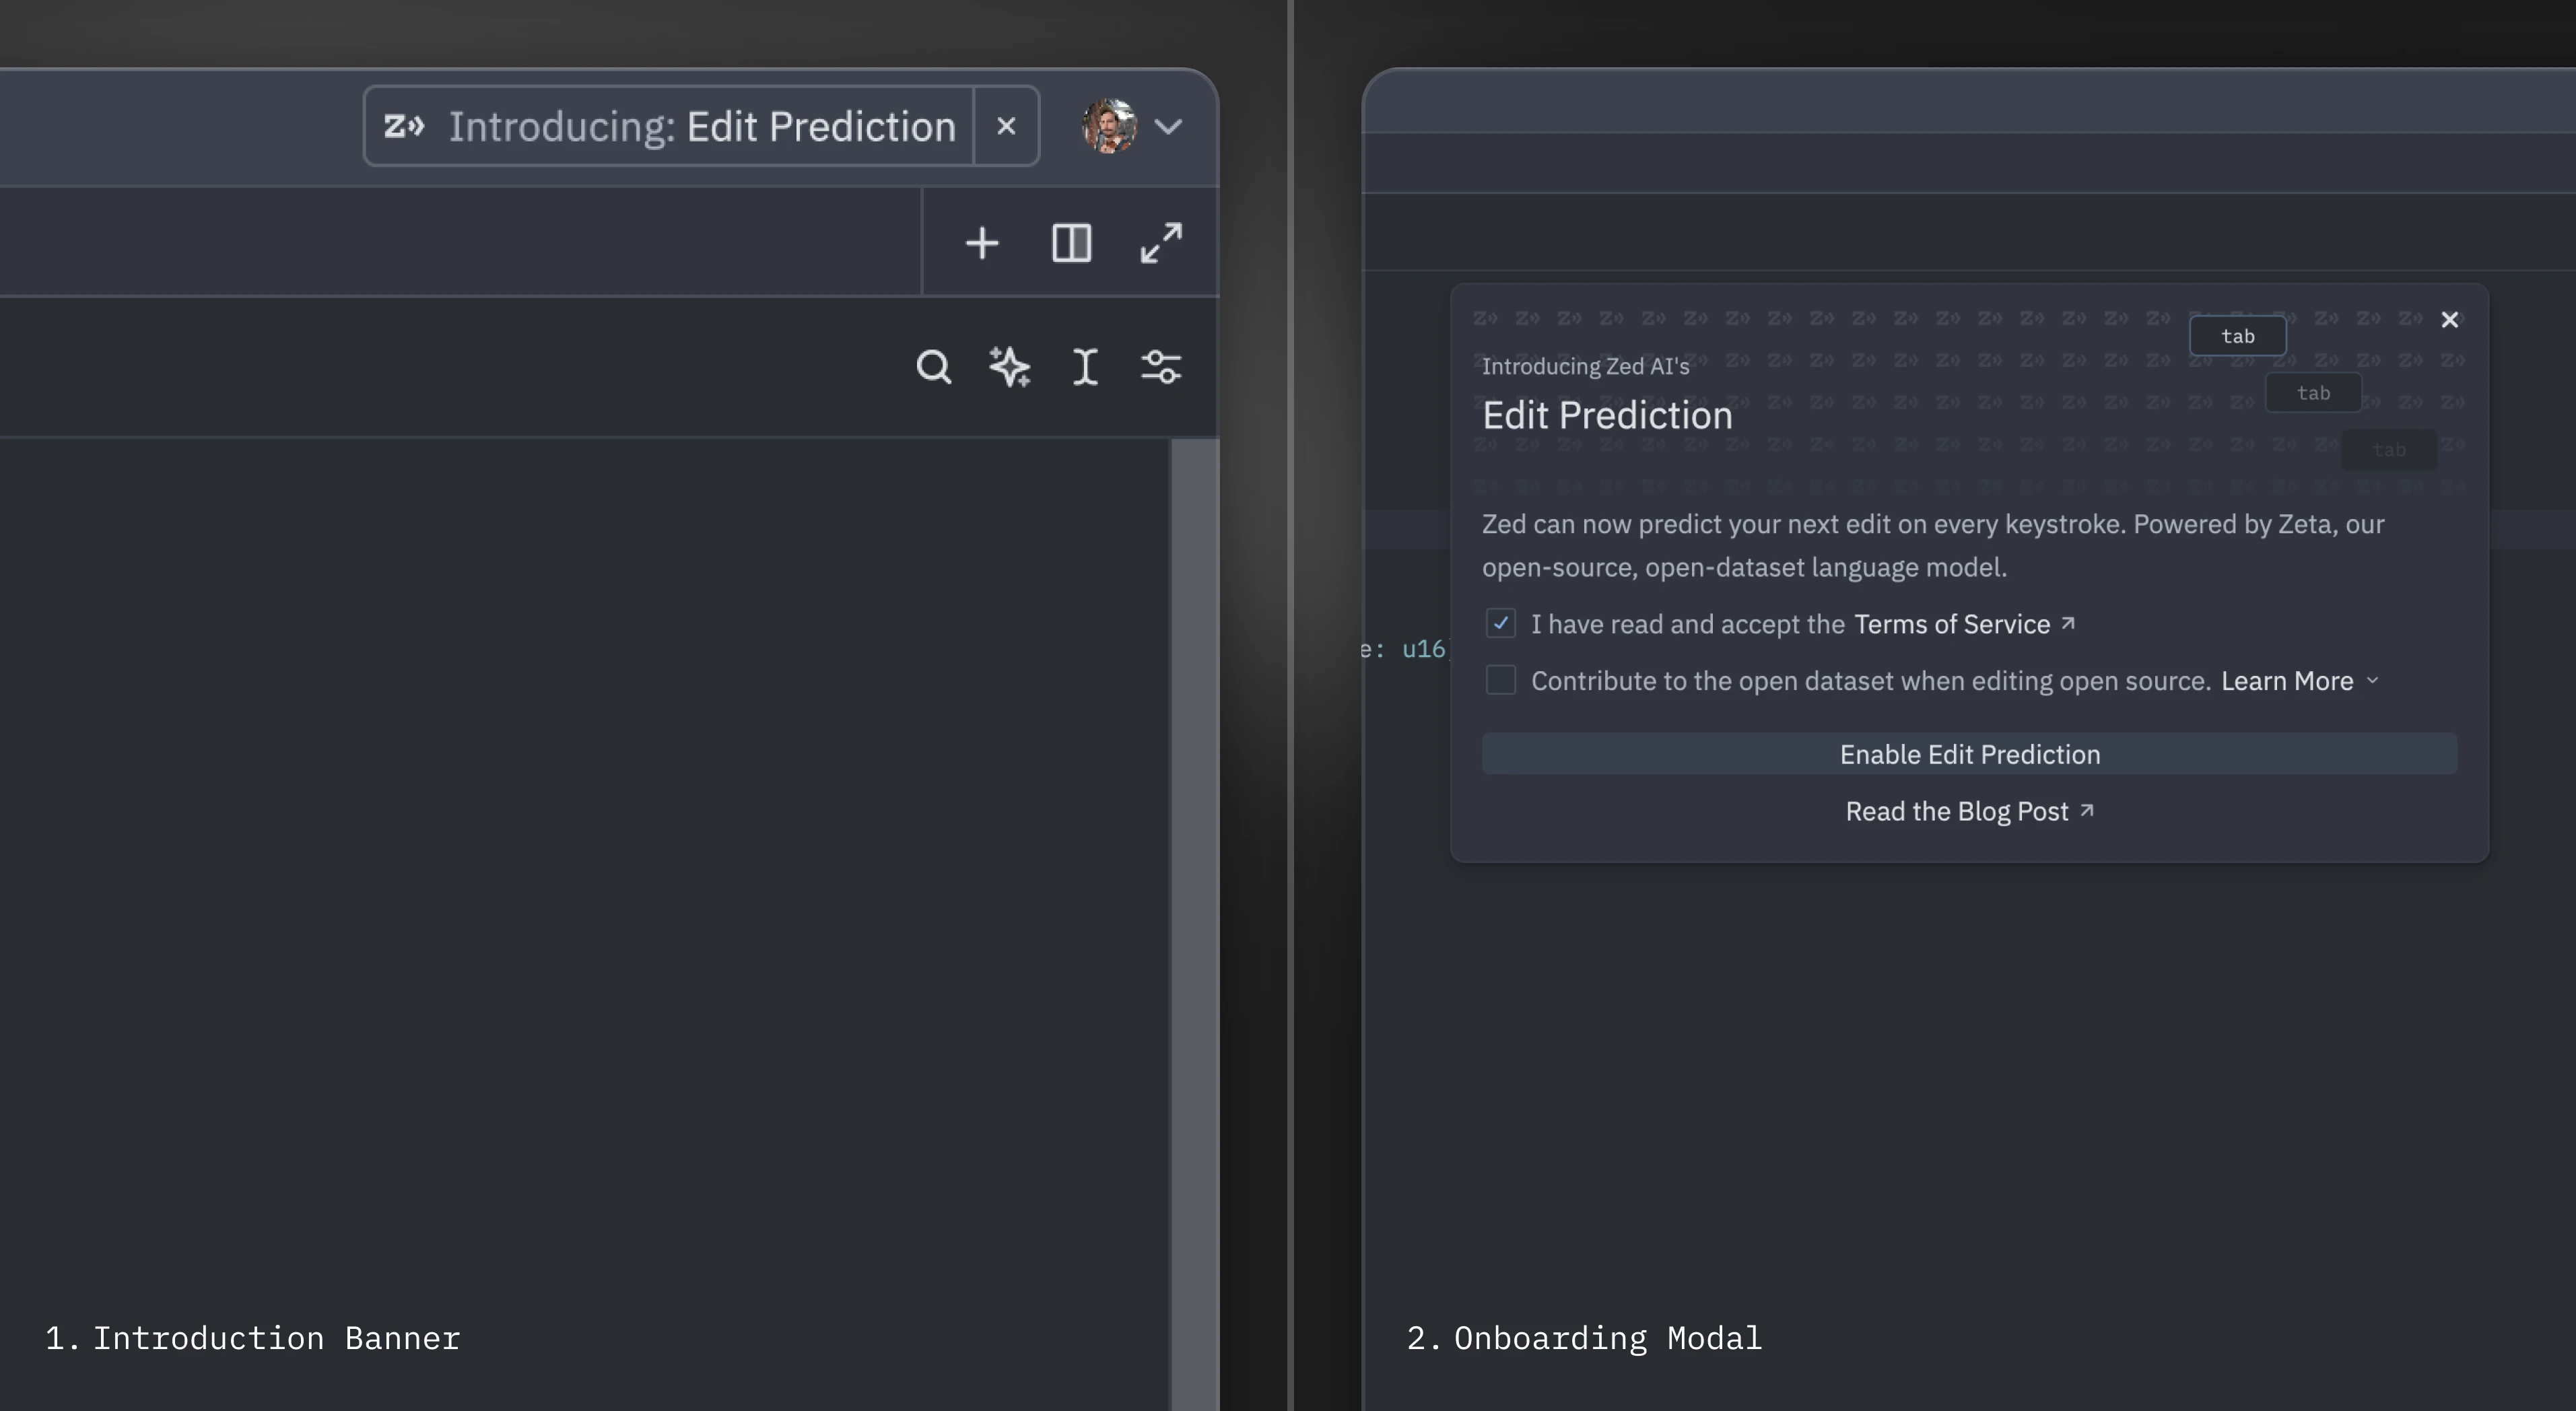
But, if you haven't come across the banner, Zed's Edit Prediction is the default edit prediction provider and you should see it right away in your status bar.
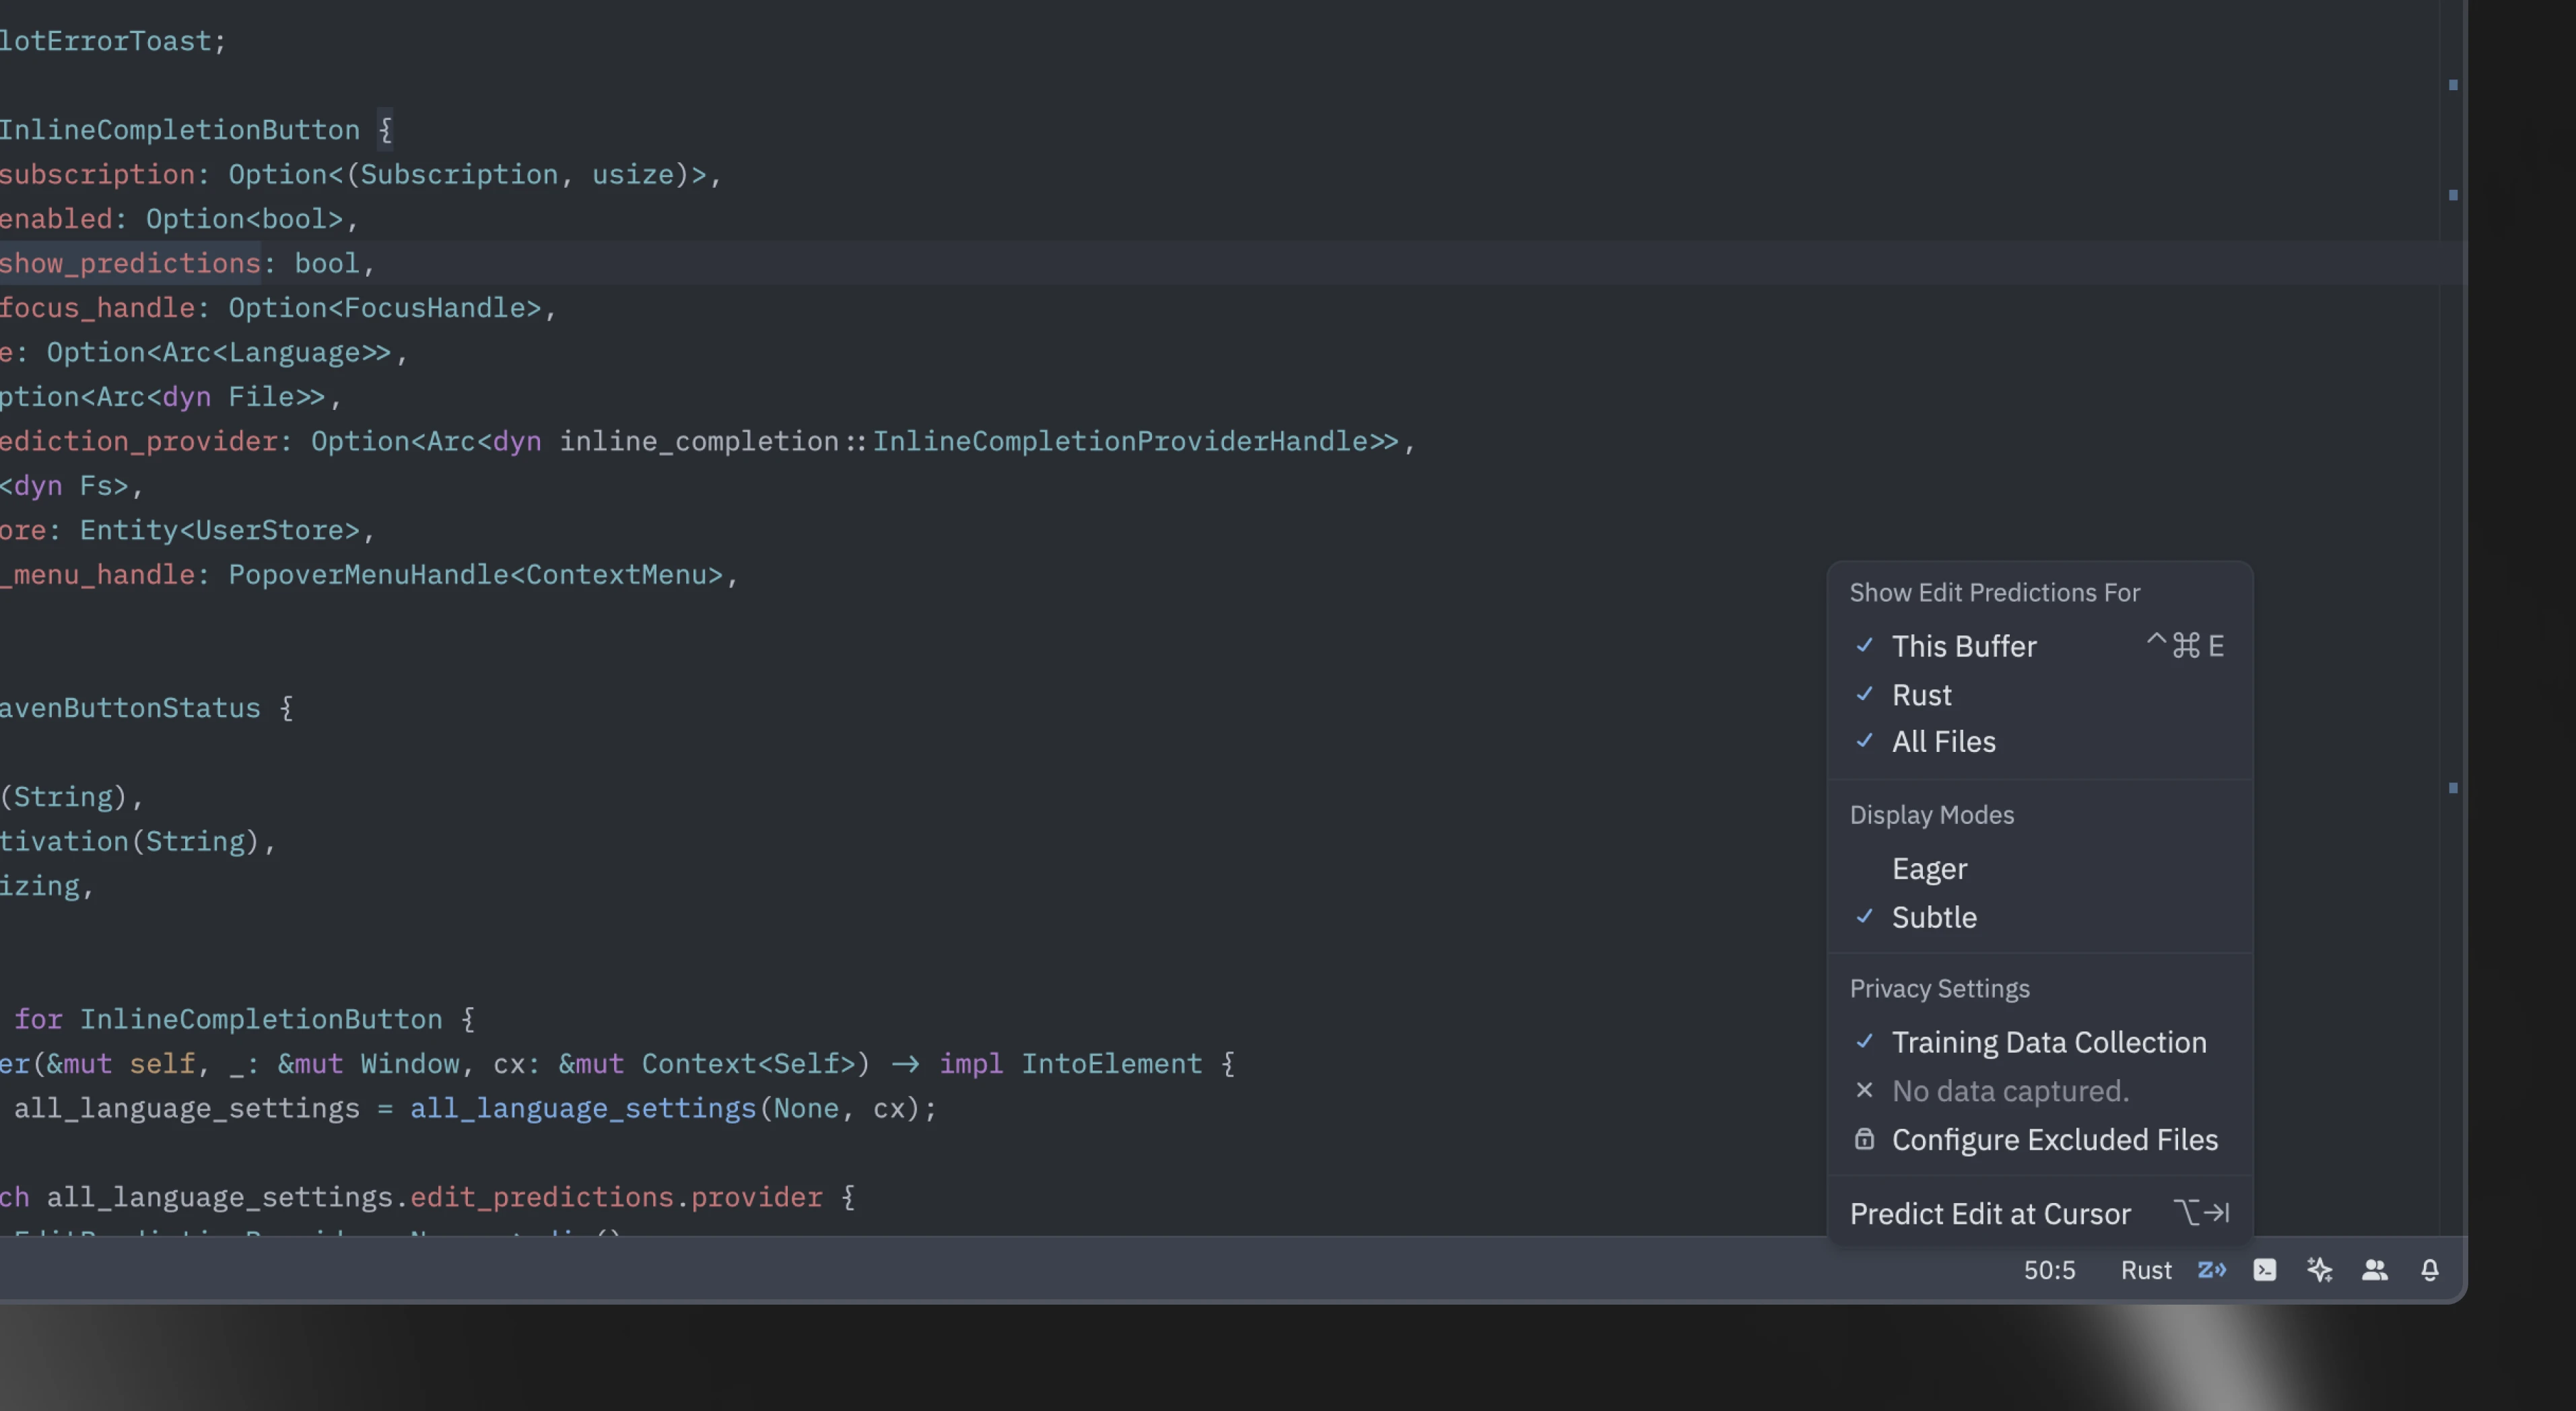
### Switching Modes {#switching-modes}
Zed's Edit Prediction comes with two different display modes:
1. `eager` (default): predictions are displayed inline as long as it doesn't conflict with language server completions
2. `subtle`: predictions only appear inline when holding a modifier key (`alt` by default)
Toggle between them via the `mode` key:
```json
"edit_predictions": {
"mode": "eager" | "subtle"
},
```
Or directly via the UI through the status bar menu:
### Conflict With Other `tab` Actions {#edit-predictions-conflict}
By default, when `tab` would normally perform a different action, Zed requires a modifier key to accept predictions:
1. When the language server completions menu is visible.
2. When your cursor isn't at the right indentation level.
In these cases, `alt-tab` is used instead to accept the prediction. When the language server completions menu is open, holding `alt` first will cause it to temporarily disappear in order to preview the prediction within the buffer.
On Linux, `alt-tab` is often used by the window manager for switching windows, so `alt-l` is provided as the default binding for accepting predictions. `tab` and `alt-tab` also work, but aren't displayed by default.
{#action editor::AcceptPartialEditPrediction} ({#kb editor::AcceptPartialEditPrediction}) can be used to accept the current edit prediction up to the next word boundary.
See the [Configuring GitHub Copilot](#github-copilot) and [Configuring Supermaven](#supermaven) sections below for configuration of other providers. Only text insertions at the current cursor are supported for these providers, whereas the Zeta model provides multiple predictions including deletions.
## Configuring Edit Prediction Keybindings {#edit-predictions-keybinding}
By default, `tab` is used to accept edit predictions. You can use another keybinding by inserting this in your keymap:
```json
{
"context": "Editor && edit_prediction",
"bindings": {
// Here we also allow `alt-enter` to accept the prediction
"alt-enter": "editor::AcceptEditPrediction"
}
}
```
When there's a [conflict with the `tab` key](#edit-predictions-conflict), Zed uses a different context to accept keybindings (`edit_prediction_conflict`). If you want to use a different one, you can insert this in your keymap:
```json
{
"context": "Editor && edit_prediction_conflict",
"bindings": {
"ctrl-enter": "editor::AcceptEditPrediction" // Example of a modified keybinding
}
}
```
If your keybinding contains a modifier (`ctrl` in the example above), it will also be used to preview the edit prediction and temporarily hide the language server completion menu.
You can also bind this action to keybind without a modifier. In that case, Zed will use the default modifier (`alt`) to preview the edit prediction.
```json
{
"context": "Editor && edit_prediction_conflict",
"bindings": {
// Here we bind tab to accept even when there's a language server completion
// or the cursor isn't at the correct indentation level
"tab": "editor::AcceptEditPrediction"
}
}
```
To maintain the use of the modifier key for accepting predictions when there is a language server completions menu, but allow `tab` to accept predictions regardless of cursor position, you can specify the context further with `showing_completions`:
```json
{
"context": "Editor && edit_prediction_conflict && !showing_completions",
"bindings": {
// Here we don't require a modifier unless there's a language server completion
"tab": "editor::AcceptEditPrediction"
}
}
```
### Keybinding Example: Always Use Alt-Tab
The keybinding example below causes `alt-tab` to always be used instead of sometimes using `tab`. You might want this in order to have just one keybinding to use for accepting edit predictions, since the behavior of `tab` varies based on context.
```json
{
"context": "Editor && edit_prediction",
"bindings": {
"alt-tab": "editor::AcceptEditPrediction"
}
},
// Bind `tab` back to its original behavior.
{
"context": "Editor",
"bindings": {
"tab": "editor::Tab"
}
},
{
"context": "Editor && showing_completions",
"bindings": {
"tab": "editor::ComposeCompletion"
}
},
```
If `"vim_mode": true` is set within `settings.json`, then additional bindings are needed after the above to return `tab` to its original behavior:
```json
{
"context": "(VimControl && !menu) || vim_mode == replace || vim_mode == waiting",
"bindings": {
"tab": "vim::Tab"
}
},
{
"context": "vim_mode == literal",
"bindings": {
"tab": ["vim::Literal", ["tab", "\u0009"]]
}
},
```
### Keybinding Example: Displaying Tab and Alt-Tab on Linux
While `tab` and `alt-tab` are supported on Linux, `alt-l` is displayed instead. If your window manager does not reserve `alt-tab`, and you would prefer to use `tab` and `alt-tab`, include these bindings in `keymap.json`:
```json
{
"context": "Editor && edit_prediction",
"bindings": {
"tab": "editor::AcceptEditPrediction",
// Optional: This makes the default `alt-l` binding do nothing.
"alt-l": null
}
},
{
"context": "Editor && edit_prediction_conflict",
"bindings": {
"alt-tab": "editor::AcceptEditPrediction",
// Optional: This makes the default `alt-l` binding do nothing.
"alt-l": null
}
},
```
### Missing keybind {#edit-predictions-missing-keybinding}
Zed requires at least one keybinding for the {#action editor::AcceptEditPrediction} action in both the `Editor && edit_prediction` and `Editor && edit_prediction_conflict` contexts ([learn more above](#edit-predictions-keybinding)).
If you have previously bound the default keybindings to different actions in the global context, you will not be able to preview or accept edit predictions. For example:
```json
[
// Your keymap
{
"bindings": {
// Binds `alt-tab` to a different action globally
"alt-tab": "menu::SelectNext"
}
}
]
```
To fix this, you can specify your own keybinding for accepting edit predictions:
```json
[
// ...
{
"context": "Editor && edit_prediction_conflict",
"bindings": {
"alt-l": "editor::AcceptEditPrediction"
}
}
]
```
If you would like to use the default keybinding, you can free it up by either moving yours to a more specific context or changing it to something else.
## Disabling Automatic Edit Prediction
There are different levels in which you can disable edit predictions to be displayed, including not having it turned on at all.
Alternatively, if you have Zed set as your provider, consider [using Subtle Mode](#switching-modes).
### On Buffers
To not have predictions appear automatically as you type, set this within `settings.json`:
```json
{
"show_edit_predictions": false
}
```
This hides every indication that there is a prediction available, regardless of [the display mode](#switching-modes) you're in (valid only if you have Zed as your provider).
Still, you can trigger edit predictions manually by executing {#action editor::ShowEditPrediction} or hitting {#kb editor::ShowEditPrediction}.
### For Specific Languages
To not have predictions appear automatically as you type when working with a specific language, set this within `settings.json`:
```json
{
"language": {
"python": {
"show_edit_predictions": false
}
}
}
```
### In Specific Directories
To disable edit predictions for specific directories or files, set this within `settings.json`:
```json
{
"edit_predictions": {
"disabled_globs": ["~/.config/zed/settings.json"]
}
}
```
### Turning Off Completely
To completely turn off edit prediction across all providers, explicitly set the settings to `none`, like so:
```json
"features": {
"edit_prediction_provider": "none"
},
```
## Configuring GitHub Copilot {#github-copilot}
To use GitHub Copilot as your provider, set this within `settings.json`:
```json
{
"features": {
"edit_prediction_provider": "copilot"
}
}
```
You should be able to sign-in to GitHub Copilot by clicking on the Copilot icon in the status bar and following the setup instructions.
### Using GitHub Copilot Enterprise {#github-copilot-enterprise}
If your organization uses GitHub Copilot Enterprise, you can configure Zed to use your enterprise instance by specifying the enterprise URI in your `settings.json`:
```json
{
"edit_predictions": {
"copilot": {
"enterprise_uri": "https://your.enterprise.domain"
}
}
}
```
Replace `"https://your.enterprise.domain"` with the URL provided by your GitHub Enterprise administrator (e.g., `https://foo.ghe.com`).
Once set, Zed will route Copilot requests through your enterprise endpoint. When you sign in by clicking the Copilot icon in the status bar, you will be redirected to your configured enterprise URL to complete authentication. All other Copilot features and usage remain the same.
Copilot can provide multiple completion alternatives, and these can be navigated with the following actions:
- {#action editor::NextEditPrediction} ({#kb editor::NextEditPrediction}): To cycle to the next edit prediction
- {#action editor::PreviousEditPrediction} ({#kb editor::PreviousEditPrediction}): To cycle to the previous edit prediction
## Configuring Supermaven {#supermaven}
To use Supermaven as your provider, set this within `settings.json`:
```json
{
"features": {
"edit_prediction_provider": "supermaven"
}
}
```
You should be able to sign-in to Supermaven by clicking on the Supermaven icon in the status bar and following the setup instructions.
## See also
You may also use the [Agent Panel](./agent-panel.md) or the [Inline Assistant](./inline-assistant.md) to interact with language models, see the [AI documentation](./overview.md) for more information on the other AI features in Zed.
# Inline Assistant
## Usage Overview
Use `ctrl-enter` to open the Inline Assistant nearly anywhere you can enter text: editors, text threads, the rules library, channel notes, and even within the terminal panel.
The Inline Assistant allows you to send the current selection (or the current line) to a language model and modify the selection with the language model's response.
You can also perform multiple generation requests in parallel by pressing `ctrl-enter` with multiple cursors, or by pressing the same binding with a selection that spans multiple excerpts in a multibuffer.
## Context
Give the Inline Assistant context the same way you can in [the Agent Panel](./agent-panel.md), allowing you to provide additional instructions or rules for code transformations with @-mentions.
A useful pattern here is to create a thread in the Agent Panel, and then use the mention that thread with `@thread` in the Inline Assistant to include it as context.
> The Inline Assistant is limited to normal mode context windows ([see Models](./models.md) for more).
## Prefilling Prompts
To create a custom keybinding that prefills a prompt, you can add the following format in your keymap:
```json
[
{
"context": "Editor && mode == full",
"bindings": {
"ctrl-shift-enter": [
"assistant::InlineAssist",
{ "prompt": "Build a snake game" }
]
}
}
]
```
# Model Context Protocol
Zed uses the [Model Context Protocol](https://modelcontextprotocol.io/) to interact with context servers.
> The Model Context Protocol (MCP) is an open protocol that enables seamless integration between LLM applications and external data sources and tools. Whether you're building an AI-powered IDE, enhancing a chat interface, or creating custom AI workflows, MCP provides a standardized way to connect LLMs with the context they need.
Check out the [Anthropic news post](https://www.anthropic.com/news/model-context-protocol) and the [Zed blog post](https://zed.dev/blog/mcp) for a general intro to MCP.
## Installing MCP Servers
### As Extensions
One of the ways you can use MCP servers in Zed is by exposing them as an extension.
To learn how to create your own, check out the [MCP Server Extensions](../extensions/mcp-extensions.md) page for more details.
Thanks to our awesome community, many MCP servers have already been added as extensions.
You can check which ones are available via any of these routes:
1. [the Zed website](https://zed.dev/extensions?filter=context-servers)
2. in the app, open the Command Palette and run the `zed: extensions` action
3. in the app, go to the Agent Panel's top-right menu and look for the "View Server Extensions" menu item
In any case, here are some of the ones available:
- [Context7](https://zed.dev/extensions/context7-mcp-server)
- [GitHub](https://zed.dev/extensions/github-mcp-server)
- [Puppeteer](https://zed.dev/extensions/puppeteer-mcp-server)
- [Gem](https://zed.dev/extensions/gem)
- [Brave Search](https://zed.dev/extensions/brave-search-mcp-server)
- [Prisma](https://github.com/aqrln/prisma-mcp-zed)
- [Framelink Figma](https://zed.dev/extensions/framelink-figma-mcp-server)
- [Linear](https://zed.dev/extensions/linear-mcp-server)
- [Resend](https://zed.dev/extensions/resend-mcp-server)
### As Custom Servers
Creating an extension is not the only way to use MCP servers in Zed.
You can connect them by adding their commands directly to your `settings.json`, like so:
```json
{
"context_servers": {
"your-mcp-server": {
"source": "custom",
"command": "some-command",
"args": ["arg-1", "arg-2"],
"env": {}
}
}
}
```
Alternatively, you can also add a custom server by accessing the Agent Panel's Settings view (also accessible via the `agent: open configuration` action).
From there, you can add it through the modal that appears when you click the "Add Custom Server" button.
## Using MCP Servers
### Installation Check
Regardless of whether you're using MCP servers as an extension or adding them directly, most servers out there need some sort of configuration as part of the set up process.
In the case of extensions, Zed will show a modal displaying what is required for you to properly set up a given server.
For example, the GitHub MCP extension requires you to add a [Personal Access Token](https://docs.github.com/en/authentication/keeping-your-account-and-data-secure/managing-your-personal-access-tokens).
In the case of custom servers, make sure you check the provider documentation to determine what type of command, arguments, and environment variables need to be added to the JSON.
To check whether your MCP server is properly installed, go to the Agent Panel's settings view and watch the indicator dot next to its name.
If they're running correctly, the indicator will be green and its tooltip will say "Server is active".
If not, other colors and tooltip messages will indicate what is happening.
### Using in the Agent Panel
Once installation is complete, you can return to the Agent Panel and start prompting.
Mentioning your MCP server by name helps the agent pick it up.
If you want to ensure a given server will be used, you can create [a custom profile](./agent-panel.md#custom-profiles) by turning off the built-in tools (either all of them or the ones that would cause conflicts) and turning on only the tools coming from the MCP server.
As an example, [the Dagger team suggests](https://container-use.com/agent-integrations#add-container-use-agent-profile-optional) doing that with their [Container Use MCP server](https://zed.dev/extensions/container-use-mcp-server):
```json
"agent": {
"profiles": {
"container-use": {
"name": "Container Use",
"tools": {
"fetch": true,
"thinking": true,
"copy_path": false,
"find_path": false,
"delete_path": false,
"create_directory": false,
"list_directory": false,
"diagnostics": false,
"read_file": false,
"open": false,
"move_path": false,
"grep": false,
"edit_file": false,
"terminal": false
},
"enable_all_context_servers": false,
"context_servers": {
"container-use": {
"tools": {
"environment_create": true,
"environment_add_service": true,
"environment_update": true,
"environment_run_cmd": true,
"environment_open": true,
"environment_file_write": true,
"environment_file_read": true,
"environment_file_list": true,
"environment_file_delete": true,
"environment_checkpoint": true
}
}
}
}
}
}
```
### Tool Approval
Zed's Agent Panel includes the `agent.always_allow_tool_actions` setting that, if set to `false`, will require you to give permission for any editing attempt as well as tool calls coming from MCP servers.
You can change this by setting this key to `true` in either your `settings.json` or through the Agent Panel's settings view.
# Models
Zed’s plans offer hosted versions of major LLM’s, generally with higher rate limits than individual API keys.
We’re working hard to expand the models supported by Zed’s subscription offerings, so please check back often.
| Model | Provider | Burn Mode | Context Window | Price per Prompt | Price per Request |
| ----------------- | --------- | --------- | -------------- | ---------------- | ----------------- |
| Claude 3.5 Sonnet | Anthropic | ❌ | 60k | $0.04 | N/A |
| Claude 3.7 Sonnet | Anthropic | ❌ | 120k | $0.04 | N/A |
| Claude 3.7 Sonnet | Anthropic | ✅ | 200k | N/A | $0.05 |
| Claude Sonnet 4 | Anthropic | ❌ | 120k | $0.04 | N/A |
| Claude Sonnet 4 | Anthropic | ✅ | 200k | N/A | $0.05 |
| Claude Opus 4 | Anthropic | ❌ | 120k | $0.20 | N/A |
| Claude Opus 4 | Anthropic | ✅ | 200k | N/A | $0.25 |
> Note: Because of the 5x token cost for [Opus relative to Sonnet](https://www.anthropic.com/pricing#api), each Opus prompt consumes 5 prompts against your billing meter
## Usage {#usage}
The models above can be used with the prompts included in your plan. For models not marked with [“Burn Mode”](#burn-mode), each prompt is counted against the monthly limit of your plan.
If you’ve exceeded your limit for the month, and are on a paid plan, you can enable usage-based pricing to continue using models for the rest of the month. See [Plans and Usage](./plans-and-usage.md) for more information.
Non-Burn Mode usage will use up to 25 tool calls per one prompt. If your prompt extends beyond 25 tool calls, Zed will ask if you’d like to continue, which will consume a second prompt.
## Burn Mode {#burn-mode}
> Note: "Burn Mode" is the new name for what was previously called "Max Mode".
In Burn Mode, we enable models to use [large context windows](#context-windows), unlimited tool calls, and other capabilities for expanded reasoning, to allow an unfettered agentic experience.
Because of the increased cost to Zed, each subsequent request beyond the initial user prompt in Burn Mode models is counted as a prompt for metering.
In addition, usage-based pricing per request is slightly more expensive for Burn Mode models than usage-based pricing per prompt for regular models.
> Note that the Agent Panel using a Burn Mode model may consume a good bit of your monthly prompt capacity, if many tool calls are used.
> We encourage you to think through what model is best for your needs before leaving the Agent Panel to work.
By default, all threads and [text threads](./text-threads.md) start in normal mode.
However, you can use the `agent.preferred_completion_mode` setting to have Burn Mode activated by default.
## Context Windows {#context-windows}
A context window is the maximum span of text and code an LLM can consider at once, including both the input prompt and output generated by the model.
In [Burn Mode](#burn-mode), we increase context window size to allow models to have enhanced reasoning capabilities.
Each Agent thread and text thread in Zed maintains its own context window.
The more prompts, attached files, and responses included in a session, the larger the context window grows.
For best results, it’s recommended you take a purpose-based approach to Agent thread management, starting a new thread for each unique task.
## Tool Calls {#tool-calls}
Models can use [tools](./tools.md) to interface with your code, search the web, and perform other useful functions.
In [Burn Mode](#burn-mode), models can use an unlimited number of tools per prompt, with each tool call counting as a prompt for metering purposes.
For non-Burn Mode models, you'll need to interact with the model every 25 tool calls to continue, at which point a new prompt will be counted against your plan limit.
# AI
Zed smoothly integrates LLMs in multiple ways across the editor.
Learn how to get started with AI on Zed and all its capabilities.
## Setting up AI in Zed
- [Configuration](./configuration.md): Learn how to set up different language model providers like Anthropic, OpenAI, Ollama, Google AI, and more.
- [Models](./models.md): Learn about the various language models available in Zed.
- [Subscription](./subscription.md): Learn about Zed's subscriptions and other billing-related information.
- [Privacy and Security](./privacy-and-security.md): Understand how Zed handles privacy and security with AI features.
## Agentic Editing
- [Agent Panel](./agent-panel.md): Create and manage interactions with language models.
- [Rules](./rules.md): How to define rules for AI interactions.
- [Tools](./tools.md): Explore the tools that enable agentic capabilities.
- [Model Context Protocol](./mcp.md): Learn about how to install and configure MCP servers.
- [Inline Assistant](./inline-assistant.md): Discover how to use the agent to power inline transformations directly within a file or terminal.
## Edit Prediction
- [Edit Prediction](./edit-prediction.md): Learn about Zed's AI prediction feature that helps autocomplete your code.
## Text Threads
- [Text Threads](./text-threads.md): Learn about an alternative, text-based interface for interacting with language models.
# Plans and Usage
To view your current usage, you can visit your account at [zed.dev/account](https://zed.dev/account).
You’ll also find usage meters in-product when you’re nearing the limit for your plan or trial.
## Available Plans {#plans}
For costs and more information on pricing, visit [Zed’s pricing page](https://zed.dev/pricing).
Please note that if you’re interested in just using Zed as the world’s fastest editor, with no AI or subscription features, you can always do so for free, without [authentication](../accounts.md).
## Usage {#usage}
- A `prompt` in Zed is an input from the user, initiated on pressing enter, composed of one or many `requests`. A `prompt` can be initiated from the Agent Panel, or via Inline Assist.
- A `request` in Zed is a response to a `prompt`, plus any tool calls that are initiated as part of that response. There may be one `request` per `prompt`, or many.
Most models offered by Zed are metered per-prompt.
Some models that use large context windows and unlimited tool calls ([“Burn Mode”](./models.md#burn-mode)) count each individual request within a prompt against your prompt limit, since the agentic work spawned by the prompt is expensive to support.
See [the Models page](./models.md) for a list of which subset of models are metered by request.
Plans come with a set amount of prompts included, with the number varying depending on the plan you’ve selected.
## Usage-Based Pricing {#ubp}
You may opt in to usage-based pricing for prompts that exceed what is included in your paid plan from [your account page](https://zed.dev/account).
Usage-based pricing is only available with a paid plan, and is exclusively opt-in.
From the dashboard, you can toggle usage-based pricing for usage exceeding your paid plan.
You can also configure a spend limit in USD.
Once the spend limit is hit, we’ll stop any further usage until your prompt limit resets.
We will bill for additional prompts when you’ve made prompts totaling $20, or when your billing date occurs, whichever comes first.
Cost per request for each model can be found on [the models page](./models.md).
## Business Usage {#business-usage}
Email [sales@zed.dev](mailto:sales@zed.dev) with any questions on business plans, metering, and usage-based pricing.
# Privacy and Security
## Philosophy
Zed aims to collect on the minimum data necessary to serve and improve our product.
We believe in opt-in data sharing as the default in building AI products, rather than opt-out, like most of our competitors. Privacy Mode is not a setting to be toggled, it's a default stance.
As an open-source product, we believe in maximal transparency, and invite you to examine our codebase. If you find issues, we encourage you to share them with us.
It is entirely possible to use Zed without sharing any data with us and without authenticating into the product. We're happy to always support this desired use pattern.
## Documentation
- [Telemetry](../telemetry.md): How Zed collects general telemetry data.
- [AI Improvement](./ai-improvement.md): Zed's opt-in-only approach to data collection for AI improvement, whether our Agentic offering or Edit Predictions.
- [Accounts](../accounts.md): When and why you'd need to authenticate into Zed, how to do so, and what scope we need from you.
## Legal Links
- [Terms of Service](https://zed.dev/terms-of-service)
- [Terms of Use](https://zed.dev/terms)
- [Privacy Policy](https://zed.dev/privacy-policy)
- [Zed's Contributor License and Feedback Agreement](https://zed.dev/cla)
- [Subprocessors](https://zed.dev/subprocessors)
# Using Rules {#using-rules}
A rule is essentially a prompt that is inserted at the beginning of each interaction with the Agent.
Currently, Zed supports `.rules` files at the directory's root and the Rules Library, which allows you to store multiple rules for on-demand usage.
## `.rules` files
Zed supports including `.rules` files at the top level of worktrees, and act as project-level instructions that are included in all of your interactions with the Agent Panel.
Other names for this file are also supported for compatibility with other agents, but note that the first file which matches in this list will be used:
- `.rules`
- `.cursorrules`
- `.windsurfrules`
- `.clinerules`
- `.github/copilot-instructions.md`
- `AGENT.md`
- `AGENTS.md`
- `CLAUDE.md`
- `GEMINI.md`
## Rules Library {#rules-library}
The Rules Library is an interface for writing and managing rules. Like other text-driven UIs in Zed, it is a full editor with syntax highlighting, keyboard shortcuts, etc.
You can use the inline assistant right in the rules editor, allowing you to automate and rewrite rules.
### Opening the Rules Library
1. Open the Agent Panel.
2. Click on the Agent menu (`...`) in the top right corner.
3. Select `Rules...` from the dropdown.
You can also use the `agent: open rules library` command while in the Agent Panel.
### Managing Rules
Once a rules file is selected, you can edit it directly in the built-in editor. Its title can be changed from the editor title bar as well.
Rules can be duplicated, deleted, or added to the default rules using the buttons in the rules editor.
### Creating Rules {#creating-rules}
To create a rule file, simply open the `Rules Library` and click the `+` button. Rules files are stored locally and can be accessed from the library at any time.
Having a series of rules files specifically tailored to prompt engineering can also help you write consistent and effective rules.
Here are a couple of helpful resources for writing better rules:
- [Anthropic: Prompt Engineering](https://docs.anthropic.com/en/docs/build-with-claude/prompt-engineering/overview)
- [OpenAI: Prompt Engineering](https://platform.openai.com/docs/guides/prompt-engineering)
### Editing the Default Rules {#default-rules}
Zed allows you to customize the default rules used when interacting with LLMs.
Or to be more precise, it uses a series of rules that are combined to form the default rules.
Default rules are included in the context of every new thread automatically.
You can also manually add other rules (that are not flagged as default) as context using the `@rule` command.
## Migrating from Prompt Library
Previously, the Rules Library was called the "Prompt Library".
The new rules system replaces the Prompt Library except in a few specific cases, which are outlined below.
### Slash Commands in Rules
Previously, it was possible to use slash commands (now @-mentions) in custom prompts (now rules).
There is currently no support for using @-mentions in rules files, however, slash commands are supported in rules files when used with text threads.
See the documentation for using [slash commands in rules](./text-threads.md#slash-commands-in-rules) for more information.
### Prompt templates
Zed maintains backwards compatibility with its original template system, which allows you to customize prompts used throughout the application, including the inline assistant.
While the Rules Library is now the primary way to manage prompts, you can still use these legacy templates to override default prompts.
For more details, see the [Rules Templates](./text-threads.md#rule-templates) section under [Text Threads](./text-threads.md).
# Subscription
Zed's hosted models are offered via subscription to Zed Pro or Zed Business.
> Using your own API keys is _free_—you do not need to subscribe to a Zed plan to use our AI features with your own keys.
See the following pages for specific aspects of our subscription offering:
- [Plans and Usage](./plans-and-usage.md): Outlines Zed's plans, how usage is measured, and usage-based pricing for overages.
- [Billing](./billing.md): Billing policies and procedures, and how to update or view various billing settings.
- [Models](./models.md): Overview of the models offered by Zed's subscriptions.
# Model Temperature
Zed's settings allow you to specify a custom temperature for a provider and/or model:
```json
"model_parameters": [
// To set parameters for all requests to OpenAI models:
{
"provider": "openai",
"temperature": 0.5
},
// To set parameters for all requests in general:
{
"temperature": 0
},
// To set parameters for a specific provider and model:
{
"provider": "zed.dev",
"model": "claude-sonnet-4",
"temperature": 1.0
}
],
```
# Text Threads
## Overview {#overview}
Text threads in the [Agent Panel](./agent-panel.md) function similarly to any other editor. You can use custom key bindings and work with multiple cursors, allowing for seamless transitions between coding and engaging in discussions with the language models.
However, the text threads differ with the inclusion of message blocks. These blocks serve as containers for text that correspond to different roles within the context. These roles include:
- `You`
- `Assistant`
- `System`
To begin, type a message in a `You` block.
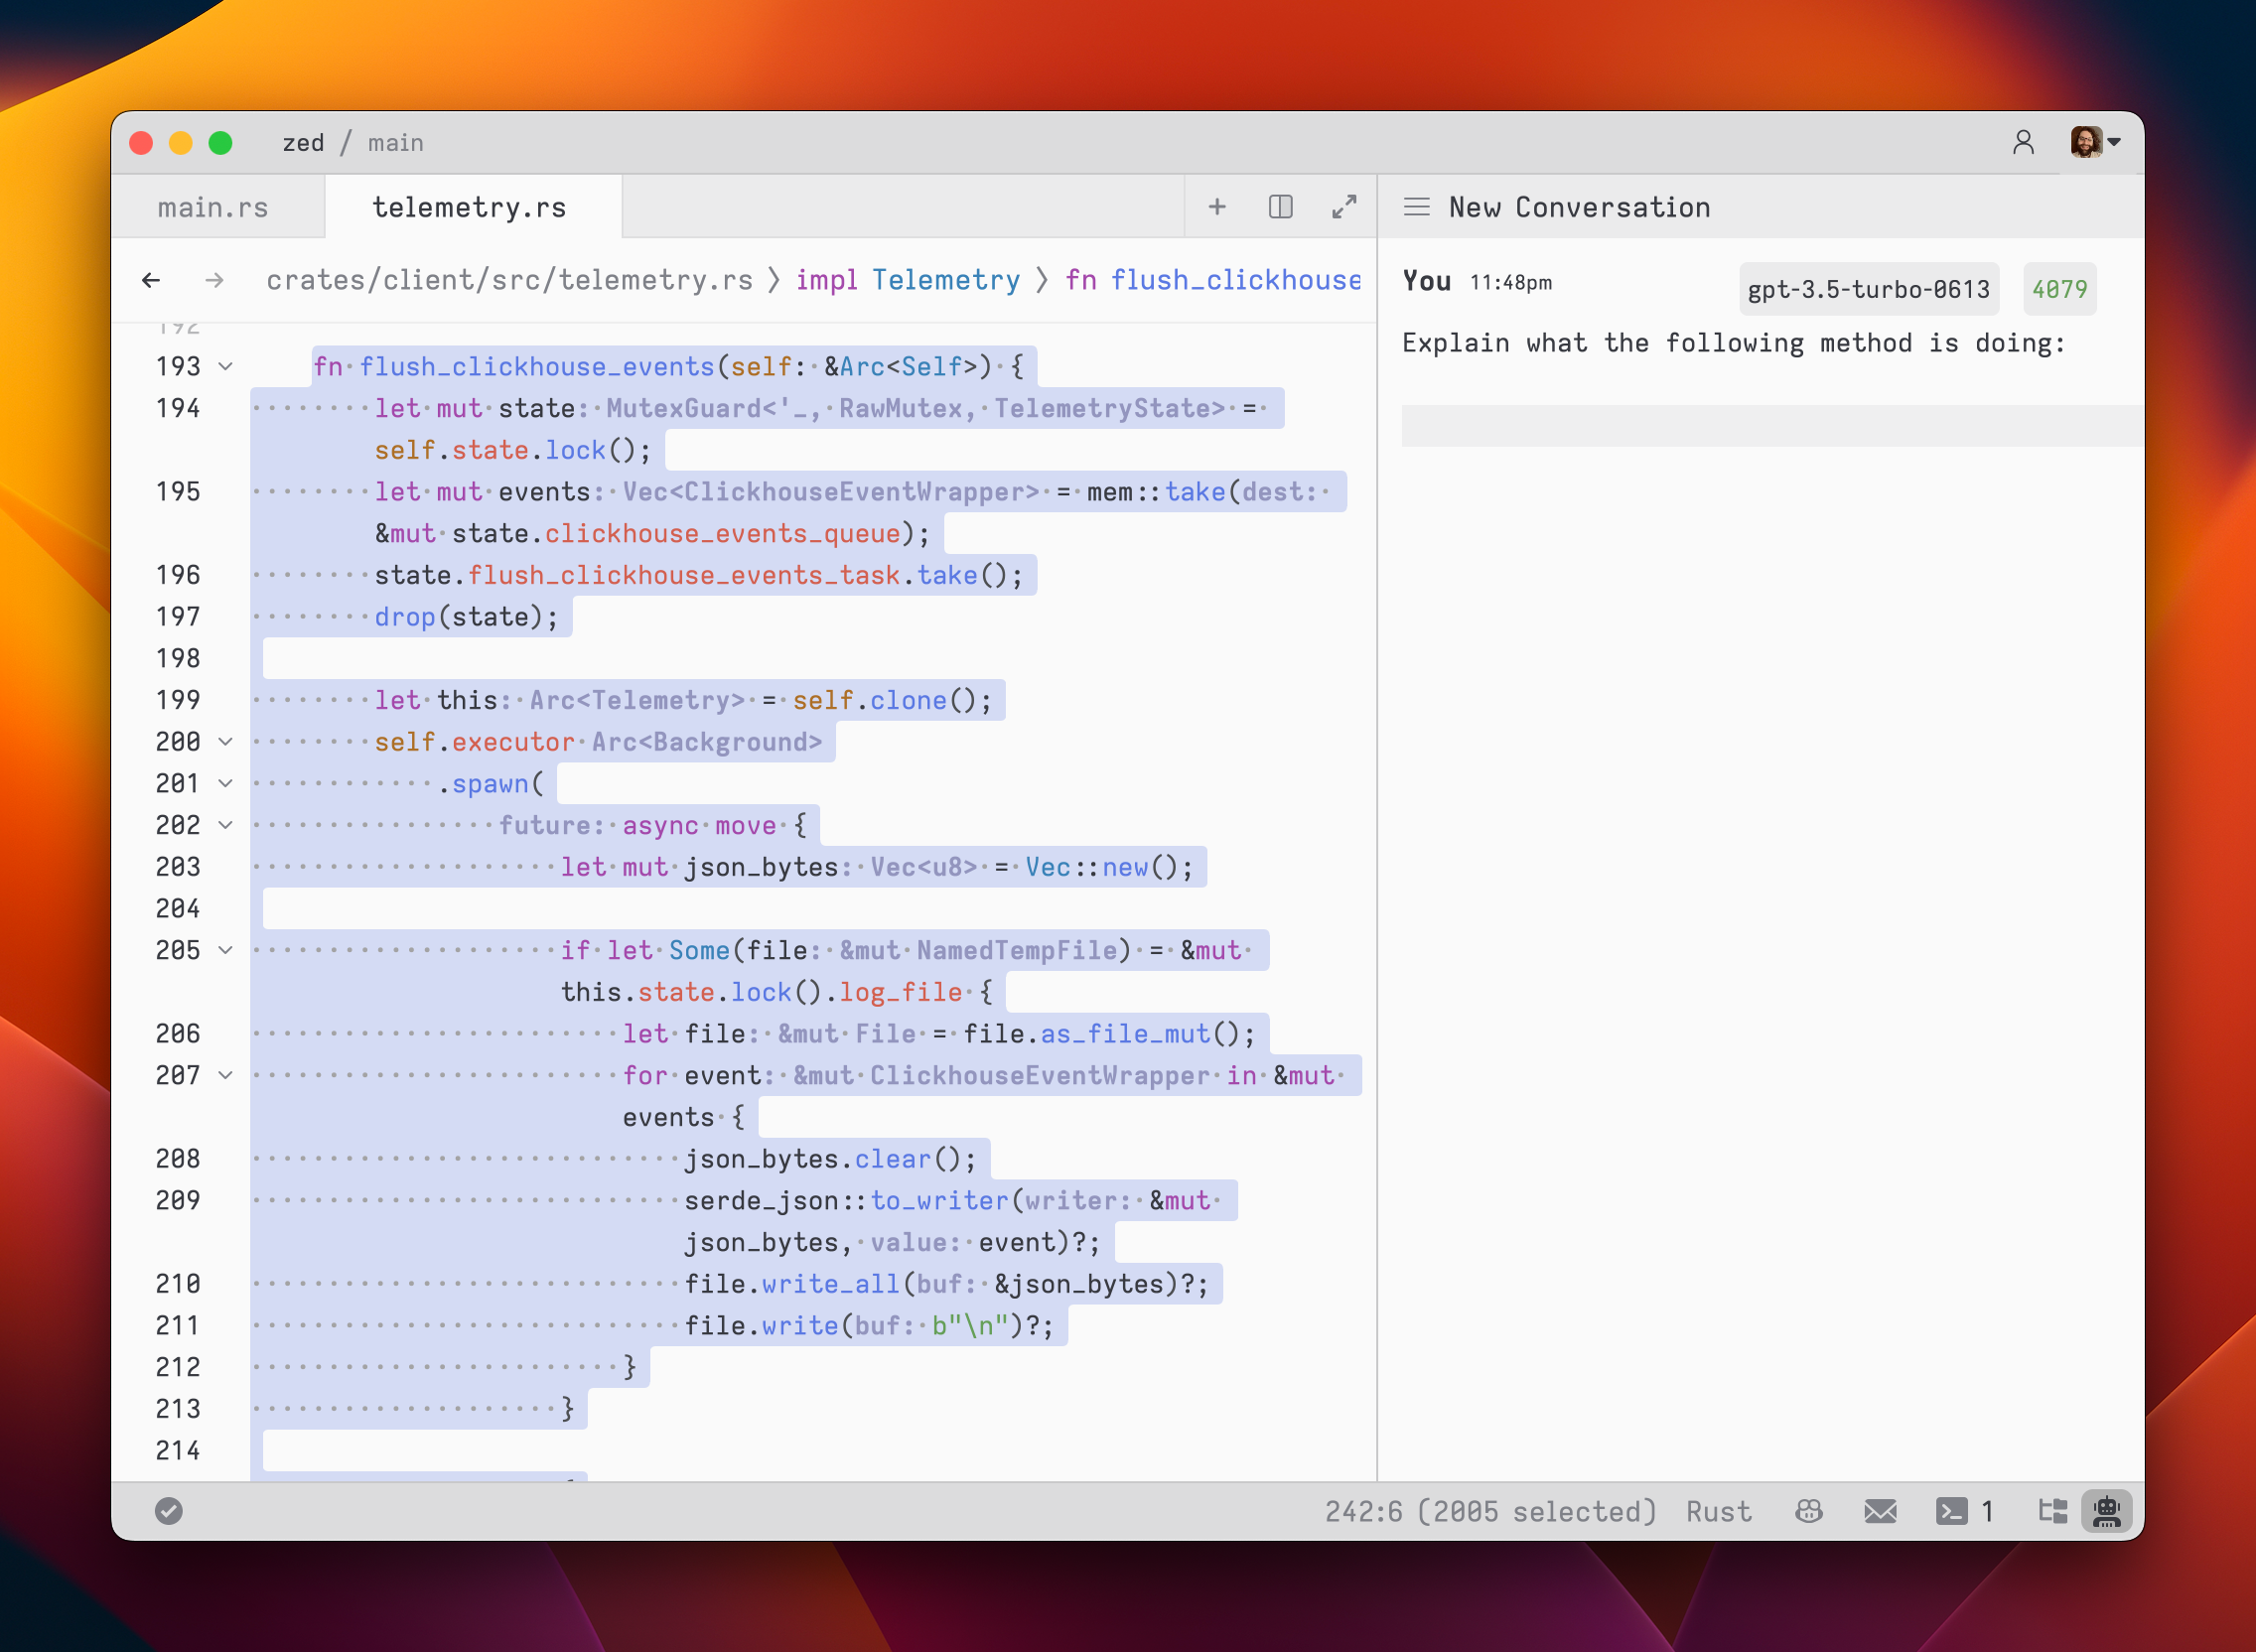
As you type, the remaining tokens count for the selected model is updated.
Inserting text from an editor is as simple as highlighting the text and running `assistant: quote selection` ({#kb assistant::QuoteSelection}); Zed will wrap it in a fenced code block if it is code.
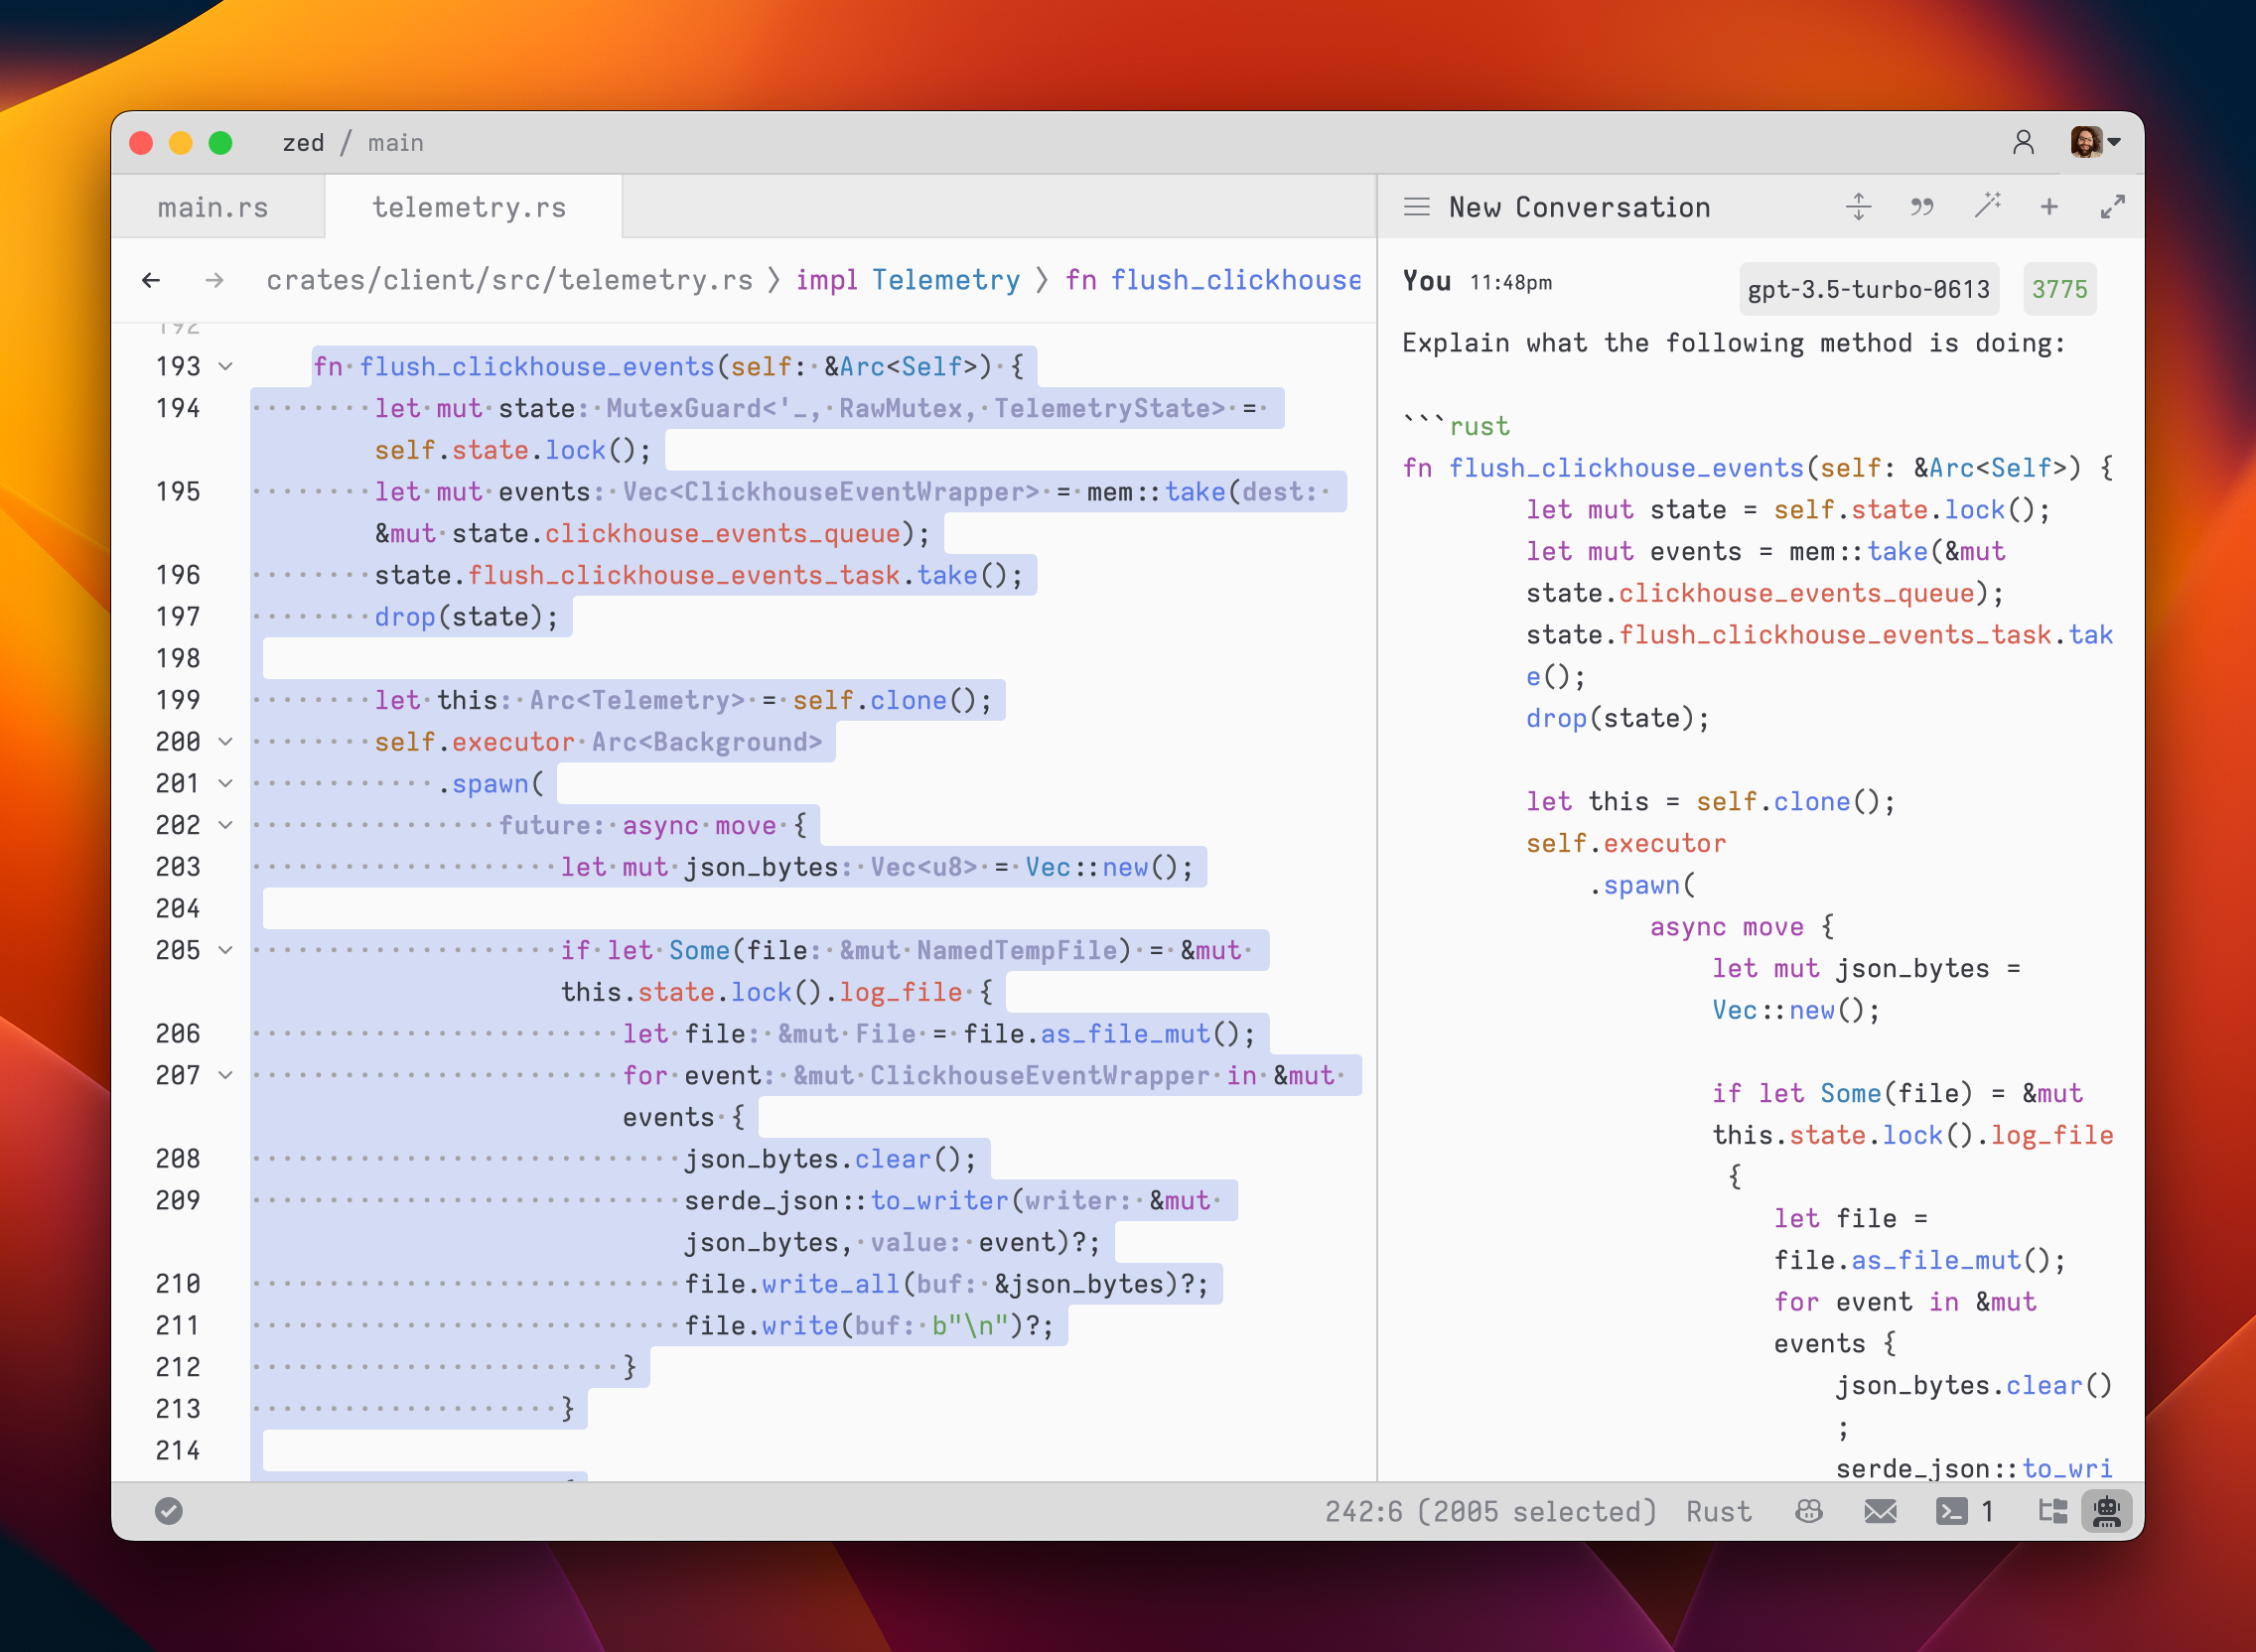
To submit a message, use {#kb assistant::Assist}(`assistant: assist`). Unlike normal threads, where pressing enter would submit the message, in text threads, our goal is to make it feel as close to a regular editor as possible. So, pressing {#kb editor::Newline} simply inserts a new line.
After submitting a message, the response will be streamed below, in an `Assistant` message block.

The stream can be canceled at any point with escape. This is useful if you realize early on that the response is not what you were looking for.
If you want to start a new conversation at any time, you can hit cmd-n|ctrl-n or use the `New Chat` menu option in the hamburger menu at the top left of the panel.
Simple back-and-forth conversations work well with the text threads. However, there may come a time when you want to modify the previous text in the conversation and steer it in a different direction.
## Editing a Text Thread {#edit-text-thread}
Text threads give you the flexibility to have control over the context.
You can freely edit any previous text, including the responses from the LLM.
If you want to remove a message block entirely, simply place your cursor at the beginning of the block and use the `delete` key.
A typical workflow might involve making edits and adjustments throughout the context to refine your inquiry or provide additional information. Here's an example:
1. Write text in a `You` block.
2. Submit the message with {#kb assistant::Assist}.
3. Receive an `Assistant` response that doesn't meet your expectations.
4. Cancel the response with escape.
5. Erase the content of the `Assistant` message block and remove the block entirely.
6. Add additional context to your original message.
7. Submit the message with {#kb assistant::Assist}.
Being able to edit previous messages gives you control over how tokens are used. You don't need to start up a new chat to correct a mistake or to add additional information, and you don't have to waste tokens by submitting follow-up corrections.
> **Note**: The act of editing past messages is often referred to as "Rewriting History" in the context of the language models.
Some additional points to keep in mind:
- You can cycle the role of a message block by clicking on the role, which is useful when you receive a response in an `Assistant` block that you want to edit and send back up as a `You` block.
## Commands Overview {#commands}
Slash commands enhance the assistant's capabilities. Begin by typing a `/` at the beginning of the line to see a list of available commands:
- `/default`: Inserts the default rule
- `/diagnostics`: Injects errors reported by the project's language server
- `/fetch`: Fetches the content of a webpage and inserts it
- `/file`: Inserts a single file or a directory of files
- `/now`: Inserts the current date and time
- `/prompt`: Adds a custom-configured prompt to the context ([see Rules Library](./rules.md#rules-library))
- `/symbols`: Inserts the current tab's active symbols
- `/tab`: Inserts the content of the active tab or all open tabs
- `/terminal`: Inserts a select number of lines of output from the terminal
- `/selection`: Inserts the selected text
> **Note:** Remember, commands are only evaluated when the text thread is created or when the command is inserted, so a command like `/now` won't continuously update, or `/file` commands won't keep their contents up to date.
### `/default`
Read more about `/default` in the [Rules: Editing the Default Rules](./rules.md#default-rules) section.
Usage: `/default`
### `/diagnostics`
The `/diagnostics` command injects errors reported by the project's language server into the context. This is useful for getting an overview of current issues in your project.
Usage: `/diagnostics [--include-warnings] [path]`
- `--include-warnings`: Optional flag to include warnings in addition to errors.
- `path`: Optional path to limit diagnostics to a specific file or directory.
### `/file`
The `/file` command inserts the content of a single file or a directory of files into the context. This allows you to reference specific parts of your project in your conversation with the assistant.
Usage: `/file `
You can use glob patterns to match multiple files or directories.
Examples:
- `/file src/index.js` - Inserts the content of `src/index.js` into the context.
- `/file src/*.js` - Inserts the content of all `.js` files in the `src` directory.
- `/file src` - Inserts the content of all files in the `src` directory.
### `/now`
The `/now` command inserts the current date and time into the context. This can be useful letting the language model know the current time (and by extension, how old their current knowledge base is).
Usage: `/now`
### `/prompt`
The `/prompt` command inserts a prompt from the prompt library into the context. It can also be used to nest prompts within prompts.
Usage: `/prompt `
Related: `/default`
### `/symbols`
The `/symbols` command inserts the active symbols (functions, classes, etc.) from the current tab into the context. This is useful for getting an overview of the structure of the current file.
Usage: `/symbols`
### `/tab`
The `/tab` command inserts the content of the active tab or all open tabs into the context. This allows you to reference the content you're currently working on.
Usage: `/tab [tab_name|all]`
- `tab_name`: Optional name of a specific tab to insert.
- `all`: Insert content from all open tabs.
Examples:
- `/tab` - Inserts the content of the active tab.
- `/tab "index.js"` - Inserts the content of the tab named "index.js".
- `/tab all` - Inserts the content of all open tabs.
### `/terminal`
The `/terminal` command inserts a select number of lines of output from the terminal into the context. This is useful for referencing recent command outputs or logs.
Usage: `/terminal []`
- ``: Optional parameter to specify the number of lines to insert (default is a 50).
### `/selection`
The `/selection` command inserts the selected text in the editor into the context. This is useful for referencing specific parts of your code.
This is equivalent to the `assistant: quote selection` command ({#kb assistant::QuoteSelection}).
Usage: `/selection`
## Commands in the Rules Library {#slash-commands-in-rules}
[Commands](#commands) can be used in rules, in the Rules Library (previously known as Prompt Library), to insert dynamic content or perform actions.
For example, if you want to create a rule where it is important for the model to know the date, you can use the `/now` command to insert the current date.
> **Warn:** Slash commands in rules **only** work when they are used in text threads. Using them in non-text threads is not supported.
> **Note:** Slash commands in rules **must** be on their own line.
See the [list of commands](#commands) above for more information on commands, and what slash commands are available.
### Example
```plaintext
You are an expert Rust engineer. The user has asked you to review their project and answer some questions.
Here is some information about their project:
/file Cargo.toml
```
In the above example, the `@file` command is used to insert the contents of the `Cargo.toml` file (or all `Cargo.toml` files present in the project) into the rule.
## Nesting Rules
Similar to adding rules to the default rules, you can nest rules within other rules with the `/prompt` command (only supported in Text Threads currently).
You might want to nest rules to:
- Create templates on the fly
- Break collections like docs or references into smaller, mix-and-matchable parts
- Create variants of a similar rule (e.g., `Async Rust - Tokio` vs. `Async Rust - Async-std`)
### Example:
```plaintext
Title: Zed-Flavored Rust
## About Zed
/prompt Zed: Zed (a rule about what Zed is)
## Rust - Zed Style
/prompt Rust: Async - Async-std (zed doesn't use tokio)
/prompt Rust: Zed-style Crates (we have some unique conventions)
/prompt Rust - Workspace deps (bias towards reusing deps from the workspace)
```
_The text in parentheses above are comments and are not part of the rule._
> **Note:** While you technically _can_ nest a rule within itself, we wouldn't recommend it (in the strongest of terms.) Use at your own risk!
By using nested rules, you can create modular and reusable rule components that can be combined in various ways to suit different scenarios.
> **Note:** When using slash commands to bring in additional context, the injected content can be edited directly inline in the text thread—edits here will not propagate to the saved rules.
## Extensibility
Additional slash commands can be provided by extensions.
See [Extension: Slash Commands](../extensions/slash-commands.md) to learn how to create your own.
## Advanced Concepts
### Rule Templates {#rule-templates}
Zed uses rule templates to power internal assistant features, like the terminal assistant, or the content rules used in the inline assistant.
Zed has the following internal rule templates:
- `content_prompt.hbs`: Used for generating content in the editor.
- `terminal_assistant_prompt.hbs`: Used for the terminal assistant feature.
At this point it is unknown if we will expand templates further to be user-creatable.
### Overriding Templates
> **Note:** It is not recommended to override templates unless you know what you are doing. Editing templates will break your assistant if done incorrectly.
Zed allows you to override the default rules used for various assistant features by placing custom Handlebars (.hbs) templates in your `~/.config/zed/prompt_overrides` directory.
The following templates can be overridden:
1. [`content_prompt.hbs`](https://github.com/zed-industries/zed/tree/main/assets/prompts/content_prompt.hbs): Used for generating content in the editor.
2. [`terminal_assistant_prompt.hbs`](https://github.com/zed-industries/zed/tree/main/assets/prompts/terminal_assistant_prompt.hbs): Used for the terminal assistant feature.
> **Note:** Be sure you want to override these, as you'll miss out on iteration on our built-in features. This should be primarily used when developing Zed.
You can customize these templates to better suit your needs while maintaining the core structure and variables used by Zed. Zed will automatically reload your prompt overrides when they change on disk.
Consult Zed's [assets/prompts](https://github.com/zed-industries/zed/tree/main/assets/prompts) directory for current versions you can play with.
### History {#history}
After you submit your first message in a text thread, a name for your context is generated by the language model, and the context is automatically saved to your file system in
- `~/.config/zed/conversations` (macOS)
- `~/.local/share/zed/conversations` (Linux)
- `%LocalAppData%\Zed\conversations` (Windows)
You can access and load previous contexts by clicking on the history button in the top-left corner of the agent panel.
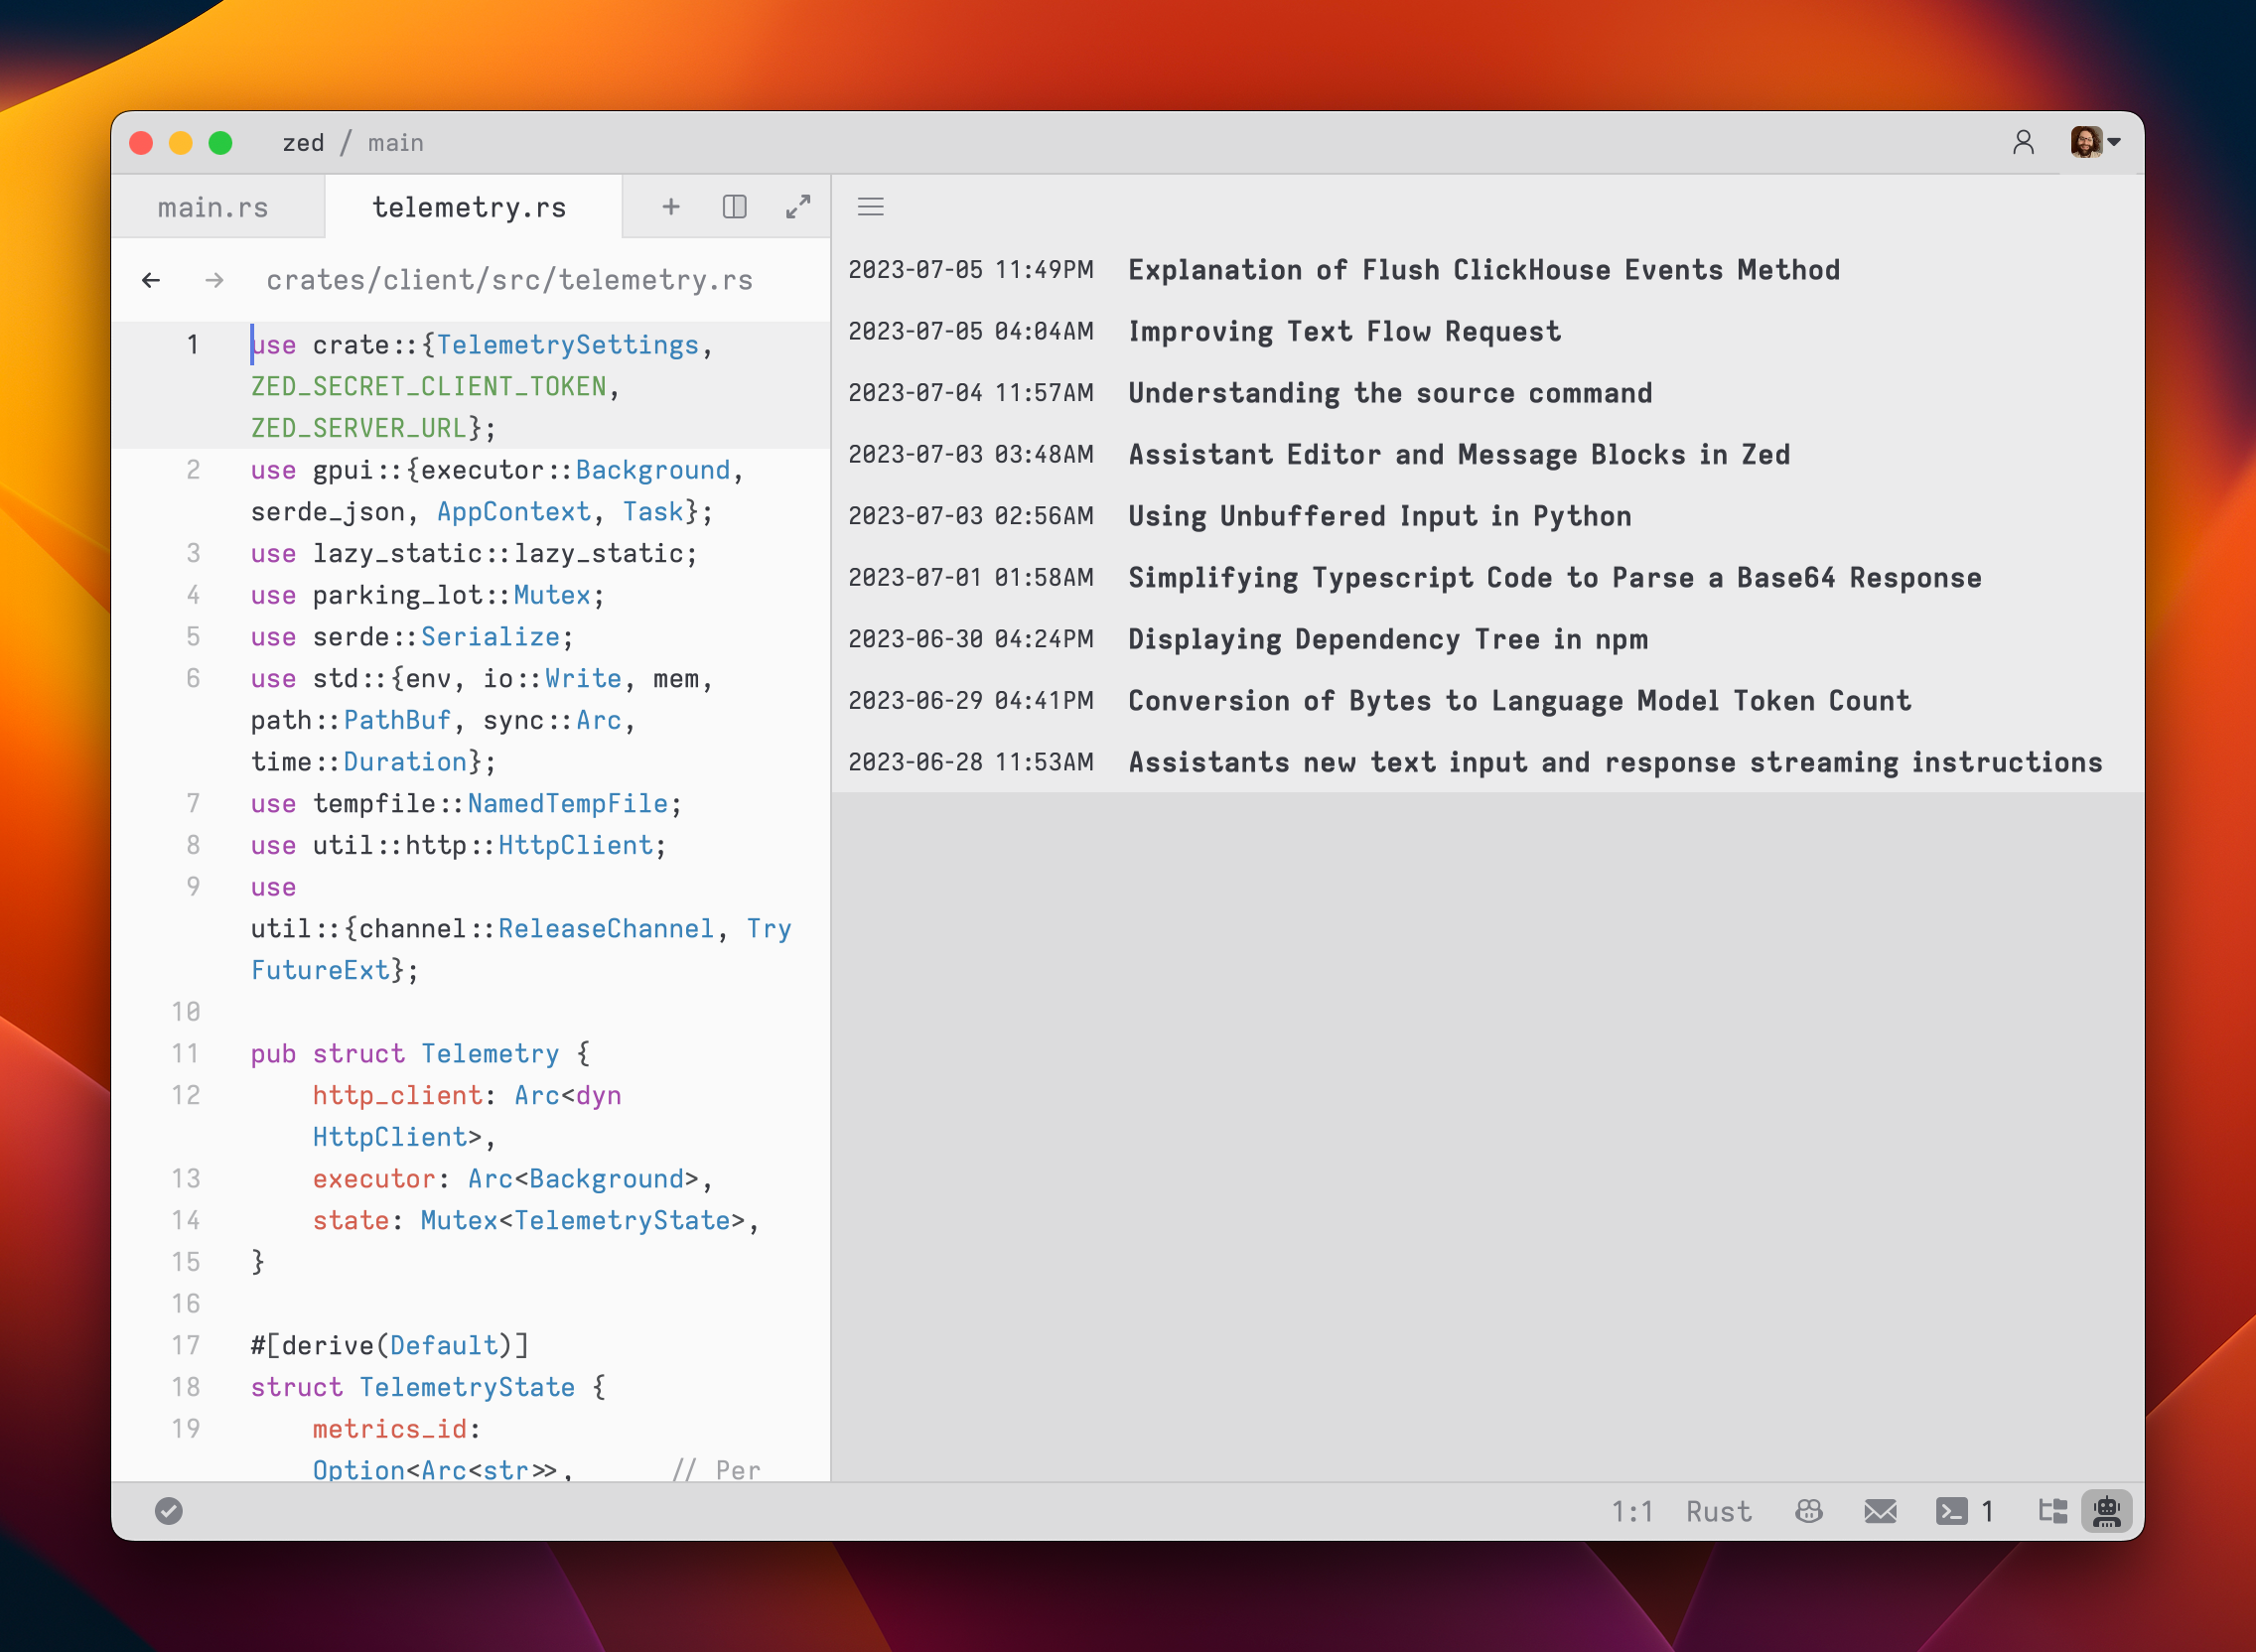
# Tools
Zed's Agent has access to a variety of tools that allow it to interact with your codebase and perform tasks.
## Read & Search Tools
### `diagnostics`
Gets errors and warnings for either a specific file or the entire project, useful after making edits to determine if further changes are needed.
### `fetch`
Fetches a URL and returns the content as Markdown. Useful for providing docs as context.
### `find_path`
Quickly finds files by matching glob patterns (like "\*_/_.js"), returning matching file paths alphabetically.
### `grep`
Searches file contents across the project using regular expressions, preferred for finding symbols in code without knowing exact file paths.
### `list_directory`
Lists files and directories in a given path, providing an overview of filesystem contents.
### `now`
Returns the current date and time.
### `open`
Opens a file or URL with the default application associated with it on the user's operating system.
### `read_file`
Reads the content of a specified file in the project, allowing access to file contents.
### `thinking`
Allows the Agent to work through problems, brainstorm ideas, or plan without executing actions, useful for complex problem-solving.
### `web_search`
Searches the web for information, providing results with snippets and links from relevant web pages, useful for accessing real-time information.
## Edit Tools
### `copy_path`
Copies a file or directory recursively in the project, more efficient than manually reading and writing files when duplicating content.
### `create_directory`
Creates a new directory at the specified path within the project, creating all necessary parent directories (similar to `mkdir -p`).
### `create_file`
Creates a new file at a specified path with given text content, the most efficient way to create new files or completely replace existing ones.
### `delete_path`
Deletes a file or directory (including contents recursively) at the specified path and confirms the deletion.
### `edit_file`
Edits files by replacing specific text with new content.
### `move_path`
Moves or renames a file or directory in the project, performing a rename if only the filename differs.
### `terminal`
Executes shell commands and returns the combined output, creating a new shell process for each invocation.
# Channels
At Zed we believe that great things are built by great people working together. We have designed Zed to help every individual work faster and to help teams of people work together more effectively.
## Overview
Channels provide a way to streamline collaborating for software engineers in many ways, but particularly:
- Pairing – when working on something together, you both have your own screen, mouse, and keyboard.
- Mentoring – it’s easy to jump in to someone else’s context, and help them get unstuck, without the friction of pushing code up.
- Refactoring – you can have multiple people join in on large refactoring without fear of conflict.
- Ambient awareness – you can see what everyone else is working on with no need for status emails or meetings.
## Channels
To open the collaboration panel hit {#kb collab_panel::ToggleFocus} or `collab panel: toggle focus`.
Each channel corresponds to an ongoing project or work-stream. You can see who’s in a channel as their avatars will show up in the sidebar. This makes it easy to see what everyone is doing and where to find them if needed.
You can create as many channels as you need. As in the example above, you can mix channels for your day job, as well as side-projects in one instance of Zed.
Joining a channel adds you to a shared room where you can work on projects together.
## Sharing projects
After joining a channel, you can `Share` a project with the other people there. This will enable them to edit the code hosted on your machine as though they had it checked out locally.
When you are editing someone else’s project, you still have the full power of the editor at your fingertips, you can jump to definitions, use the AI assistant, and see any diagnostic errors. This is extremely powerful for pairing, as one of you can be implementing the current method while the other is reading and researching the correct solution to the next problem. And, because you have your own config running, it feels like you’re using your own machine.
See [our collaboration documentation](./collaboration.md) for more details about how this works.
## Notes
Each channel has a notes file associated with it to keep track of current status, new ideas, or to collaborate on building out the design for the feature that you’re working on before diving into code.
This is similar to a Google Doc, except powered by Zed's collaborative software and persisted to our servers.
## Chat
The chat is also there for quickly sharing context without a microphone, getting questions answered, or however else you'd want to use a chat channel.
## Inviting people
By default, channels you create can only be accessed by you. You can invite collaborators by right clicking and selecting `Manage members`.
When you have channels nested under each other, permissions are inherited. For instance, in the example above, we only need to add people to the `#zed` channel, and they will automatically gain access to `#core-editor`, `#new-languages`, and `#stability`.
Once you have added someone, they can either join your channel by clicking on it in their Zed sidebar, or you can share the link to the channel so that they can join directly.
## Livestreaming & Guests
A Channel can also be made Public. This allows anyone to join the channel by clicking on the link.
Guest users in channels can hear and see everything that is happening, and have read only access to projects and channel notes. They can use the Chat as normal.
If you'd like to invite a guest to participate in a channel for the duration of a call you can do so by right clicking on them in the Collaboration Panel. "Allowing Write Access" will allow them to edit any projects shared into the call, and to use their microphone and share their screen if they wish.
# Collaboration
Only collaborate with people that you trust. Since sharing a project gives them access to your local file system, you should not share projects with people you do not trust; they could potentially do some nasty things.
In the future, we will do more to prevent this type of access beyond the shared project and add more control over what collaborators can do, but for now, only collaborate with people you trust.
## Adding a collaborator to a call
Before you can collaborate, you'll need to add a collaborator to your contacts. To do this:
1. Open the contacts menu by clicking on the `Show contacts menu` button in the upper right-hand corner of the window or by running `collab: toggle contacts menu` (`cmd-shift-c`).
2. Click the add button to the right of the search box.
3. Search for the contact you want to add using their GitHub handle. Note: the person you are trying to add as a contact must be an existing Zed user.
### Inviting a collaborator
You can add an existing Zed user as a contact from the contacts menu, deployed from the `Show contacts menu` button in the upper right-hand corner of the window or by `collab: toggle contacts menu` (`cmd-shift-c`) and then clicking the `Search for new contact` button to the right of the search box.
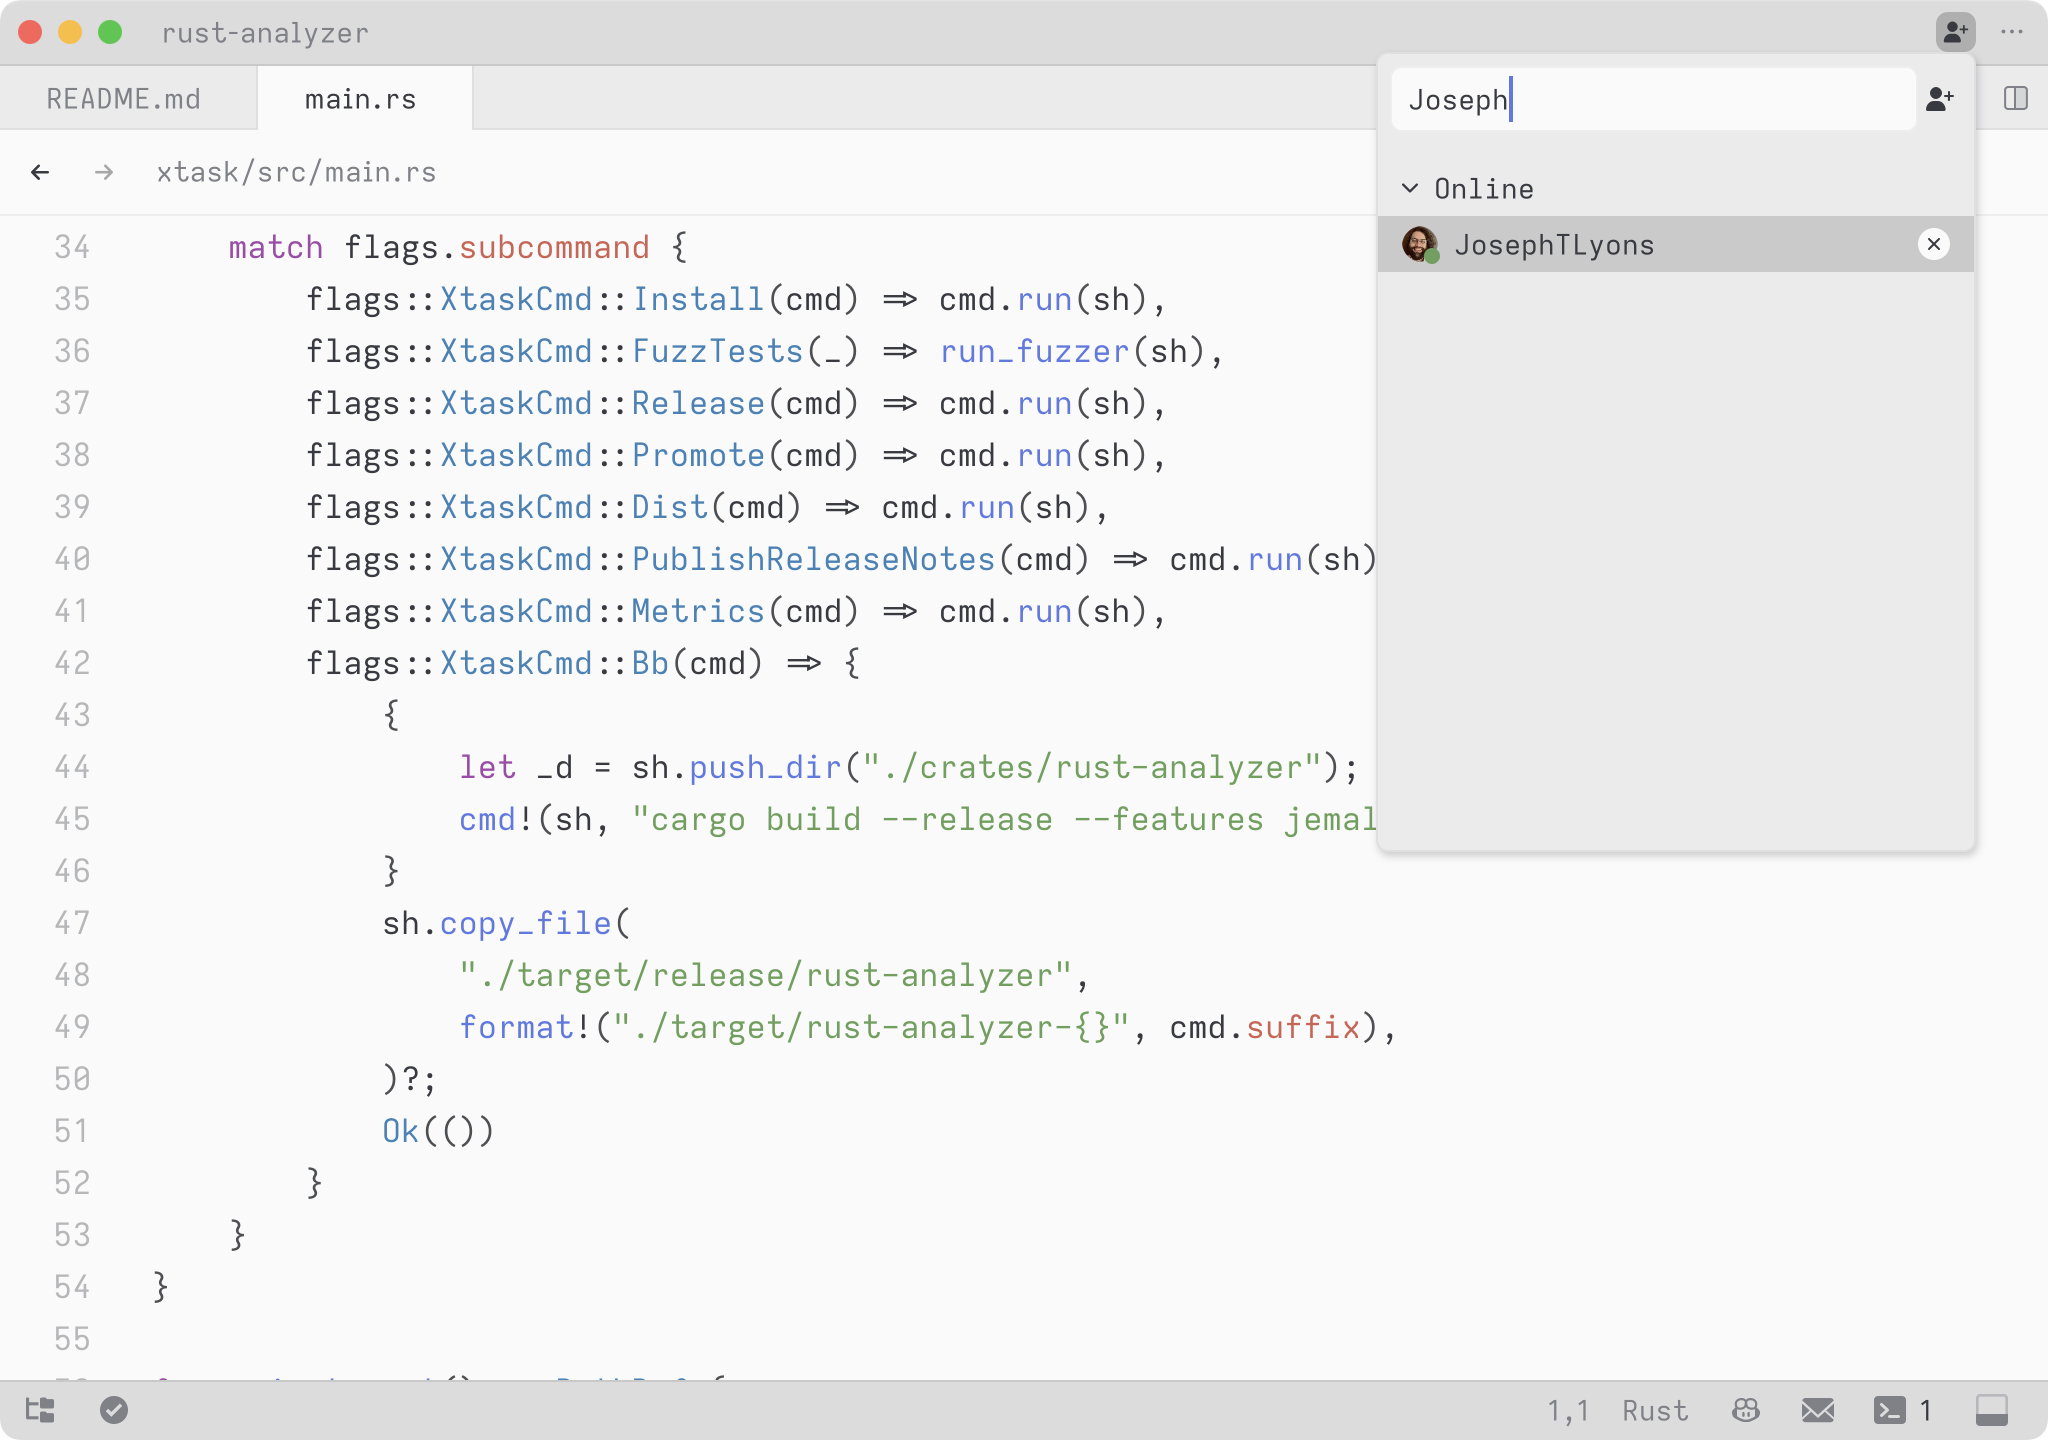
When you invite a collaborator to a project not in a call they will receive a notification to join, and a new call is created.
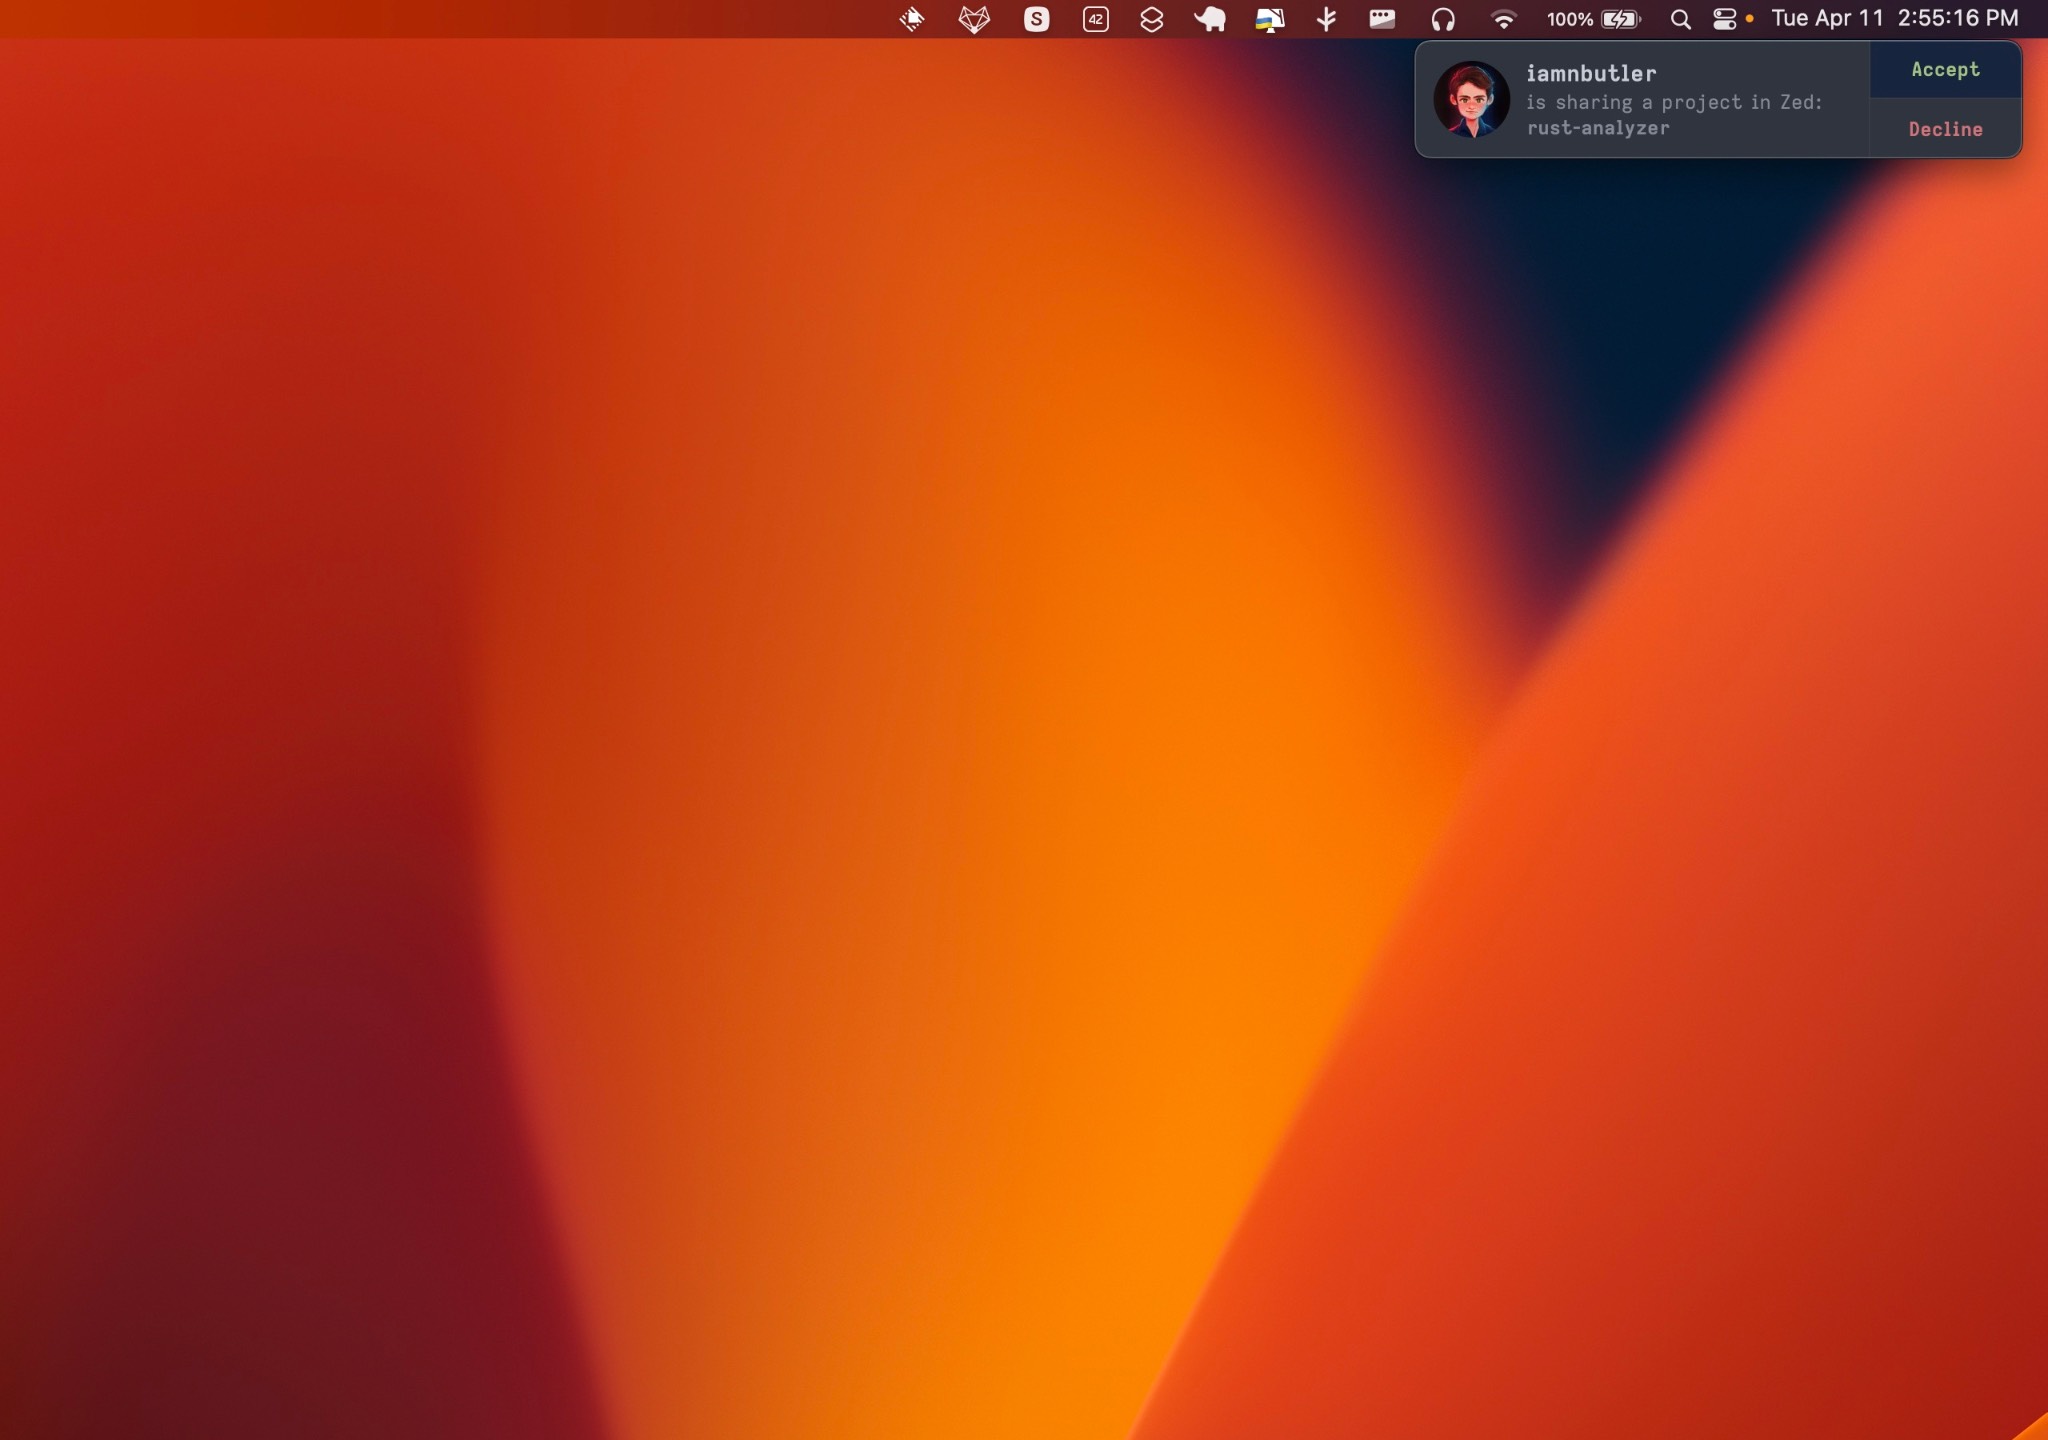
### Inviting non-Zed users
If someone you want to collaborate with has not yet signed up for Zed, they will need to [download the app](https://zed.dev/download) and sign in for the first time before you can add them. Identity is tied to GitHub accounts, so new users will need to authenticate with GitHub in order to sign into Zed.
### Voice chat
When joining a call, Zed will automatically share your microphone with other users in the call, if your OS allows it. This isn't tied to your project. You can disable this for your client via the [`mute_on_join`](./configuring-zed.md#calls) setting.
## Collaborating on a project
### Share a project
When you invite a collaborator to join your project, a new call begins. Your Zed windows will show the call participants in the title bar of the window.
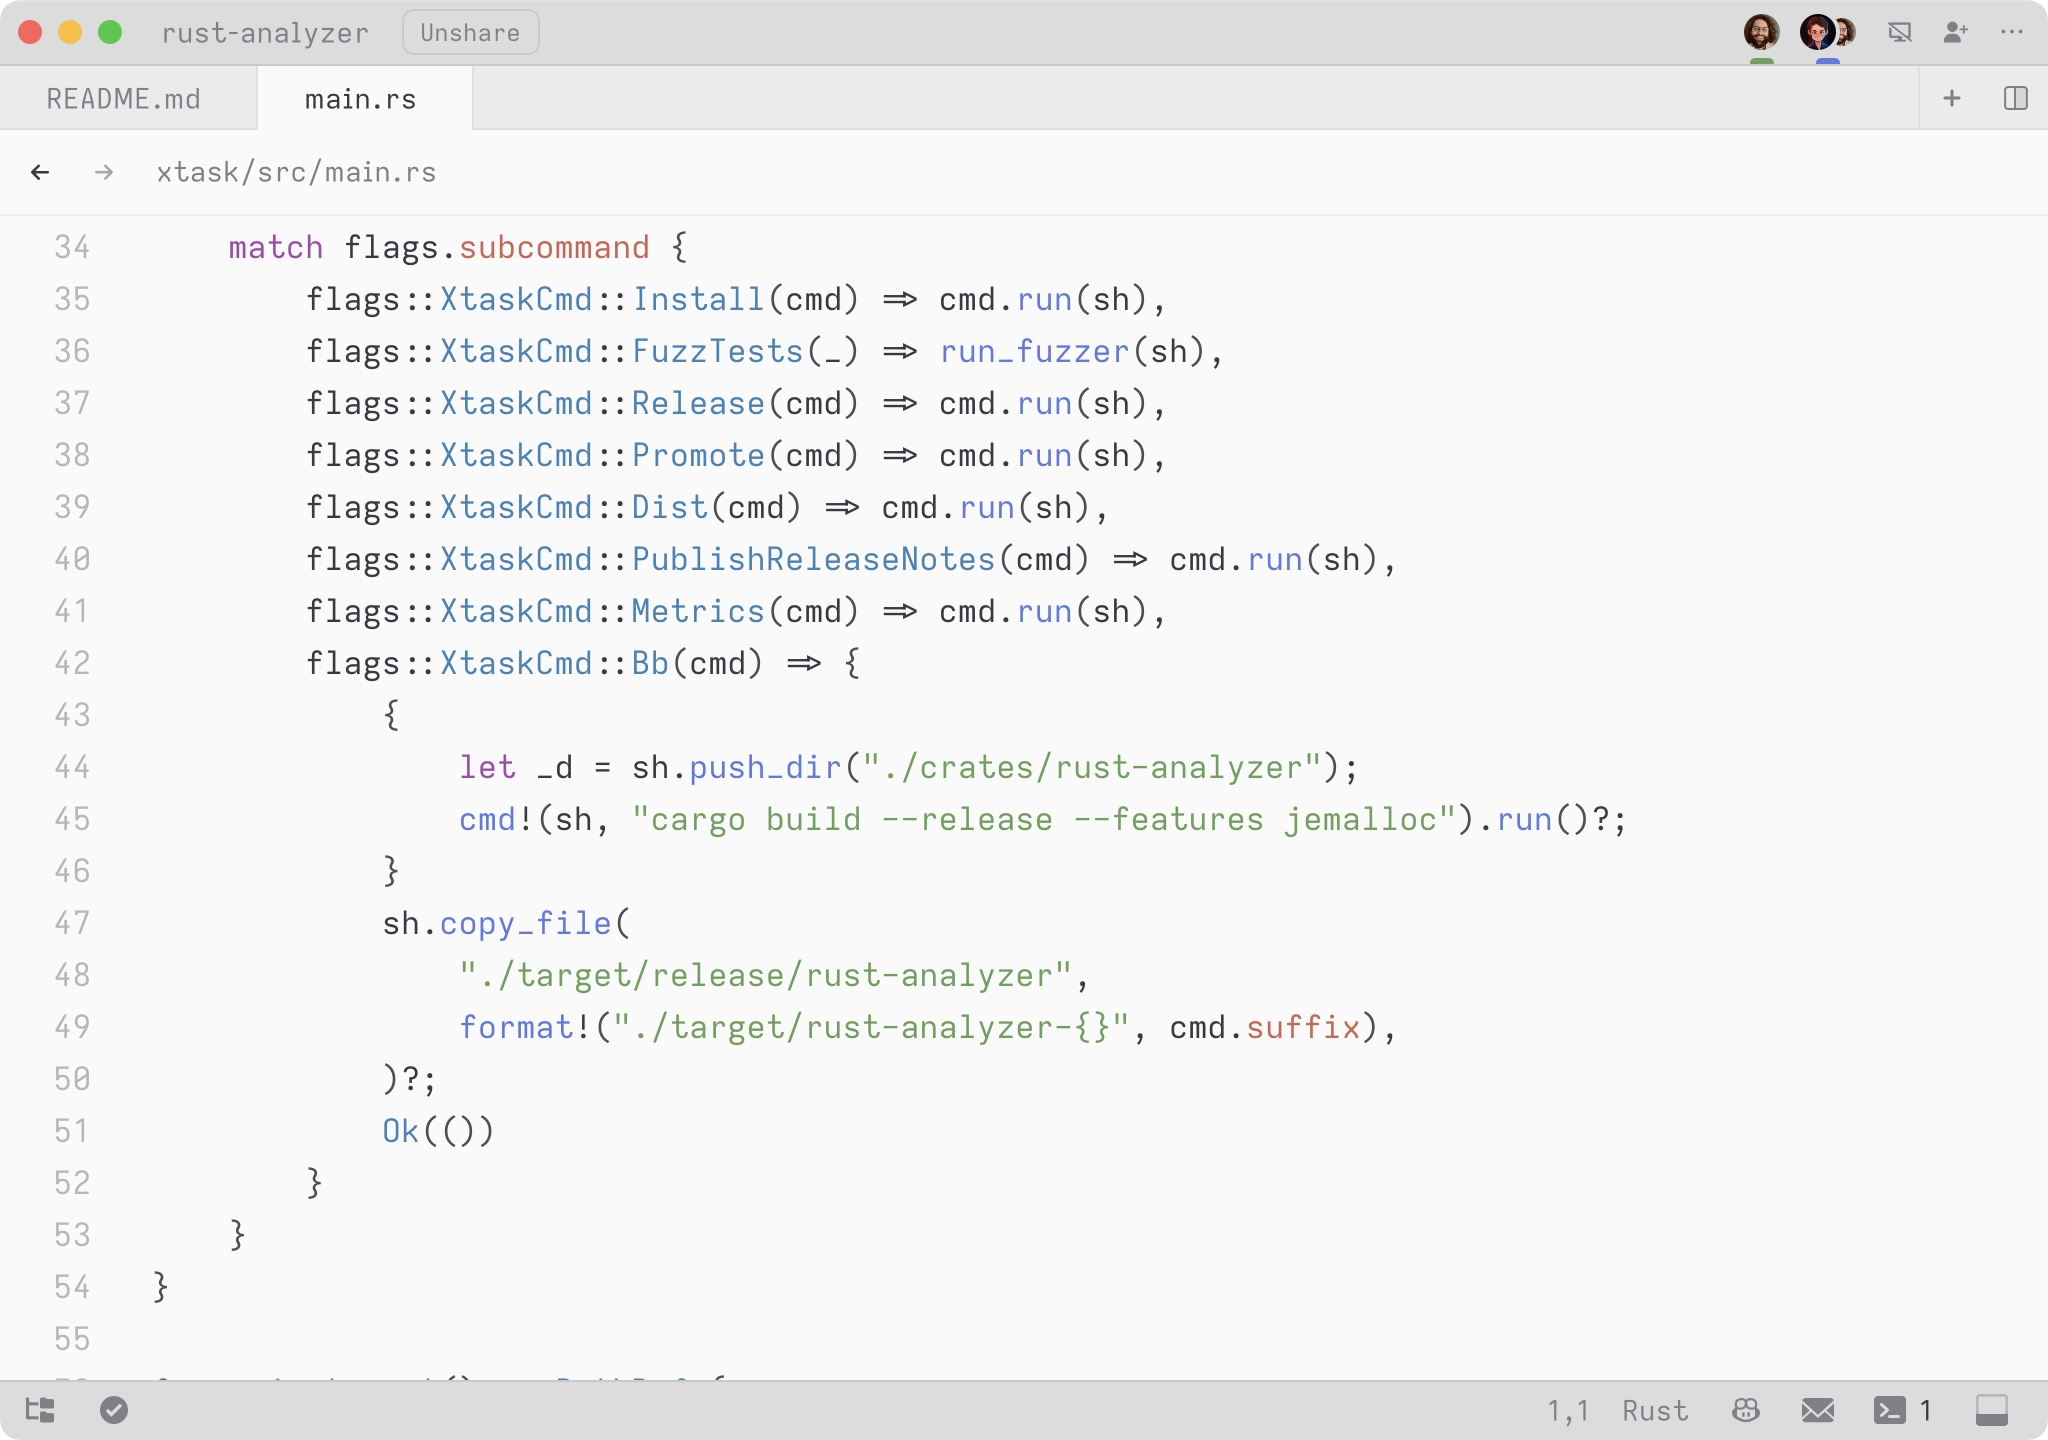
Collaborators in the same project as you are in color, and have a cursor color. Collaborators in other projects are shown in gray. Collaborators that have access to the current project will have their own cursor color under their avatar.
We aim to eliminate the distinction between local and remote projects as much as possible. Collaborators can open, edit, and save files, perform searches, interact with the language server, etc. Guests have a read-only view of the project, including access to language server info.
#### Unshared Projects
If a collaborator is currently in a project that is not shared, you will not be able to jump to their project or follow them until they either share the project or return to a project that is shared.
If you are in a project that isn't shared, others will not be able to join it or see its contents.
### Follow a collaborator
To follow a collaborator, click on their avatar in the top right of the window. You can also cycle through collaborators using `workspace: follow next collaborator` (`ctrl-alt-cmd-f`).
When you join a project, you'll immediately start following the collaborator that invited you.
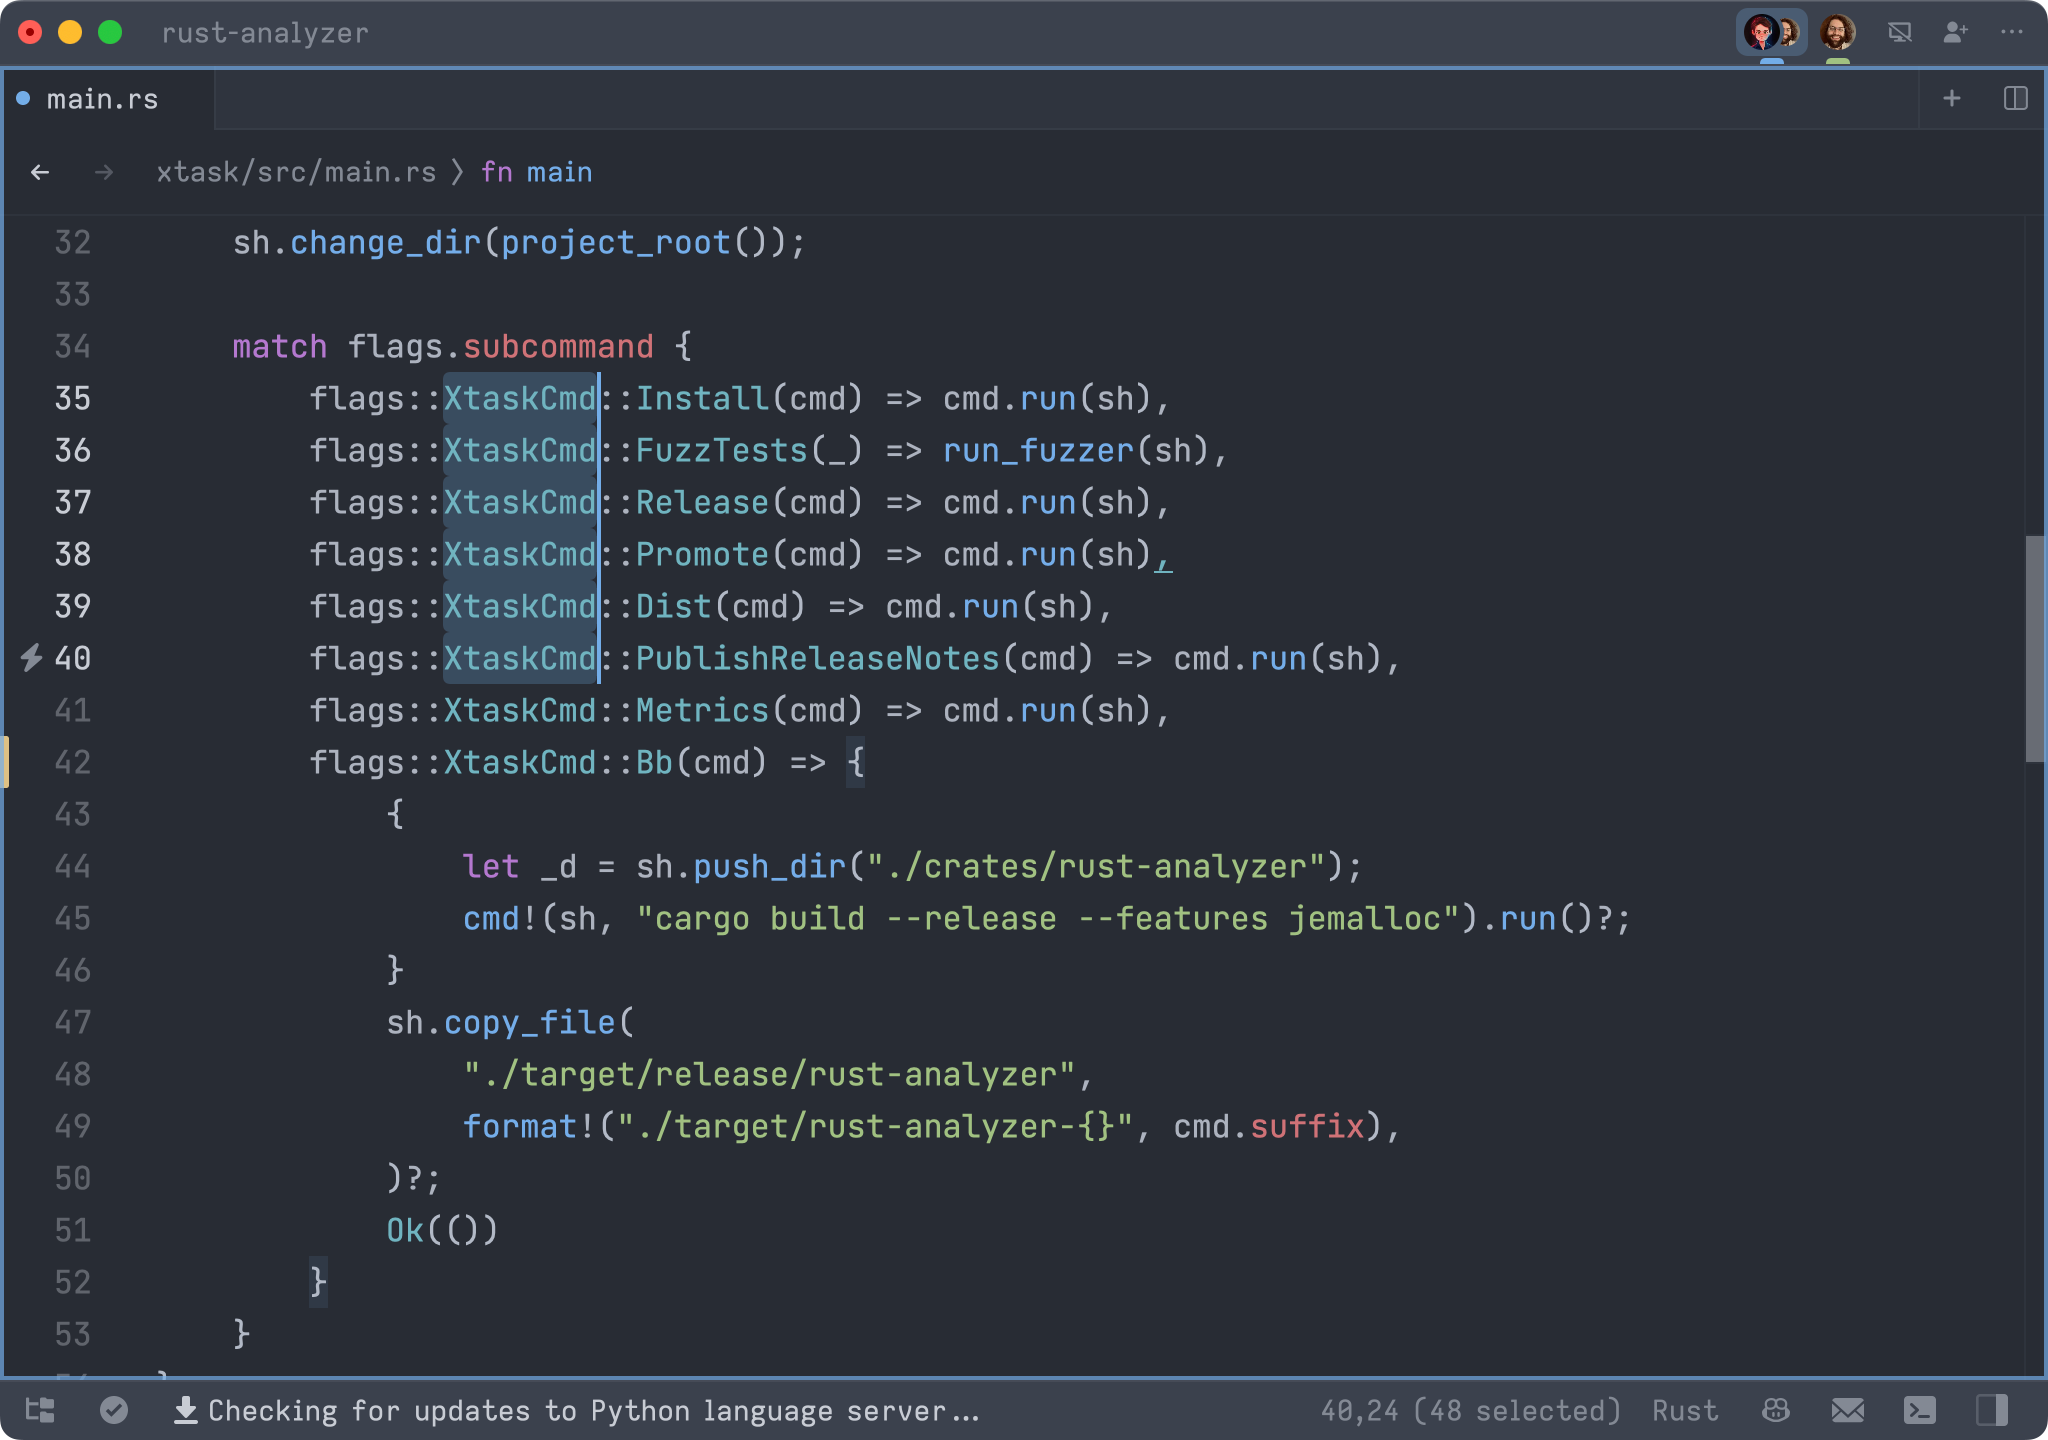
When you are in a pane that is following a collaborator, you will:
- follow their cursor and scroll position
- follow them to other files in the same project
- instantly swap to viewing their screen in that pane, if they are sharing their screen and leave the project
If you move your cursor or make an edit in that pane, you will stop following.
To start following again, you can click on a collaborator's avatar or cycle through following different participants by pressing `workspace: follow next collaborator` (`ctrl-alt-cmd-f`).
#### How following works
Following is confined to a particular pane. When a pane is following a collaborator, it is outlined in their cursor color.
This pane-specific behavior allows you to follow someone in one pane while navigating independently in another and can be an effective layout for some collaboration styles.
### Sharing your screen
Share your screen with collaborators in the current call by clicking on the `Share screen` button in the top right of the window.
Collaborators will see your screen if they are following you and you start viewing a window outside Zed or a project that is not shared.
Collaborators can see your entire screen when you are screen sharing, so be careful not to share anything you don't want to share. Remember to stop screen sharing when you are finished.
Call participants can open a dedicated tab for your screen share by opening the contacts menu in the top right and clicking on the `Screen` entry if you are sharing your screen.
### Adding a project
You can add a project to a call by clicking on the `Share` button next to the project name in the title bar.
### Removing a project
You can remove a project from a call by clicking on the `Unshare` button next to the project name in the title bar.
Collaborators that are currently in that project will be disconnected from the project and will not be able to rejoin it unless you share it again.
### Following a collaborator's terminal
You can follow what a collaborator is doing in their terminal by having them share their screen and following it.
In the future, we plan to allow you to collaborate in the terminal directly in a shared project.
### Leave call
You can leave a call by opening the contacts menu in the top right and clicking on the `Leave call` button.
# Completions
Zed supports two sources for completions:
1. "Code Completions" provided by Language Servers (LSPs) automatically installed by Zed or via [Zed Language Extensions](languages.md).
2. "Edit Predictions" provided by Zed's own Zeta model or by external providers like [GitHub Copilot](#github-copilot) or [Supermaven](#supermaven).
## Language Server Code Completions {#code-completions}
When there is an appropriate language server available, Zed will provide completions of variable names, functions, and other symbols in the current file. You can disable these by adding the following to your Zed `settings.json` file:
```json
"show_completions_on_input": false
```
You can manually trigger completions with `ctrl-space` or by triggering the `editor::ShowCompletions` action from the command palette.
For more information, see:
- [Configuring Supported Languages](./configuring-languages.md)
- [List of Zed Supported Languages](./languages.md)
## Edit Predictions {#edit-predictions}
Zed has built-in support for predicting multiple edits at a time [via Zeta](https://huggingface.co/zed-industries/zeta), Zed's open-source and open-data model.
Edit predictions appear as you type, and most of the time, you can accept them by pressing `tab`.
See the [edit predictions documentation](./ai/edit-prediction.md) for more information on how to setup and configure Zed's edit predictions.
# Configuring supported languages
Zed offers powerful customization options for each programming language it supports. This guide will walk you through the various ways you can tailor your coding experience to your preferences and project requirements.
Zed's language support is built on two main technologies:
1. Tree-sitter: This handles syntax highlighting and structure-based features like the outline panel.
2. Language Server Protocol (LSP): This provides semantic features such as code completion and diagnostics.
These components work together to provide Zed's language capabilities.
In this guide, we'll cover:
- Language-specific settings
- File associations
- Working with language servers
- Formatting and linting configuration
- Customizing syntax highlighting and themes
- Advanced language features
By the end of this guide, you should know how to configure and customize supported languages in Zed.
For a comprehensive list of languages supported by Zed and their specific configurations, see our [Supported Languages](./languages.md) page. To go further, you could explore developing your own extensions to add support for additional languages or enhance existing functionality. For more information on creating language extensions, see our [Language Extensions](./extensions/languages.md) guide.
## Language-specific Settings
Zed allows you to override global settings for individual languages. These custom configurations are defined in your `settings.json` file under the `languages` key.
Here's an example of language-specific settings:
```json
"languages": {
"Python": {
"tab_size": 4,
"formatter": "language_server",
"format_on_save": "on"
},
"JavaScript": {
"tab_size": 2,
"formatter": {
"external": {
"command": "prettier",
"arguments": ["--stdin-filepath", "{buffer_path}"]
}
}
}
}
```
You can customize a wide range of settings for each language, including:
- [`tab_size`](./configuring-zed.md#tab-size): The number of spaces for each indentation level
- [`formatter`](./configuring-zed.md#formatter): The tool used for code formatting
- [`format_on_save`](./configuring-zed.md#format-on-save): Whether to automatically format code when saving
- [`enable_language_server`](./configuring-zed.md#enable-language-server): Toggle language server support
- [`hard_tabs`](./configuring-zed.md#hard-tabs): Use tabs instead of spaces for indentation
- [`preferred_line_length`](./configuring-zed.md#preferred-line-length): The recommended maximum line length
- [`soft_wrap`](./configuring-zed.md#soft-wrap): How to wrap long lines of code
- [`show_completions_on_input`](./configuring-zed.md#show-completions-on-input): Whether or not to show completions as you type
- [`show_completion_documentation`](./configuring-zed.md#show-completion-documentation): Whether to display inline and alongside documentation for items in the completions menu
These settings allow you to maintain specific coding styles across different languages and projects.
## File Associations
Zed automatically detects file types based on their extensions, but you can customize these associations to fit your workflow.
To set up custom file associations, use the [`file_types`](./configuring-zed.md#file-types) setting in your `settings.json`:
```json
"file_types": {
"C++": ["c"],
"TOML": ["MyLockFile"],
"Dockerfile": ["Dockerfile*"]
}
```
This configuration tells Zed to:
- Treat `.c` files as C++ instead of C
- Recognize files named "MyLockFile" as TOML
- Apply Dockerfile syntax to any file starting with "Dockerfile"
You can use glob patterns for more flexible matching, allowing you to handle complex naming conventions in your projects.
## Working with Language Servers
Language servers are a crucial part of Zed's intelligent coding features, providing capabilities like auto-completion, go-to-definition, and real-time error checking.
### What are Language Servers?
Language servers implement the Language Server Protocol (LSP), which standardizes communication between the editor and language-specific tools. This allows Zed to support advanced features for multiple programming languages without implementing each feature separately.
Some key features provided by language servers include:
- Code completion
- Error checking and diagnostics
- Code navigation (go to definition, find references)
- Code actions (Rename, extract method)
- Hover information
- Workspace symbol search
### Managing Language Servers
Zed simplifies language server management for users:
1. Automatic Download: When you open a file with a matching file type, Zed automatically downloads the appropriate language server. Zed may prompt you to install an extension for known file types.
2. Storage Location:
- macOS: `~/Library/Application Support/Zed/languages`
- Linux: `$XDG_DATA_HOME/languages`, `$FLATPAK_XDG_DATA_HOME/languages`, or `$HOME/.local/share`
3. Automatic Updates: Zed keeps your language servers up-to-date, ensuring you always have the latest features and improvements.
### Choosing Language Servers
Some languages in Zed offer multiple language server options. You might have multiple extensions installed that bundle language servers targeting the same language, potentially leading to overlapping capabilities. To ensure you get the functionality you prefer, Zed allows you to prioritize which language servers are used and in what order.
You can specify your preference using the `language_servers` setting:
```json
"languages": {
"PHP": {
"language_servers": ["intelephense", "!phpactor", "..."]
}
}
```
In this example:
- `intelephense` is set as the primary language server
- `phpactor` is disabled (note the `!` prefix)
- `...` expands to the rest of the language servers that are registered for PHP
This configuration allows you to tailor the language server setup to your specific needs, ensuring that you get the most suitable functionality for your development workflow.
### Configuring Language Servers
Many language servers accept custom configuration options. You can set these in the `lsp` section of your `settings.json`:
```json
"lsp": {
"rust-analyzer": {
"initialization_options": {
"check": {
"command": "clippy"
}
}
}
}
```
This example configures the Rust Analyzer to use Clippy for additional linting when saving files.
#### Nested objects
When configuring language server options in Zed, it's important to use nested objects rather than dot-delimited strings. This is particularly relevant when working with more complex configurations. Let's look at a real-world example using the TypeScript language server:
Suppose you want to configure the following settings for TypeScript:
- Enable strict null checks
- Set the target ECMAScript version to ES2020
Here's how you would structure these settings in Zed's `settings.json`:
```json
"lsp": {
"typescript-language-server": {
"initialization_options": {
// These are not supported (VSCode dotted style):
// "preferences.strictNullChecks": true,
// "preferences.target": "ES2020"
//
// These is correct (nested notation):
"preferences": {
"strictNullChecks": true,
"target": "ES2020"
},
}
}
}
```
#### Possible configuration options
Depending on how a particular language server is implemented, they may depend on different configuration options, both specified in the LSP.
- [initializationOptions](https://microsoft.github.io/language-server-protocol/specifications/lsp/3.17/specification/#version_3_17_0)
Sent once during language server startup, requires server's restart to reapply changes.
For example, rust-analyzer and clangd rely on this way of configuring only.
```json
"lsp": {
"rust-analyzer": {
"initialization_options": {
"checkOnSave": false
}
}
}
```
- [Configuration Request](https://microsoft.github.io/language-server-protocol/specifications/lsp/3.17/specification/#workspace_configuration)
May be queried by the server multiple times.
Most of the servers would rely on this way of configuring only.
```json
"lsp": {
"tailwindcss-language-server": {
"settings": {
"tailwindCSS": {
"emmetCompletions": true,
},
}
}
}
```
Apart of the LSP-related server configuration options, certain servers in Zed allow configuring the way binary is launched by Zed.
Language servers are automatically downloaded or launched if found in your path, if you wish to specify an explicit alternate binary you can specify that in settings:
```json
"lsp": {
"rust-analyzer": {
"binary": {
// Whether to fetch the binary from the internet, or attempt to find locally.
"ignore_system_version": false,
"path": "/path/to/langserver/bin",
"arguments": ["--option", "value"],
"env": {
"FOO": "BAR"
}
}
}
}
```
### Enabling or Disabling Language Servers
You can toggle language server support globally or per-language:
```json
"languages": {
"Markdown": {
"enable_language_server": false
}
}
```
This disables the language server for Markdown files, which can be useful for performance in large documentation projects. You can configure this globally in your `~/.zed/settings.json` or inside a `.zed/settings.json` in your project directory.
## Formatting and Linting
Zed provides support for code formatting and linting to maintain consistent code style and catch potential issues early.
### Configuring Formatters
Zed supports both built-in and external formatters. See [`formatter`](./configuring-zed.md#formatter) docs for more. You can configure formatters globally or per-language in your `settings.json`:
```json
"languages": {
"JavaScript": {
"formatter": {
"external": {
"command": "prettier",
"arguments": ["--stdin-filepath", "{buffer_path}"]
}
},
"format_on_save": "on"
},
"Rust": {
"formatter": "language_server",
"format_on_save": "on"
}
}
```
This example uses Prettier for JavaScript and the language server's formatter for Rust, both set to format on save.
To disable formatting for a specific language:
```json
"languages": {
"Markdown": {
"format_on_save": "off"
}
}
```
### Setting Up Linters
Linting in Zed is typically handled by language servers. Many language servers allow you to configure linting rules:
```json
"lsp": {
"eslint": {
"settings": {
"codeActionOnSave": {
"rules": ["import/order"]
}
}
}
}
```
This configuration sets up ESLint to organize imports on save for JavaScript files.
To run linter fixes automatically on save:
```json
"languages": {
"JavaScript": {
"code_actions_on_format": {
"source.fixAll.eslint": true
}
}
}
```
### Integrating Formatting and Linting
Zed allows you to run both formatting and linting on save. Here's an example that uses Prettier for formatting and ESLint for linting JavaScript files:
```json
"languages": {
"JavaScript": {
"formatter": {
"external": {
"command": "prettier",
"arguments": ["--stdin-filepath", "{buffer_path}"]
}
},
"code_actions_on_format": {
"source.fixAll.eslint": true
},
"format_on_save": "on"
}
}
```
### Troubleshooting
If you encounter issues with formatting or linting:
1. Check Zed's log file for error messages (Use the command palette: `zed: open log`)
2. Ensure external tools (formatters, linters) are correctly installed and in your PATH
3. Verify configurations in both Zed settings and language-specific config files (e.g., `.eslintrc`, `.prettierrc`)
## Syntax Highlighting and Themes
Zed offers customization options for syntax highlighting and themes, allowing you to tailor the visual appearance of your code.
### Customizing Syntax Highlighting
Zed uses Tree-sitter grammars for syntax highlighting. Override the default highlighting using the `experimental.theme_overrides` setting.
This example makes comments italic and changes the color of strings:
```json
"experimental.theme_overrides": {
"syntax": {
"comment": {
"font_style": "italic"
},
"string": {
"color": "#00AA00"
}
}
}
```
### Selecting and Customizing Themes
Change your theme:
1. Use the theme selector ({#kb theme_selector::Toggle})
2. Or set it in your `settings.json`:
```json
"theme": {
"mode": "dark",
"dark": "One Dark",
"light": "GitHub Light"
}
```
Create custom themes by creating a JSON file in `~/.config/zed/themes/`. Zed will automatically detect and make available any themes in this directory.
### Using Theme Extensions
Zed supports theme extensions. Browse and install theme extensions from the Extensions panel ({#kb zed::Extensions}).
To create your own theme extension, refer to the [Developing Theme Extensions](./extensions/themes.md) guide.
## Using Language Server Features
### Inlay Hints
Inlay hints provide additional information inline in your code, such as parameter names or inferred types. Configure inlay hints in your `settings.json`:
```json
"inlay_hints": {
"enabled": true,
"show_type_hints": true,
"show_parameter_hints": true,
"show_other_hints": true
}
```
For language-specific inlay hint settings, refer to the documentation for each language.
### Code Actions
Code actions provide quick fixes and refactoring options. Access code actions using the `editor: Toggle Code Actions` command or by clicking the lightbulb icon that appears next to your cursor when actions are available.
### Go To Definition and References
Use these commands to navigate your codebase:
- `editor: Go to Definition` (f12|f12)
- `editor: Go to Type Definition` (cmd-f12|ctrl-f12)
- `editor: Find All References` (shift-f12|shift-f12)
### Rename Symbol
To rename a symbol across your project:
1. Place your cursor on the symbol
2. Use the `editor: Rename Symbol` command (f2|f2)
3. Enter the new name and press Enter
These features depend on the capabilities of the language server for each language.
When renaming a symbol that spans multiple files, Zed will open a preview in a multibuffer. This allows you to review all the changes across your project before applying them. To confirm the rename, simply save the multibuffer. If you decide not to proceed with the rename, you can undo the changes or close the multibuffer without saving.
### Hover Information
Use the `editor: Show Hover` command to display information about the symbol under the cursor. This often includes type information, documentation, and links to relevant resources.
### Workspace Symbol Search
The `workspace: Open Symbol` command allows you to search for symbols (functions, classes, variables) across your entire project. This is useful for quickly navigating large codebases.
### Code Completion
Zed provides intelligent code completion suggestions as you type. You can manually trigger completion with the `editor: Show Completions` command. Use tab|tab or enter|enter to accept suggestions.
### Diagnostics
Language servers provide real-time diagnostics (errors, warnings, hints) as you code. View all diagnostics for your project using the `diagnostics: Toggle` command.
# Configuring Zed
Zed is designed to be configured: we want to fit your workflow and preferences exactly. We provide default settings that are designed to be a comfortable starting point for as many people as possible, but we hope you will enjoy tweaking it to make it feel incredible.
In addition to the settings described here, you may also want to change your [theme](./themes.md), configure your [key bindings](./key-bindings.md), set up [tasks](./tasks.md) or install [extensions](https://github.com/zed-industries/extensions).
## Settings files
Your settings file can be opened with {#kb zed::OpenSettings}. By default it is located at `~/.config/zed/settings.json`, though if you have XDG_CONFIG_HOME in your environment on Linux it will be at `$XDG_CONFIG_HOME/zed/settings.json` instead.
This configuration is merged with any local configuration inside your projects. You can open the project settings by running {#action zed::OpenProjectSettings} from the command palette. This will create a `.zed` directory containing`.zed/settings.json`.
Although most projects will only need one settings file at the root, you can add more local settings files for subdirectories as needed. Not all settings can be set in local files, just those that impact the behavior of the editor and language tooling. For example you can set `tab_size`, `formatter` etc. but not `theme`, `vim_mode` and similar.
The syntax for configuration files is a super-set of JSON that allows `//` comments.
## Default settings
You can find the default settings for your current Zed by running {#action zed::OpenDefaultSettings} from the command palette.
Extensions that provide language servers may also provide default settings for those language servers.
# Settings
## Active Pane Modifiers
- Description: Styling settings applied to the active pane.
- Setting: `active_pane_modifiers`
- Default:
```json
{
"active_pane_modifiers": {
"border_size": 0.0,
"inactive_opacity": 1.0
}
}
```
### Border size
- Description: Size of the border surrounding the active pane. When set to 0, the active pane doesn't have any border. The border is drawn inset.
- Setting: `border_size`
- Default: `0.0`
**Options**
Non-negative `float` values
### Inactive Opacity
- Description: Opacity of inactive panels. When set to 1.0, the inactive panes have the same opacity as the active one. If set to 0, the inactive panes content will not be visible at all. Values are clamped to the [0.0, 1.0] range.
- Setting: `inactive_opacity`
- Default: `1.0`
**Options**
`float` values
## Bottom Dock Layout
- Description: Control the layout of the bottom dock, relative to the left and right docks
- Setting: `bottom_dock_layout`
- Default: `"contained"`
**Options**
1. Contain the bottom dock, giving the full height of the window to the left and right docks
```json
{
"bottom_dock_layout": "contained"
}
```
2. Give the bottom dock the full width of the window, truncating the left and right docks
```json
{
"bottom_dock_layout": "full"
}
```
3. Left align the bottom dock, truncating the left dock and giving the right dock the full height of the window
```json
{
"bottom_dock_layout": "left_aligned"
}
```
3. Right align the bottom dock, giving the left dock the full height of the window and truncating the right dock.
```json
{
"bottom_dock_layout": "right_aligned"
}
```
## Auto Install extensions
- Description: Define extensions to be autoinstalled or never be installed.
- Setting: `auto_install_extension`
- Default: `{ "html": true }`
**Options**
You can find the names of your currently installed extensions by listing the subfolders under the [extension installation location](./extensions/installing-extensions.md#installation-location):
On MacOS:
```sh
ls ~/Library/Application\ Support/Zed/extensions/installed/
```
On Linux:
```sh
ls ~/.local/share/zed/extensions/installed
```
Define extensions which should be installed (`true`) or never installed (`false`).
```json
{
"auto_install_extensions": {
"html": true,
"dockerfile": true,
"docker-compose": false
}
}
```
## Autosave
- Description: When to automatically save edited buffers.
- Setting: `autosave`
- Default: `off`
**Options**
1. To disable autosave, set it to `off`:
```json
{
"autosave": "off"
}
```
2. To autosave when focus changes, use `on_focus_change`:
```json
{
"autosave": "on_focus_change"
}
```
3. To autosave when the active window changes, use `on_window_change`:
```json
{
"autosave": "on_window_change"
}
```
4. To autosave after an inactivity period, use `after_delay`:
```json
{
"autosave": {
"after_delay": {
"milliseconds": 1000
}
}
}
```
## Restore on Startup
- Description: Controls session restoration on startup.
- Setting: `restore_on_startup`
- Default: `last_session`
**Options**
1. Restore all workspaces that were open when quitting Zed:
```json
{
"restore_on_startup": "last_session"
}
```
2. Restore the workspace that was closed last:
```json
{
"restore_on_startup": "last_workspace"
}
```
3. Always start with an empty editor:
```json
{
"restore_on_startup": "none"
}
```
## Autoscroll on Clicks
- Description: Whether to scroll when clicking near the edge of the visible text area.
- Setting: `autoscroll_on_clicks`
- Default: `false`
**Options**
`boolean` values
## Auto Update
- Description: Whether or not to automatically check for updates.
- Setting: `auto_update`
- Default: `true`
**Options**
`boolean` values
## Base Keymap
- Description: Base key bindings scheme. Base keymaps can be overridden with user keymaps.
- Setting: `base_keymap`
- Default: `VSCode`
**Options**
1. VSCode
```json
{
"base_keymap": "VSCode"
}
```
2. Atom
```json
{
"base_keymap": "Atom"
}
```
3. JetBrains
```json
{
"base_keymap": "JetBrains"
}
```
4. None
```json
{
"base_keymap": "None"
}
```
5. SublimeText
```json
{
"base_keymap": "SublimeText"
}
```
6. TextMate
```json
{
"base_keymap": "TextMate"
}
```
## Buffer Font Family
- Description: The name of a font to use for rendering text in the editor.
- Setting: `buffer_font_family`
- Default: `Zed Plex Mono`
**Options**
The name of any font family installed on the user's system
## Buffer Font Features
- Description: The OpenType features to enable for text in the editor.
- Setting: `buffer_font_features`
- Default: `null`
- Platform: macOS and Windows.
**Options**
Zed supports all OpenType features that can be enabled or disabled for a given buffer or terminal font, as well as setting values for font features.
For example, to disable font ligatures, add the following to your settings:
```json
{
"buffer_font_features": {
"calt": false
}
}
```
You can also set other OpenType features, like setting `cv01` to `7`:
```json
{
"buffer_font_features": {
"cv01": 7
}
}
```
## Buffer Font Fallbacks
- Description: Set the buffer text's font fallbacks, this will be merged with the platform's default fallbacks.
- Setting: `buffer_font_fallbacks`
- Default: `null`
- Platform: macOS and Windows.
**Options**
For example, to use `Nerd Font` as a fallback, add the following to your settings:
```json
{
"buffer_font_fallbacks": ["Nerd Font"]
}
```
## Buffer Font Size
- Description: The default font size for text in the editor.
- Setting: `buffer_font_size`
- Default: `15`
**Options**
`integer` values from `6` to `100` pixels (inclusive)
## Buffer Font Weight
- Description: The default font weight for text in the editor.
- Setting: `buffer_font_weight`
- Default: `400`
**Options**
`integer` values between `100` and `900`
## Buffer Line Height
- Description: The default line height for text in the editor.
- Setting: `buffer_line_height`
- Default: `"comfortable"`
**Options**
`"standard"`, `"comfortable"` or `{ "custom": float }` (`1` is compact, `2` is loose)
## Close on File Delete
- Description: Whether to automatically close editor tabs when their corresponding files are deleted from disk.
- Setting: `close_on_file_delete`
- Default: `false`
**Options**
`boolean` values
When enabled, this setting will automatically close tabs for files that have been deleted from the file system. This is particularly useful for workflows involving temporary or scratch files that are frequently created and deleted. When disabled (default), deleted files remain open with a strikethrough through their tab title.
Note: Dirty files (files with unsaved changes) will not be automatically closed even when this setting is enabled, ensuring you don't lose unsaved work.
## Confirm Quit
- Description: Whether or not to prompt the user to confirm before closing the application.
- Setting: `confirm_quit`
- Default: `false`
**Options**
`boolean` values
## Centered Layout
- Description: Configuration for the centered layout mode.
- Setting: `centered_layout`
- Default:
```json
"centered_layout": {
"left_padding": 0.2,
"right_padding": 0.2,
}
```
**Options**
The `left_padding` and `right_padding` options define the relative width of the
left and right padding of the central pane from the workspace when the centered layout mode is activated. Valid values range is from `0` to `0.4`.
## Direnv Integration
- Description: Settings for [direnv](https://direnv.net/) integration. Requires `direnv` to be installed.
`direnv` integration make it possible to use the environment variables set by a `direnv` configuration to detect some language servers in `$PATH` instead of installing them.
It also allows for those environment variables to be used in tasks.
- Setting: `load_direnv`
- Default: `"direct"`
**Options**
There are two options to choose from:
1. `shell_hook`: Use the shell hook to load direnv. This relies on direnv to activate upon entering the directory. Supports POSIX shells and fish.
2. `direct`: Use `direnv export json` to load direnv. This will load direnv directly without relying on the shell hook and might cause some inconsistencies. This allows direnv to work with any shell.
## Edit Predictions
- Description: Settings for edit predictions.
- Setting: `edit_predictions`
- Default:
```json
"edit_predictions": {
"disabled_globs": [
"**/.env*",
"**/*.pem",
"**/*.key",
"**/*.cert",
"**/*.crt",
"**/.dev.vars",
"**/secrets.yml"
]
}
```
**Options**
### Disabled Globs
- Description: A list of globs for which edit predictions should be disabled for. This list adds to a pre-existing, sensible default set of globs. Any additional ones you add are combined with them.
- Setting: `disabled_globs`
- Default: `["**/.env*", "**/*.pem", "**/*.key", "**/*.cert", "**/*.crt", "**/.dev.vars", "**/secrets.yml"]`
**Options**
List of `string` values.
## Edit Predictions Disabled in
- Description: A list of language scopes in which edit predictions should be disabled.
- Setting: `edit_predictions_disabled_in`
- Default: `[]`
**Options**
List of `string` values
1. Don't show edit predictions in comments:
```json
"disabled_in": ["comment"]
```
2. Don't show edit predictions in strings and comments:
```json
"disabled_in": ["comment", "string"]
```
3. Only in Go, don't show edit predictions in strings and comments:
```json
{
"languages": {
"Go": {
"edit_predictions_disabled_in": ["comment", "string"]
}
}
}
```
## Current Line Highlight
- Description: How to highlight the current line in the editor.
- Setting: `current_line_highlight`
- Default: `all`
**Options**
1. Don't highlight the current line:
```json
"current_line_highlight": "none"
```
2. Highlight the gutter area:
```json
"current_line_highlight": "gutter"
```
3. Highlight the editor area:
```json
"current_line_highlight": "line"
```
4. Highlight the full line:
```json
"current_line_highlight": "all"
```
## Selection Highlight
- Description: Whether to highlight all occurrences of the selected text in an editor.
- Setting: `selection_highlight`
- Default: `true`
## LSP Highlight Debounce
- Description: The debounce delay before querying highlights from the language server based on the current cursor location.
- Setting: `lsp_highlight_debounce`
- Default: `75`
## Cursor Blink
- Description: Whether or not the cursor blinks.
- Setting: `cursor_blink`
- Default: `true`
**Options**
`boolean` values
## Cursor Shape
- Description: Cursor shape for the default editor.
- Setting: `cursor_shape`
- Default: `bar`
**Options**
1. A vertical bar:
```json
"cursor_shape": "bar"
```
2. A block that surrounds the following character:
```json
"cursor_shape": "block"
```
3. An underline / underscore that runs along the following character:
```json
"cursor_shape": "underline"
```
4. An box drawn around the following character:
```json
"cursor_shape": "hollow"
```
## Hide Mouse
- Description: Determines when the mouse cursor should be hidden in an editor or input box.
- Setting: `hide_mouse`
- Default: `on_typing_and_movement`
**Options**
1. Never hide the mouse cursor:
```json
"hide_mouse": "never"
```
2. Hide only when typing:
```json
"hide_mouse": "on_typing"
```
3. Hide on both typing and cursor movement:
```json
"hide_mouse": "on_typing_and_movement"
```
## Snippet Sort Order
- Description: Determines how snippets are sorted relative to other completion items.
- Setting: `snippet_sort_order`
- Default: `inline`
**Options**
1. Place snippets at the top of the completion list:
```json
"snippet_sort_order": "top"
```
2. Place snippets normally without any preference:
```json
"snippet_sort_order": "inline"
```
3. Place snippets at the bottom of the completion list:
```json
"snippet_sort_order": "bottom"
```
4. Do not show snippets in the completion list at all:
```json
"snippet_sort_order": "none"
```
## Editor Scrollbar
- Description: Whether or not to show the editor scrollbar and various elements in it.
- Setting: `scrollbar`
- Default:
```json
"scrollbar": {
"show": "auto",
"cursors": true,
"git_diff": true,
"search_results": true,
"selected_text": true,
"selected_symbol": true,
"diagnostics": "all",
"axes": {
"horizontal": true,
"vertical": true,
},
},
```
### Show Mode
- Description: When to show the editor scrollbar.
- Setting: `show`
- Default: `auto`
**Options**
1. Show the scrollbar if there's important information or follow the system's configured behavior:
```json
"scrollbar": {
"show": "auto"
}
```
2. Match the system's configured behavior:
```json
"scrollbar": {
"show": "system"
}
```
3. Always show the scrollbar:
```json
"scrollbar": {
"show": "always"
}
```
4. Never show the scrollbar:
```json
"scrollbar": {
"show": "never"
}
```
### Cursor Indicators
- Description: Whether to show cursor positions in the scrollbar.
- Setting: `cursors`
- Default: `true`
**Options**
`boolean` values
### Git Diff Indicators
- Description: Whether to show git diff indicators in the scrollbar.
- Setting: `git_diff`
- Default: `true`
**Options**
`boolean` values
### Search Results Indicators
- Description: Whether to show buffer search results in the scrollbar.
- Setting: `search_results`
- Default: `true`
**Options**
`boolean` values
### Selected Text Indicators
- Description: Whether to show selected text occurrences in the scrollbar.
- Setting: `selected_text`
- Default: `true`
**Options**
`boolean` values
### Selected Symbols Indicators
- Description: Whether to show selected symbol occurrences in the scrollbar.
- Setting: `selected_symbol`
- Default: `true`
**Options**
`boolean` values
### Diagnostics
- Description: Which diagnostic indicators to show in the scrollbar.
- Setting: `diagnostics`
- Default: `all`
**Options**
1. Show all diagnostics:
```json
{
"diagnostics": "all"
}
```
2. Do not show any diagnostics:
```json
{
"diagnostics": "none"
}
```
3. Show only errors:
```json
{
"diagnostics": "error"
}
```
4. Show only errors and warnings:
```json
{
"diagnostics": "warning"
}
```
5. Show only errors, warnings, and information:
```json
{
"diagnostics": "information"
}
```
### Axes
- Description: Forcefully enable or disable the scrollbar for each axis
- Setting: `axes`
- Default:
```json
"scrollbar": {
"axes": {
"horizontal": true,
"vertical": true,
},
}
```
#### Horizontal
- Description: When false, forcefully disables the horizontal scrollbar. Otherwise, obey other settings.
- Setting: `horizontal`
- Default: `true`
**Options**
`boolean` values
#### Vertical
- Description: When false, forcefully disables the vertical scrollbar. Otherwise, obey other settings.
- Setting: `vertical`
- Default: `true`
**Options**
`boolean` values
## Minimap
- Description: Settings related to the editor's minimap, which provides an overview of your document.
- Setting: `minimap`
- Default:
```json
{
"minimap": {
"show": "never",
"thumb": "always",
"thumb_border": "left_open",
"current_line_highlight": null
}
}
```
### Show Mode
- Description: When to show the minimap in the editor.
- Setting: `show`
- Default: `never`
**Options**
1. Always show the minimap:
```json
{
"show": "always"
}
```
2. Show the minimap if the editor's scrollbars are visible:
```json
{
"show": "auto"
}
```
3. Never show the minimap:
```json
{
"show": "never"
}
```
### Thumb Display
- Description: When to show the minimap thumb (the visible editor area) in the minimap.
- Setting: `thumb`
- Default: `always`
**Options**
1. Show the minimap thumb when hovering over the minimap:
```json
{
"thumb": "hover"
}
```
2. Always show the minimap thumb:
```json
{
"thumb": "always"
}
```
### Thumb Border
- Description: How the minimap thumb border should look.
- Setting: `thumb_border`
- Default: `left_open`
**Options**
1. Display a border on all sides of the thumb:
```json
{
"thumb_border": "full"
}
```
2. Display a border on all sides except the left side:
```json
{
"thumb_border": "left_open"
}
```
3. Display a border on all sides except the right side:
```json
{
"thumb_border": "right_open"
}
```
4. Display a border only on the left side:
```json
{
"thumb_border": "left_only"
}
```
5. Display the thumb without any border:
```json
{
"thumb_border": "none"
}
```
### Current Line Highlight
- Description: How to highlight the current line in the minimap.
- Setting: `current_line_highlight`
- Default: `null`
**Options**
1. Inherit the editor's current line highlight setting:
```json
{
"minimap": {
"current_line_highlight": null
}
}
```
2. Highlight the current line in the minimap:
```json
{
"minimap": {
"current_line_highlight": "line"
}
}
```
or
```json
{
"minimap": {
"current_line_highlight": "all"
}
}
```
3. Do not highlight the current line in the minimap:
```json
{
"minimap": {
"current_line_highlight": "gutter"
}
}
```
or
```json
{
"minimap": {
"current_line_highlight": "none"
}
}
```
## Editor Tab Bar
- Description: Settings related to the editor's tab bar.
- Settings: `tab_bar`
- Default:
```json
"tab_bar": {
"show": true,
"show_nav_history_buttons": true,
"show_tab_bar_buttons": true
}
```
### Show
- Description: Whether or not to show the tab bar in the editor.
- Setting: `show`
- Default: `true`
**Options**
`boolean` values
### Navigation History Buttons
- Description: Whether or not to show the navigation history buttons.
- Setting: `show_nav_history_buttons`
- Default: `true`
**Options**
`boolean` values
### Tab Bar Buttons
- Description: Whether or not to show the tab bar buttons.
- Setting: `show_tab_bar_buttons`
- Default: `true`
**Options**
`boolean` values
## Editor Tabs
- Description: Configuration for the editor tabs.
- Setting: `tabs`
- Default:
```json
"tabs": {
"close_position": "right",
"file_icons": false,
"git_status": false,
"activate_on_close": "history",
"show_close_button": "hover",
"show_diagnostics": "off"
},
```
### Close Position
- Description: Where to display close button within a tab.
- Setting: `close_position`
- Default: `right`
**Options**
1. Display the close button on the right:
```json
{
"close_position": "right"
}
```
2. Display the close button on the left:
```json
{
"close_position": "left"
}
```
### File Icons
- Description: Whether to show the file icon for a tab.
- Setting: `file_icons`
- Default: `false`
### Git Status
- Description: Whether or not to show Git file status in tab.
- Setting: `git_status`
- Default: `false`
### Activate on close
- Description: What to do after closing the current tab.
- Setting: `activate_on_close`
- Default: `history`
**Options**
1. Activate the tab that was open previously:
```json
{
"activate_on_close": "history"
}
```
2. Activate the right neighbour tab if present:
```json
{
"activate_on_close": "neighbour"
}
```
3. Activate the left neighbour tab if present:
```json
{
"activate_on_close": "left_neighbour"
}
```
### Show close button
- Description: Controls the appearance behavior of the tab's close button.
- Setting: `show_close_button`
- Default: `hover`
**Options**
1. Show it just upon hovering the tab:
```json
{
"show_close_button": "hover"
}
```
2. Show it persistently:
```json
{
"show_close_button": "always"
}
```
3. Never show it, even if hovering it:
```json
{
"show_close_button": "hidden"
}
```
### Show Diagnostics
- Description: Whether to show diagnostics indicators in tabs. This setting only works when file icons are active and controls which files with diagnostic issues to mark.
- Setting: `show_diagnostics`
- Default: `off`
**Options**
1. Do not mark any files:
```json
{
"show_diagnostics": "off"
}
```
2. Only mark files with errors:
```json
{
"show_diagnostics": "errors"
}
```
3. Mark files with errors and warnings:
```json
{
"show_diagnostics": "all"
}
```
### Show Inline Code Actions
- Description: Whether to show code action button at start of buffer line.
- Setting: `inline_code_actions`
- Default: `true`
**Options**
`boolean` values
### Drag And Drop Selection
- Description: Whether to allow drag and drop text selection in buffer. `delay` is the milliseconds that must elapse before drag and drop is allowed. Otherwise, a new text selection is created.
- Setting: `drag_and_drop_selection`
- Default:
```json
"drag_and_drop_selection": {
"enabled": true,
"delay": 300
}
```
## Editor Toolbar
- Description: Whether or not to show various elements in the editor toolbar.
- Setting: `toolbar`
- Default:
```json
"toolbar": {
"breadcrumbs": true,
"quick_actions": true,
"selections_menu": true,
"agent_review": true,
"code_actions": false
},
```
**Options**
Each option controls displaying of a particular toolbar element. If all elements are hidden, the editor toolbar is not displayed.
## Enable Language Server
- Description: Whether or not to use language servers to provide code intelligence.
- Setting: `enable_language_server`
- Default: `true`
**Options**
`boolean` values
## Ensure Final Newline On Save
- Description: Removes any lines containing only whitespace at the end of the file and ensures just one newline at the end.
- Setting: `ensure_final_newline_on_save`
- Default: `true`
**Options**
`boolean` values
## LSP
- Description: Configuration for language servers.
- Setting: `lsp`
- Default: `null`
**Options**
The following settings can be overridden for specific language servers:
- `initialization_options`
- `settings`
To override configuration for a language server, add an entry for that language server's name to the `lsp` value.
Some options are passed via `initialization_options` to the language server. These are for options which must be specified at language server startup and when changed will require restarting the language server.
For example to pass the `check` option to `rust-analyzer`, use the following configuration:
```json
"lsp": {
"rust-analyzer": {
"initialization_options": {
"check": {
"command": "clippy" // rust-analyzer.check.command (default: "check")
}
}
}
}
```
While other options may be changed at a runtime and should be placed under `settings`:
```json
"lsp": {
"yaml-language-server": {
"settings": {
"yaml": {
"keyOrdering": true // Enforces alphabetical ordering of keys in maps
}
}
}
}
```
## LSP Highlight Debounce
- Description: The debounce delay in milliseconds before querying highlights from the language server based on the current cursor location.
- Setting: `lsp_highlight_debounce`
- Default: `75`
**Options**
`integer` values representing milliseconds
## Format On Save
- Description: Whether or not to perform a buffer format before saving.
- Setting: `format_on_save`
- Default: `on`
**Options**
1. `on`, enables format on save obeying `formatter` setting:
```json
{
"format_on_save": "on"
}
```
2. `off`, disables format on save:
```json
{
"format_on_save": "off"
}
```
## Formatter
- Description: How to perform a buffer format.
- Setting: `formatter`
- Default: `auto`
**Options**
1. To use the current language server, use `"language_server"`:
```json
{
"formatter": "language_server"
}
```
2. Or to use an external command, use `"external"`. Specify the name of the formatting program to run, and an array of arguments to pass to the program. The buffer's text will be passed to the program on stdin, and the formatted output should be written to stdout. For example, the following command would strip trailing spaces using [`sed(1)`](https://linux.die.net/man/1/sed):
```json
{
"formatter": {
"external": {
"command": "sed",
"arguments": ["-e", "s/ *$//"]
}
}
}
```
3. External formatters may optionally include a `{buffer_path}` placeholder which at runtime will include the path of the buffer being formatted. Formatters operate by receiving file content via standard input, reformatting it and then outputting it to standard output and so normally don't know the filename of what they are formatting. Tools like Prettier support receiving the file path via a command line argument which can then used to impact formatting decisions.
WARNING: `{buffer_path}` should not be used to direct your formatter to read from a filename. Your formatter should only read from standard input and should not read or write files directly.
```json
"formatter": {
"external": {
"command": "prettier",
"arguments": ["--stdin-filepath", "{buffer_path}"]
}
}
```
4. Or to use code actions provided by the connected language servers, use `"code_actions"`:
```json
{
"formatter": {
"code_actions": {
// Use ESLint's --fix:
"source.fixAll.eslint": true,
// Organize imports on save:
"source.organizeImports": true
}
}
}
```
5. Or to use multiple formatters consecutively, use an array of formatters:
```json
{
"formatter": [
{ "language_server": { "name": "rust-analyzer" } },
{
"external": {
"command": "sed",
"arguments": ["-e", "s/ *$//"]
}
}
]
}
```
Here `rust-analyzer` will be used first to format the code, followed by a call of sed.
If any of the formatters fails, the subsequent ones will still be executed.
## Code Actions On Format
- Description: The code actions to perform with the primary language server when formatting the buffer.
- Setting: `code_actions_on_format`
- Default: `{}`, except for Go it's `{ "source.organizeImports": true }`
**Examples**
1. Organize imports on format in TypeScript and TSX buffers:
```json
{
"languages": {
"TypeScript": {
"code_actions_on_format": {
"source.organizeImports": true
}
},
"TSX": {
"code_actions_on_format": {
"source.organizeImports": true
}
}
}
}
```
2. Run ESLint `fixAll` code action when formatting:
```json
{
"languages": {
"JavaScript": {
"code_actions_on_format": {
"source.fixAll.eslint": true
}
}
}
}
```
3. Run only a single ESLint rule when using `fixAll`:
```json
{
"languages": {
"JavaScript": {
"code_actions_on_format": {
"source.fixAll.eslint": true
}
}
},
"lsp": {
"eslint": {
"settings": {
"codeActionOnSave": {
"rules": ["import/order"]
}
}
}
}
}
```
## Auto close
- Description: Whether to automatically add matching closing characters when typing opening parenthesis, bracket, brace, single or double quote characters.
- Setting: `use_autoclose`
- Default: `true`
**Options**
`boolean` values
## Always Treat Brackets As Autoclosed
- Description: Controls how the editor handles the autoclosed characters.
- Setting: `always_treat_brackets_as_autoclosed`
- Default: `false`
**Options**
`boolean` values
**Example**
If the setting is set to `true`:
1. Enter in the editor: `)))`
2. Move the cursor to the start: `^)))`
3. Enter again: `)))`
The result is still `)))` and not `))))))`, which is what it would be by default.
## File Scan Exclusions
- Setting: `file_scan_exclusions`
- Description: Files or globs of files that will be excluded by Zed entirely. They will be skipped during file scans, file searches, and not be displayed in the project file tree. Overrides `file_scan_inclusions`.
- Default:
```json
"file_scan_exclusions": [
"**/.git",
"**/.svn",
"**/.hg",
"**/.jj",
"**/CVS",
"**/.DS_Store",
"**/Thumbs.db",
"**/.classpath",
"**/.settings"
],
```
Note, specifying `file_scan_exclusions` in settings.json will override the defaults (shown above). If you are looking to exclude additional items you will need to include all the default values in your settings.
## File Scan Inclusions
- Setting: `file_scan_inclusions`
- Description: Files or globs of files that will be included by Zed, even when ignored by git. This is useful for files that are not tracked by git, but are still important to your project. Note that globs that are overly broad can slow down Zed's file scanning. `file_scan_exclusions` takes precedence over these inclusions.
- Default:
```json
"file_scan_inclusions": [".env*"],
```
## File Types
- Setting: `file_types`
- Description: Configure how Zed selects a language for a file based on its filename or extension. Supports glob entries.
- Default:
```json
"file_types": {
"JSONC": ["**/.zed/**/*.json", "**/zed/**/*.json", "**/Zed/**/*.json", "**/.vscode/**/*.json"],
"Shell Script": [".env.*"]
}
```
**Examples**
To interpret all `.c` files as C++, files called `MyLockFile` as TOML and files starting with `Dockerfile` as Dockerfile:
```json
{
"file_types": {
"C++": ["c"],
"TOML": ["MyLockFile"],
"Dockerfile": ["Dockerfile*"]
}
}
```
## Diagnostics
- Description: Configuration for diagnostics-related features.
- Setting: `diagnostics`
- Default:
```json
{
"diagnostics": {
"include_warnings": true,
"inline": {
"enabled": false
},
"update_with_cursor": false,
"primary_only": false,
"use_rendered": false
}
}
```
### Inline Diagnostics
- Description: Whether or not to show diagnostics information inline.
- Setting: `inline`
- Default:
```json
{
"diagnostics": {
"inline": {
"enabled": false,
"update_debounce_ms": 150,
"padding": 4,
"min_column": 0,
"max_severity": null
}
}
}
```
**Options**
1. Enable inline diagnostics.
```json
{
"diagnostics": {
"inline": {
"enabled": true
}
}
}
```
2. Delay diagnostic updates until some time after the last diagnostic update.
```json
{
"diagnostics": {
"inline": {
"enabled": true,
"update_debounce_ms": 150
}
}
}
```
3. Set padding between the end of the source line and the start of the diagnostic.
```json
{
"diagnostics": {
"inline": {
"enabled": true,
"padding": 4
}
}
}
```
4. Horizontally align inline diagnostics at the given column.
```json
{
"diagnostics": {
"inline": {
"enabled": true,
"min_column": 80
}
}
}
```
5. Show only warning and error diagnostics.
```json
{
"diagnostics": {
"inline": {
"enabled": true,
"max_severity": "warning"
}
}
}
```
## Git
- Description: Configuration for git-related features.
- Setting: `git`
- Default:
```json
{
"git": {
"git_gutter": "tracked_files",
"inline_blame": {
"enabled": true
},
"hunk_style": "staged_hollow"
}
}
```
### Git Gutter
- Description: Whether or not to show the git gutter.
- Setting: `git_gutter`
- Default: `tracked_files`
**Options**
1. Show git gutter in tracked files
```json
{
"git": {
"git_gutter": "tracked_files"
}
}
```
2. Hide git gutter
```json
{
"git": {
"git_gutter": "hide"
}
}
```
### Gutter Debounce
- Description: Sets the debounce threshold (in milliseconds) after which changes are reflected in the git gutter.
- Setting: `gutter_debounce`
- Default: `null`
**Options**
`integer` values representing milliseconds
Example:
```json
{
"git": {
"gutter_debounce": 100
}
}
```
### Inline Git Blame
- Description: Whether or not to show git blame information inline, on the currently focused line.
- Setting: `inline_blame`
- Default:
```json
{
"git": {
"inline_blame": {
"enabled": true
}
}
}
```
**Options**
1. Disable inline git blame:
```json
{
"git": {
"inline_blame": {
"enabled": false
}
}
}
```
2. Only show inline git blame after a delay (that starts after cursor stops moving):
```json
{
"git": {
"inline_blame": {
"enabled": true,
"delay_ms": 500
}
}
}
```
3. Show a commit summary next to the commit date and author:
```json
{
"git": {
"inline_blame": {
"enabled": true,
"show_commit_summary": true
}
}
}
```
4. Use this as the minimum column at which to display inline blame information:
```json
{
"git": {
"inline_blame": {
"enabled": true,
"min_column": 80
}
}
}
```
### Hunk Style
- Description: What styling we should use for the diff hunks.
- Setting: `hunk_style`
- Default:
```json
{
"git": {
"hunk_style": "staged_hollow"
}
}
```
**Options**
1. Show the staged hunks faded out and with a border:
```json
{
"git": {
"hunk_style": "staged_hollow"
}
}
```
2. Show unstaged hunks faded out and with a border:
```json
{
"git": {
"hunk_style": "unstaged_hollow"
}
}
```
## Indent Guides
- Description: Configuration related to indent guides. Indent guides can be configured separately for each language.
- Setting: `indent_guides`
- Default:
```json
{
"indent_guides": {
"enabled": true,
"line_width": 1,
"active_line_width": 1,
"coloring": "fixed",
"background_coloring": "disabled"
}
}
```
**Options**
1. Disable indent guides
```json
{
"indent_guides": {
"enabled": false
}
}
```
2. Enable indent guides for a specific language.
```json
{
"languages": {
"Python": {
"indent_guides": {
"enabled": true
}
}
}
}
```
3. Enable indent aware coloring ("rainbow indentation").
The colors that are used for different indentation levels are defined in the theme (theme key: `accents`). They can be customized by using theme overrides.
```json
{
"indent_guides": {
"enabled": true,
"coloring": "indent_aware"
}
}
```
4. Enable indent aware background coloring ("rainbow indentation").
The colors that are used for different indentation levels are defined in the theme (theme key: `accents`). They can be customized by using theme overrides.
```json
{
"indent_guides": {
"enabled": true,
"coloring": "indent_aware",
"background_coloring": "indent_aware"
}
}
```
## Hard Tabs
- Description: Whether to indent lines using tab characters or multiple spaces.
- Setting: `hard_tabs`
- Default: `false`
**Options**
`boolean` values
## Multi Cursor Modifier
- Description: Determines the modifier to be used to add multiple cursors with the mouse. The open hover link mouse gestures will adapt such that it do not conflict with the multicursor modifier.
- Setting: `multi_cursor_modifier`
- Default: `alt`
**Options**
1. Maps to `Alt` on Linux and Windows and to `Option` on MacOS:
```json
{
"multi_cursor_modifier": "alt"
}
```
2. Maps `Control` on Linux and Windows and to `Command` on MacOS:
```json
{
"multi_cursor_modifier": "cmd_or_ctrl" // alias: "cmd", "ctrl"
}
```
## Hover Popover Enabled
- Description: Whether or not to show the informational hover box when moving the mouse over symbols in the editor.
- Setting: `hover_popover_enabled`
- Default: `true`
**Options**
`boolean` values
## Hover Popover Delay
- Description: Time to wait in milliseconds before showing the informational hover box.
- Setting: `hover_popover_delay`
- Default: `300`
**Options**
`integer` values representing milliseconds
## Icon Theme
- Description: The icon theme setting can be specified in two forms - either as the name of an icon theme or as an object containing the `mode`, `dark`, and `light` icon themes for files/folders inside Zed.
- Setting: `icon_theme`
- Default: `Zed (Default)`
### Icon Theme Object
- Description: Specify the icon theme using an object that includes the `mode`, `dark`, and `light`.
- Setting: `icon_theme`
- Default:
```json
"icon_theme": {
"mode": "system",
"dark": "Zed (Default)",
"light": "Zed (Default)"
},
```
### Mode
- Description: Specify the icon theme mode.
- Setting: `mode`
- Default: `system`
**Options**
1. Set the icon theme to dark mode
```json
{
"mode": "dark"
}
```
2. Set the icon theme to light mode
```json
{
"mode": "light"
}
```
3. Set the icon theme to system mode
```json
{
"mode": "system"
}
```
### Dark
- Description: The name of the dark icon theme.
- Setting: `dark`
- Default: `Zed (Default)`
**Options**
Run the `icon theme selector: toggle` action in the command palette to see a current list of valid icon themes names.
### Light
- Description: The name of the light icon theme.
- Setting: `light`
- Default: `Zed (Default)`
**Options**
Run the `icon theme selector: toggle` action in the command palette to see a current list of valid icon themes names.
## Inlay hints
- Description: Configuration for displaying extra text with hints in the editor.
- Setting: `inlay_hints`
- Default:
```json
"inlay_hints": {
"enabled": false,
"show_type_hints": true,
"show_parameter_hints": true,
"show_other_hints": true,
"show_background": false,
"edit_debounce_ms": 700,
"scroll_debounce_ms": 50,
"toggle_on_modifiers_press": null
}
```
**Options**
Inlay hints querying consists of two parts: editor (client) and LSP server.
With the inlay settings above are changed to enable the hints, editor will start to query certain types of hints and react on LSP hint refresh request from the server.
At this point, the server may or may not return hints depending on its implementation, further configuration might be needed, refer to the corresponding LSP server documentation.
The following languages have inlay hints preconfigured by Zed:
- [Go](https://docs.zed.dev/languages/go)
- [Rust](https://docs.zed.dev/languages/rust)
- [Svelte](https://docs.zed.dev/languages/svelte)
- [Typescript](https://docs.zed.dev/languages/typescript)
Use the `lsp` section for the server configuration. Examples are provided in the corresponding language documentation.
Hints are not instantly queried in Zed, two kinds of debounces are used, either may be set to 0 to be disabled.
Settings-related hint updates are not debounced.
All possible config values for `toggle_on_modifiers_press` are:
```json
"inlay_hints": {
"toggle_on_modifiers_press": {
"control": true,
"shift": true,
"alt": true,
"platform": true,
"function": true
}
}
```
Unspecified values have a `false` value, hints won't be toggled if all the modifiers are `false` or not all the modifiers are pressed.
## Journal
- Description: Configuration for the journal.
- Setting: `journal`
- Default:
```json
"journal": {
"path": "~",
"hour_format": "hour12"
}
```
### Path
- Description: The path of the directory where journal entries are stored.
- Setting: `path`
- Default: `~`
**Options**
`string` values
### Hour Format
- Description: The format to use for displaying hours in the journal.
- Setting: `hour_format`
- Default: `hour12`
**Options**
1. 12-hour format:
```json
{
"hour_format": "hour12"
}
```
2. 24-hour format:
```json
{
"hour_format": "hour24"
}
```
## Languages
- Description: Configuration for specific languages.
- Setting: `languages`
- Default: `null`
**Options**
To override settings for a language, add an entry for that languages name to the `languages` value. Example:
```json
"languages": {
"C": {
"format_on_save": "off",
"preferred_line_length": 64,
"soft_wrap": "preferred_line_length"
},
"JSON": {
"tab_size": 4
}
}
```
The following settings can be overridden for each specific language:
- [`enable_language_server`](#enable-language-server)
- [`ensure_final_newline_on_save`](#ensure-final-newline-on-save)
- [`format_on_save`](#format-on-save)
- [`formatter`](#formatter)
- [`hard_tabs`](#hard-tabs)
- [`preferred_line_length`](#preferred-line-length)
- [`remove_trailing_whitespace_on_save`](#remove-trailing-whitespace-on-save)
- [`show_edit_predictions`](#show-edit-predictions)
- [`show_whitespaces`](#show-whitespaces)
- [`soft_wrap`](#soft-wrap)
- [`tab_size`](#tab-size)
- [`use_autoclose`](#use-autoclose)
- [`always_treat_brackets_as_autoclosed`](#always-treat-brackets-as-autoclosed)
These values take in the same options as the root-level settings with the same name.
## Network Proxy
- Description: Configure a network proxy for Zed.
- Setting: `proxy`
- Default: `null`
**Options**
The proxy setting must contain a URL to the proxy.
The following URI schemes are supported:
- `http`
- `https`
- `socks4` - SOCKS4 proxy with local DNS
- `socks4a` - SOCKS4 proxy with remote DNS
- `socks5` - SOCKS5 proxy with local DNS
- `socks5h` - SOCKS5 proxy with remote DNS
`http` will be used when no scheme is specified.
By default no proxy will be used, or Zed will attempt to retrieve proxy settings from environment variables, such as `http_proxy`, `HTTP_PROXY`, `https_proxy`, `HTTPS_PROXY`, `all_proxy`, `ALL_PROXY`, `no_proxy` and `NO_PROXY`.
For example, to set an `http` proxy, add the following to your settings:
```json
{
"proxy": "http://127.0.0.1:10809"
}
```
Or to set a `socks5` proxy:
```json
{
"proxy": "socks5h://localhost:10808"
}
```
If you wish to exclude certain hosts from using the proxy, set the `NO_PROXY` environment variable. This accepts a comma-separated list of hostnames, host suffixes, IPv4/IPv6 addresses or blocks that should not use the proxy. For example if your environment included `NO_PROXY="google.com, 192.168.1.0/24"` all hosts in `192.168.1.*`, `google.com` and `*.google.com` would bypass the proxy. See [reqwest NoProxy docs](https://docs.rs/reqwest/latest/reqwest/struct.NoProxy.html#method.from_string) for more.
## Preview tabs
- Description:
Preview tabs allow you to open files in preview mode, where they close automatically when you switch to another file unless you explicitly pin them. This is useful for quickly viewing files without cluttering your workspace. Preview tabs display their file names in italics. \
There are several ways to convert a preview tab into a regular tab:
- Double-clicking on the file
- Double-clicking on the tab header
- Using the `project_panel::OpenPermanent` action
- Editing the file
- Dragging the file to a different pane
- Setting: `preview_tabs`
- Default:
```json
"preview_tabs": {
"enabled": true,
"enable_preview_from_file_finder": false,
"enable_preview_from_code_navigation": false,
}
```
### Enable preview from file finder
- Description: Determines whether to open files in preview mode when selected from the file finder.
- Setting: `enable_preview_from_file_finder`
- Default: `false`
**Options**
`boolean` values
### Enable preview from code navigation
- Description: Determines whether a preview tab gets replaced when code navigation is used to navigate away from the tab.
- Setting: `enable_preview_from_code_navigation`
- Default: `false`
**Options**
`boolean` values
## File Finder
### File Icons
- Description: Whether to show file icons in the file finder.
- Setting: `file_icons`
- Default: `true`
### Modal Max Width
- Description: Max-width of the file finder modal. It can take one of these values: `small`, `medium`, `large`, `xlarge`, and `full`.
- Setting: `modal_max_width`
- Default: `small`
### Skip Focus For Active In Search
- Description: Determines whether the file finder should skip focus for the active file in search results.
- Setting: `skip_focus_for_active_in_search`
- Default: `true`
## Preferred Line Length
- Description: The column at which to soft-wrap lines, for buffers where soft-wrap is enabled.
- Setting: `preferred_line_length`
- Default: `80`
**Options**
`integer` values
## Projects Online By Default
- Description: Whether or not to show the online projects view by default.
- Setting: `projects_online_by_default`
- Default: `true`
**Options**
`boolean` values
## Remove Trailing Whitespace On Save
- Description: Whether or not to remove any trailing whitespace from lines of a buffer before saving it.
- Setting: `remove_trailing_whitespace_on_save`
- Default: `true`
**Options**
`boolean` values
## Search
- Description: Search options to enable by default when opening new project and buffer searches.
- Setting: `search`
- Default:
```json
"search": {
"whole_word": false,
"case_sensitive": false,
"include_ignored": false,
"regex": false
},
```
## Seed Search Query From Cursor
- Description: When to populate a new search's query based on the text under the cursor.
- Setting: `seed_search_query_from_cursor`
- Default: `always`
**Options**
1. `always` always populate the search query with the word under the cursor
2. `selection` only populate the search query when there is text selected
3. `never` never populate the search query
## Use Smartcase Search
- Description: When enabled, automatically adjusts search case sensitivity based on your query. If your search query contains any uppercase letters, the search becomes case-sensitive; if it contains only lowercase letters, the search becomes case-insensitive. \
This applies to both in-file searches and project-wide searches.
- Setting: `use_smartcase_search`
- Default: `false`
**Options**
`boolean` values
Examples:
- Searching for "function" would match "function", "Function", "FUNCTION", etc.
- Searching for "Function" would only match "Function", not "function" or "FUNCTION"
## Show Call Status Icon
- Description: Whether or not to show the call status icon in the status bar.
- Setting: `show_call_status_icon`
- Default: `true`
**Options**
`boolean` values
## Completions
- Description: Controls how completions are processed for this language.
- Setting: `completions`
- Default:
```json
{
"completions": {
"words": "fallback",
"lsp": true,
"lsp_fetch_timeout_ms": 0,
"lsp_insert_mode": "replace_suffix"
}
}
```
### Words
- Description: Controls how words are completed. For large documents, not all words may be fetched for completion.
- Setting: `words`
- Default: `fallback`
**Options**
1. `enabled` - Always fetch document's words for completions along with LSP completions
2. `fallback` - Only if LSP response errors or times out, use document's words to show completions
3. `disabled` - Never fetch or complete document's words for completions (word-based completions can still be queried via a separate action)
### LSP
- Description: Whether to fetch LSP completions or not.
- Setting: `lsp`
- Default: `true`
**Options**
`boolean` values
### LSP Fetch Timeout (ms)
- Description: When fetching LSP completions, determines how long to wait for a response of a particular server. When set to 0, waits indefinitely.
- Setting: `lsp_fetch_timeout_ms`
- Default: `0`
**Options**
`integer` values representing milliseconds
### LSP Insert Mode
- Description: Controls what range to replace when accepting LSP completions.
- Setting: `lsp_insert_mode`
- Default: `replace_suffix`
**Options**
1. `insert` - Replaces text before the cursor, using the `insert` range described in the LSP specification
2. `replace` - Replaces text before and after the cursor, using the `replace` range described in the LSP specification
3. `replace_subsequence` - Behaves like `"replace"` if the text that would be replaced is a subsequence of the completion text, and like `"insert"` otherwise
4. `replace_suffix` - Behaves like `"replace"` if the text after the cursor is a suffix of the completion, and like `"insert"` otherwise
## Show Completions On Input
- Description: Whether or not to show completions as you type.
- Setting: `show_completions_on_input`
- Default: `true`
**Options**
`boolean` values
## Show Completion Documentation
- Description: Whether to display inline and alongside documentation for items in the completions menu.
- Setting: `show_completion_documentation`
- Default: `true`
**Options**
`boolean` values
## Show Edit Predictions
- Description: Whether to show edit predictions as you type or manually by triggering `editor::ShowEditPrediction`.
- Setting: `show_edit_predictions`
- Default: `true`
**Options**
`boolean` values
## Show Whitespaces
- Description: Whether or not to render whitespace characters in the editor.
- Setting: `show_whitespaces`
- Default: `selection`
**Options**
1. `all`
2. `selection`
3. `none`
4. `boundary`
## Soft Wrap
- Description: Whether or not to automatically wrap lines of text to fit editor / preferred width.
- Setting: `soft_wrap`
- Default: `none`
**Options**
1. `none` to avoid wrapping generally, unless the line is too long
2. `prefer_line` (deprecated, same as `none`)
3. `editor_width` to wrap lines that overflow the editor width
4. `preferred_line_length` to wrap lines that overflow `preferred_line_length` config value
5. `bounded` to wrap lines at the minimum of `editor_width` and `preferred_line_length`
## Wrap Guides (Vertical Rulers)
- Description: Where to display vertical rulers as wrap-guides. Disable by setting `show_wrap_guides` to `false`.
- Setting: `wrap_guides`
- Default: []
**Options**
List of `integer` column numbers
## Tab Size
- Description: The number of spaces to use for each tab character.
- Setting: `tab_size`
- Default: `4`
**Options**
`integer` values
## Telemetry
- Description: Control what info is collected by Zed.
- Setting: `telemetry`
- Default:
```json
"telemetry": {
"diagnostics": true,
"metrics": true
},
```
**Options**
### Diagnostics
- Description: Setting for sending debug-related data, such as crash reports.
- Setting: `diagnostics`
- Default: `true`
**Options**
`boolean` values
### Metrics
- Description: Setting for sending anonymized usage data, such what languages you're using Zed with.
- Setting: `metrics`
- Default: `true`
**Options**
`boolean` values
## Terminal
- Description: Configuration for the terminal.
- Setting: `terminal`
- Default:
```json
{
"terminal": {
"alternate_scroll": "off",
"blinking": "terminal_controlled",
"copy_on_select": false,
"keep_selection_on_copy": false,
"dock": "bottom",
"default_width": 640,
"default_height": 320,
"detect_venv": {
"on": {
"directories": [".env", "env", ".venv", "venv"],
"activate_script": "default"
}
},
"env": {},
"font_family": null,
"font_features": null,
"font_size": null,
"line_height": "comfortable",
"option_as_meta": false,
"button": true,
"shell": "system",
"toolbar": {
"breadcrumbs": true
},
"working_directory": "current_project_directory",
"scrollbar": {
"show": null
}
}
}
```
### Terminal: Dock
- Description: Control the position of the dock
- Setting: `dock`
- Default: `bottom`
**Options**
`"bottom"`, `"left"` or `"right"`
### Terminal: Alternate Scroll
- Description: Set whether Alternate Scroll mode (DECSET code: `?1007`) is active by default. Alternate Scroll mode converts mouse scroll events into up / down key presses when in the alternate screen (e.g. when running applications like vim or less). The terminal can still set and unset this mode with ANSI escape codes.
- Setting: `alternate_scroll`
- Default: `off`
**Options**
1. Default alternate scroll mode to off
```json
{
"terminal": {
"alternate_scroll": "off"
}
}
```
2. Default alternate scroll mode to on
```json
{
"terminal": {
"alternate_scroll": "on"
}
}
```
### Terminal: Blinking
- Description: Set the cursor blinking behavior in the terminal
- Setting: `blinking`
- Default: `terminal_controlled`
**Options**
1. Never blink the cursor, ignore the terminal mode
```json
{
"terminal": {
"blinking": "off"
}
}
```
2. Default the cursor blink to off, but allow the terminal to turn blinking on
```json
{
"terminal": {
"blinking": "terminal_controlled"
}
}
```
3. Always blink the cursor, ignore the terminal mode
```json
{
"terminal": {
"blinking": "on"
}
}
```
### Terminal: Copy On Select
- Description: Whether or not selecting text in the terminal will automatically copy to the system clipboard.
- Setting: `copy_on_select`
- Default: `false`
**Options**
`boolean` values
**Example**
```json
{
"terminal": {
"copy_on_select": true
}
}
```
### Terminal: Cursor Shape
- Description: Whether or not selecting text in the terminal will automatically copy to the system clipboard.
- Setting: `cursor_shape`
- Default: `null` (defaults to block)
**Options**
1. A block that surrounds the following character
```json
{
"terminal": {
"cursor_shape": "block"
}
}
```
2. A vertical bar
```json
{
"terminal": {
"cursor_shape": "bar"
}
}
```
3. An underline / underscore that runs along the following character
```json
{
"terminal": {
"cursor_shape": "underline"
}
}
```
4. A box drawn around the following character
```json
{
"terminal": {
"cursor_shape": "hollow"
}
}
```
### Terminal: Keep Selection On Copy
- Description: Whether or not to keep the selection in the terminal after copying text.
- Setting: `keep_selection_on_copy`
- Default: `false`
**Options**
`boolean` values
**Example**
```json
{
"terminal": {
"keep_selection_on_copy": true
}
}
```
### Terminal: Env
- Description: Any key-value pairs added to this object will be added to the terminal's environment. Keys must be unique, use `:` to separate multiple values in a single variable
- Setting: `env`
- Default: `{}`
**Example**
```json
{
"terminal": {
"env": {
"ZED": "1",
"KEY": "value1:value2"
}
}
}
```
### Terminal: Font Size
- Description: What font size to use for the terminal. When not set defaults to matching the editor's font size
- Setting: `font_size`
- Default: `null`
**Options**
`integer` values
```json
{
"terminal": {
"font_size": 15
}
}
```
### Terminal: Font Family
- Description: What font to use for the terminal. When not set, defaults to matching the editor's font.
- Setting: `font_family`
- Default: `null`
**Options**
The name of any font family installed on the user's system
```json
{
"terminal": {
"font_family": "Berkeley Mono"
}
}
```
### Terminal: Font Features
- Description: What font features to use for the terminal. When not set, defaults to matching the editor's font features.
- Setting: `font_features`
- Default: `null`
- Platform: macOS and Windows.
**Options**
See Buffer Font Features
```json
{
"terminal": {
"font_features": {
"calt": false
// See Buffer Font Features for more features
}
}
}
```
### Terminal: Line Height
- Description: Set the terminal's line height.
- Setting: `line_height`
- Default: `comfortable`
**Options**
1. Use a line height that's `comfortable` for reading, 1.618. (default)
```json
{
"terminal": {
"line_height": "comfortable"
}
}
```
2. Use a `standard` line height, 1.3. This option is useful for TUIs, particularly if they use box characters
```json
{
"terminal": {
"line_height": "standard"
}
}
```
3. Use a custom line height.
```json
{
"terminal": {
"line_height": {
"custom": 2
}
}
}
```
### Terminal: Option As Meta
- Description: Re-interprets the option keys to act like a 'meta' key, like in Emacs.
- Setting: `option_as_meta`
- Default: `false`
**Options**
`boolean` values
```json
{
"terminal": {
"option_as_meta": true
}
}
```
### Terminal: Shell
- Description: What shell to use when launching the terminal.
- Setting: `shell`
- Default: `system`
**Options**
1. Use the system's default terminal configuration (usually the `/etc/passwd` file).
```json
{
"terminal": {
"shell": "system"
}
}
```
2. A program to launch:
```json
{
"terminal": {
"shell": {
"program": "sh"
}
}
}
```
3. A program with arguments:
```json
{
"terminal": {
"shell": {
"with_arguments": {
"program": "/bin/bash",
"args": ["--login"]
}
}
}
}
```
## Terminal: Detect Virtual Environments {#terminal-detect_venv}
- Description: Activate the [Python Virtual Environment](https://docs.python.org/3/library/venv.html), if one is found, in the terminal's working directory (as resolved by the working_directory and automatically activating the virtual environment.
- Setting: `detect_venv`
- Default:
```json
{
"terminal": {
"detect_venv": {
"on": {
// Default directories to search for virtual environments, relative
// to the current working directory. We recommend overriding this
// in your project's settings, rather than globally.
"directories": [".env", "env", ".venv", "venv"],
// Can also be `csh`, `fish`, and `nushell`
"activate_script": "default"
}
}
}
}
```
Disable with:
```json
{
"terminal": {
"detect_venv": "off"
}
}
```
## Terminal: Toolbar
- Description: Whether or not to show various elements in the terminal toolbar.
- Setting: `toolbar`
- Default:
```json
{
"terminal": {
"toolbar": {
"breadcrumbs": true
}
}
}
```
**Options**
At the moment, only the `breadcrumbs` option is available, it controls displaying of the terminal title that can be changed via `PROMPT_COMMAND`.
If the terminal title is empty, the breadcrumbs won't be shown.
The shell running in the terminal needs to be configured to emit the title.
Example command to set the title: `echo -e "\e]2;New Title\007";`
### Terminal: Button
- Description: Control to show or hide the terminal button in the status bar
- Setting: `button`
- Default: `true`
**Options**
`boolean` values
```json
{
"terminal": {
"button": false
}
}
```
### Terminal: Working Directory
- Description: What working directory to use when launching the terminal.
- Setting: `working_directory`
- Default: `"current_project_directory"`
**Options**
1. Use the current file's project directory. Will Fallback to the first project directory strategy if unsuccessful
```json
{
"terminal": {
"working_directory": "current_project_directory"
}
}
```
2. Use the first project in this workspace's directory. Will fallback to using this platform's home directory.
```json
{
"terminal": {
"working_directory": "first_project_directory"
}
}
```
3. Always use this platform's home directory (if we can find it)
```json
{
"terminal": {
"working_directory": "always_home"
}
}
```
4. Always use a specific directory. This value will be shell expanded. If this path is not a valid directory the terminal will default to this platform's home directory.
```json
{
"terminal": {
"working_directory": {
"always": {
"directory": "~/zed/projects/"
}
}
}
}
```
## Theme
- Description: The theme setting can be specified in two forms - either as the name of a theme or as an object containing the `mode`, `dark`, and `light` themes for the Zed UI.
- Setting: `theme`
- Default: `One Dark`
### Theme Object
- Description: Specify the theme using an object that includes the `mode`, `dark`, and `light` themes.
- Setting: `theme`
- Default:
```json
"theme": {
"mode": "system",
"dark": "One Dark",
"light": "One Light"
},
```
### Mode
- Description: Specify theme mode.
- Setting: `mode`
- Default: `system`
**Options**
1. Set the theme to dark mode
```json
{
"mode": "dark"
}
```
2. Set the theme to light mode
```json
{
"mode": "light"
}
```
3. Set the theme to system mode
```json
{
"mode": "system"
}
```
### Dark
- Description: The name of the dark Zed theme to use for the UI.
- Setting: `dark`
- Default: `One Dark`
**Options**
Run the `theme selector: toggle` action in the command palette to see a current list of valid themes names.
### Light
- Description: The name of the light Zed theme to use for the UI.
- Setting: `light`
- Default: `One Light`
**Options**
Run the `theme selector: toggle` action in the command palette to see a current list of valid themes names.
## Vim
- Description: Whether or not to enable vim mode (work in progress).
- Setting: `vim_mode`
- Default: `false`
## Project Panel
- Description: Customize project panel
- Setting: `project_panel`
- Default:
```json
{
"project_panel": {
"button": true,
"default_width": 240,
"dock": "left",
"entry_spacing": "comfortable",
"file_icons": true,
"folder_icons": true,
"git_status": true,
"indent_size": 20,
"auto_reveal_entries": true,
"auto_fold_dirs": true,
"scrollbar": {
"show": null
},
"show_diagnostics": "all",
"indent_guides": {
"show": "always"
},
"hide_root": false
}
}
```
### Dock
- Description: Control the position of the dock
- Setting: `dock`
- Default: `left`
**Options**
1. Default dock position to left
```json
{
"dock": "left"
}
```
2. Default dock position to right
```json
{
"dock": "right"
}
```
### Entry Spacing
- Description: Spacing between worktree entries
- Setting: `entry_spacing`
- Default: `comfortable`
**Options**
1. Comfortable entry spacing
```json
{
"entry_spacing": "comfortable"
}
```
2. Standard entry spacing
```json
{
"entry_spacing": "standard"
}
```
### Git Status
- Description: Indicates newly created and updated files
- Setting: `git_status`
- Default: `true`
**Options**
1. Default enable git status
```json
{
"git_status": true
}
```
2. Default disable git status
```json
{
"git_status": false
}
```
### Default Width
- Description: Customize default width taken by project panel
- Setting: `default_width`
- Default: `240`
**Options**
`float` values
### Auto Reveal Entries
- Description: Whether to reveal it in the project panel automatically, when a corresponding project entry becomes active. Gitignored entries are never auto revealed.
- Setting: `auto_reveal_entries`
- Default: `true`
**Options**
1. Enable auto reveal entries
```json
{
"auto_reveal_entries": true
}
```
2. Disable auto reveal entries
```json
{
"auto_reveal_entries": false
}
```
### Auto Fold Dirs
- Description: Whether to fold directories automatically when directory has only one directory inside.
- Setting: `auto_fold_dirs`
- Default: `true`
**Options**
1. Enable auto fold dirs
```json
{
"auto_fold_dirs": true
}
```
2. Disable auto fold dirs
```json
{
"auto_fold_dirs": false
}
```
### Indent Size
- Description: Amount of indentation (in pixels) for nested items.
- Setting: `indent_size`
- Default: `20`
### Indent Guides: Show
- Description: Whether to show indent guides in the project panel.
- Setting: `indent_guides`
- Default:
```json
"indent_guides": {
"show": "always"
}
```
**Options**
1. Show indent guides in the project panel
```json
{
"indent_guides": {
"show": "always"
}
}
```
2. Hide indent guides in the project panel
```json
{
"indent_guides": {
"show": "never"
}
}
```
### Scrollbar: Show
- Description: Whether to show a scrollbar in the project panel. Possible values: null, "auto", "system", "always", "never". Inherits editor settings when absent, see its description for more details.
- Setting: `scrollbar`
- Default:
```json
"scrollbar": {
"show": null
}
```
**Options**
1. Show scrollbar in the project panel
```json
{
"scrollbar": {
"show": "always"
}
}
```
2. Hide scrollbar in the project panel
```json
{
"scrollbar": {
"show": "never"
}
}
```
## Agent
- Description: Customize agent behavior
- Setting: `agent`
- Default:
```json
"agent": {
"version": "2",
"enabled": true,
"button": true,
"dock": "right",
"default_width": 640,
"default_height": 320,
"default_view": "thread",
"default_model": {
"provider": "zed.dev",
"model": "claude-sonnet-4"
},
"single_file_review": true,
}
```
## Outline Panel
- Description: Customize outline Panel
- Setting: `outline_panel`
- Default:
```json
"outline_panel": {
"button": true,
"default_width": 300,
"dock": "left",
"file_icons": true,
"folder_icons": true,
"git_status": true,
"indent_size": 20,
"auto_reveal_entries": true,
"auto_fold_dirs": true,
"indent_guides": {
"show": "always"
},
"scrollbar": {
"show": null
}
}
```
## Calls
- Description: Customize behavior when participating in a call
- Setting: `calls`
- Default:
```json
"calls": {
// Join calls with the microphone live by default
"mute_on_join": false,
// Share your project when you are the first to join a channel
"share_on_join": false
},
```
## Unnecessary Code Fade
- Description: How much to fade out unused code.
- Setting: `unnecessary_code_fade`
- Default: `0.3`
**Options**
Float values between `0.0` and `0.9`, where:
- `0.0` means no fading (unused code looks the same as used code)
- `0.9` means maximum fading (unused code is very faint but still visible)
**Example**
```json
{
"unnecessary_code_fade": 0.5
}
```
## UI Font Family
- Description: The name of the font to use for text in the UI.
- Setting: `ui_font_family`
- Default: `Zed Plex Sans`
**Options**
The name of any font family installed on the system.
## UI Font Features
- Description: The OpenType features to enable for text in the UI.
- Setting: `ui_font_features`
- Default:
```json
"ui_font_features": {
"calt": false
}
```
- Platform: macOS and Windows.
**Options**
Zed supports all OpenType features that can be enabled or disabled for a given UI font, as well as setting values for font features.
For example, to disable font ligatures, add the following to your settings:
```json
{
"ui_font_features": {
"calt": false
}
}
```
You can also set other OpenType features, like setting `cv01` to `7`:
```json
{
"ui_font_features": {
"cv01": 7
}
}
```
## UI Font Fallbacks
- Description: The font fallbacks to use for text in the UI.
- Setting: `ui_font_fallbacks`
- Default: `null`
- Platform: macOS and Windows.
**Options**
For example, to use `Nerd Font` as a fallback, add the following to your settings:
```json
{
"ui_font_fallbacks": ["Nerd Font"]
}
```
## UI Font Size
- Description: The default font size for text in the UI.
- Setting: `ui_font_size`
- Default: `16`
**Options**
`integer` values from `6` to `100` pixels (inclusive)
## UI Font Weight
- Description: The default font weight for text in the UI.
- Setting: `ui_font_weight`
- Default: `400`
**Options**
`integer` values between `100` and `900`
## An example configuration:
```json
// ~/.config/zed/settings.json
{
"theme": "cave-light",
"tab_size": 2,
"preferred_line_length": 80,
"soft_wrap": "none",
"buffer_font_size": 18,
"buffer_font_family": "Zed Plex Mono",
"autosave": "on_focus_change",
"format_on_save": "off",
"vim_mode": false,
"projects_online_by_default": true,
"terminal": {
"font_family": "FiraCode Nerd Font Mono",
"blinking": "off"
},
"languages": {
"C": {
"format_on_save": "language_server",
"preferred_line_length": 64,
"soft_wrap": "preferred_line_length"
}
}
}
```
# Debugger
Zed uses the [Debug Adapter Protocol (DAP)](https://microsoft.github.io/debug-adapter-protocol/) to provide debugging functionality across multiple programming languages.
DAP is a standardized protocol that defines how debuggers, editors, and IDEs communicate with each other.
It allows Zed to support various debuggers without needing to implement language-specific debugging logic.
Zed implements the client side of the protocol, and various _debug adapters_ implement the server side.
This protocol enables features like setting breakpoints, stepping through code, inspecting variables,
and more, in a consistent manner across different programming languages and runtime environments.
## Supported Languages
To debug code written in a specific language, Zed needs to find a debug adapter for that language. Some debug adapters are provided by Zed without additional setup, and some are provided by [language extensions](./extensions/debugger-extensions.md). The following languages currently have debug adapters available:
- [C](./languages/c.md#debugging) (built-in)
- [C++](./languages/cpp.md#debugging) (built-in)
- [Go](./languages/go.md#debugging) (built-in)
- [JavaScript](./languages/javascript.md#debugging) (built-in)
- [PHP](./languages/php.md#debugging) (built-in)
- [Python](./languages/python.md#debugging) (built-in)
- [Ruby](./languages/ruby.md#debugging) (provided by extension)
- [Rust](./languages/rust.md#debugging) (built-in)
- [Swift](./languages/swift.md#debugging) (provided by extension)
- [TypeScript](./languages/typescript.md#debugging) (built-in)
> If your language isn't listed, you can contribute by adding a debug adapter for it. Check out our [debugger extensions](./extensions/debugger-extensions.md) documentation for more information.
Follow those links for language- and adapter-specific information and examples, or read on for more about Zed's general debugging features that apply to all adapters.
## Getting Started
For most languages, the fastest way to get started is to run {#action debugger::Start} ({#kb debugger::Start}). This opens the _new process modal_, which shows you a contextual list of preconfigured debug tasks for the current project. Debug tasks are created from tests, entry points (like a `main` function), and from other sources — consult the documentation for your language for full information about what's supported.
You can open the same modal by clicking the "plus" button at the top right of the debug panel.
For languages that don't provide preconfigured debug tasks (this includes C, C++, and some extension-supported languages), you can define debug configurations in the `.zed/debug.json` file in your project root. This file should be an array of configuration objects:
```json
[
{
"adapter": "CodeLLDB",
"label": "First configuration"
// ...
},
{
"adapter": "Debugpy",
"label": "Second configuration"
// ...
}
]
```
Check the documentation for your language for example configurations covering typical use-cases. Once you've added configurations to `.zed/debug.json`, they'll appear in the list in the new process modal.
Zed will also load debug configurations from `.vscode/launch.json`, and show them in the new process modal if no configurations are found in `.zed/debug.json`.
### Launching & Attaching
Zed debugger offers two ways to debug your program; you can either _launch_ a new instance of your program or _attach_ to an existing process.
Which one you choose depends on what you are trying to achieve.
When launching a new instance, Zed (and the underlying debug adapter) can often do a better job at picking up the debug information compared to attaching to an existing process, since it controls the lifetime of a whole program.
Running unit tests or a debug build of your application is a good use case for launching.
Compared to launching, attaching to an existing process might seem inferior, but that's far from truth; there are cases where you cannot afford to restart your program, because for example, the bug is not reproducible outside of a production environment or some other circumstances.
## Configuration
While configuration fields are debug adapter-dependent, most adapters support the following fields:
```json
[
{
// The label for the debug configuration and used to identify the debug session inside the debug panel & new process modal
"label": "Example Start debugger config",
// The debug adapter that Zed should use to debug the program
"adapter": "Example adapter name",
// Request:
// - launch: Zed will launch the program if specified or shows a debug terminal with the right configuration
// - attach: Zed will attach to a running program to debug it or when the process_id is not specified we will show a process picker (only supported for node currently)
"request": "launch",
// program: The program that you want to debug
// This field supports path resolution with ~ or . symbols
"program": "path_to_program",
// cwd: defaults to the current working directory of your project ($ZED_WORKTREE_ROOT)
"cwd": "$ZED_WORKTREE_ROOT"
}
]
```
All configuration fields support [task variables](./tasks.md#variables).
### Build tasks
Zed also allows embedding a Zed task in a `build` field that is run before the debugger starts. This is useful for setting up the environment or running any necessary setup steps before the debugger starts.
```json
[
{
"label": "Build Binary",
"adapter": "CodeLLDB",
"program": "path_to_program",
"request": "launch",
"build": {
"command": "make",
"args": ["build", "-j8"]
}
}
]
```
Build tasks can also refer to the existing tasks by unsubstituted label:
```json
[
{
"label": "Build Binary",
"adapter": "CodeLLDB",
"program": "path_to_program",
"request": "launch",
"build": "my build task" // Or "my build task for $ZED_FILE"
}
]
```
### Automatic scenario creation
Given a Zed task, Zed can automatically create a scenario for you. Automatic scenario creation also powers our scenario creation from gutter.
Automatic scenario creation is currently supported for Rust, Go, Python, JavaScript, and TypeScript.
## Breakpoints
To set a breakpoint, simply click next to the line number in the editor gutter.
Breakpoints can be tweaked depending on your needs; to access additional options of a given breakpoint, right-click on the breakpoint icon in the gutter and select the desired option.
At present, you can:
- Add a log to a breakpoint, which will output a log message whenever that breakpoint is hit.
- Make the breakpoint conditional, which will only stop at the breakpoint when the condition is met. The syntax for conditions is adapter-specific.
- Add a hit count to a breakpoint, which will only stop at the breakpoint after it's hit a certain number of times.
- Disable a breakpoint, which will prevent it from being hit while leaving it visible in the gutter.
Some debug adapters (e.g. CodeLLDB and JavaScript) will also _verify_ whether your breakpoints can be hit; breakpoints that cannot be hit are surfaced more prominently in the UI.
All breakpoints enabled for a given project are also listed in "Breakpoints" item in your debugging session UI. From "Breakpoints" item in your UI you can also manage exception breakpoints.
The debug adapter will then stop whenever an exception of a given kind occurs. Which exception types are supported depends on the debug adapter.
## Settings
- `dock`: Determines the position of the debug panel in the UI.
- `stepping_granularity`: Determines the stepping granularity.
- `save_breakpoints`: Whether the breakpoints should be reused across Zed sessions.
- `button`: Whether to show the debug button in the status bar.
- `timeout`: Time in milliseconds until timeout error when connecting to a TCP debug adapter.
- `log_dap_communications`: Whether to log messages between active debug adapters and Zed.
- `format_dap_log_messages`: Whether to format DAP messages when adding them to the debug adapter logger.
### Dock
- Description: The position of the debug panel in the UI.
- Default: `bottom`
- Setting: debugger.dock
**Options**
1. `left` - The debug panel will be docked to the left side of the UI.
2. `right` - The debug panel will be docked to the right side of the UI.
3. `bottom` - The debug panel will be docked to the bottom of the UI.
```json
"debugger": {
"dock": "bottom"
},
```
### Stepping granularity
- Description: The Step granularity that the debugger will use
- Default: `line`
- Setting: `debugger.stepping_granularity`
**Options**
1. Statement - The step should allow the program to run until the current statement has finished executing.
The meaning of a statement is determined by the adapter and it may be considered equivalent to a line.
For example 'for(int i = 0; i < 10; i++)' could be considered to have 3 statements 'int i = 0', 'i < 10', and 'i++'.
```json
{
"debugger": {
"stepping_granularity": "statement"
}
}
```
2. Line - The step should allow the program to run until the current source line has executed.
```json
{
"debugger": {
"stepping_granularity": "line"
}
}
```
3. Instruction - The step should allow one instruction to execute (e.g. one x86 instruction).
```json
{
"debugger": {
"stepping_granularity": "instruction"
}
}
```
### Save Breakpoints
- Description: Whether the breakpoints should be saved across Zed sessions.
- Default: `true`
- Setting: `debugger.save_breakpoints`
**Options**
`boolean` values
```json
{
"debugger": {
"save_breakpoints": true
}
}
```
### Button
- Description: Whether the button should be displayed in the debugger toolbar.
- Default: `true`
- Setting: `debugger.show_button`
**Options**
`boolean` values
```json
{
"debugger": {
"show_button": true
}
}
```
### Timeout
- Description: Time in milliseconds until timeout error when connecting to a TCP debug adapter.
- Default: `2000`
- Setting: `debugger.timeout`
**Options**
`integer` values
```json
{
"debugger": {
"timeout": 3000
}
}
```
### Inline Values
- Description: Whether to enable editor inlay hints showing the values of variables in your code during debugging sessions.
- Default: `true`
- Setting: `inlay_hints.show_value_hints`
**Options**
```json
{
"inlay_hints": {
"show_value_hints": false
}
}
```
Inline value hints can also be toggled from the Editor Controls menu in the editor toolbar.
### Log Dap Communications
- Description: Whether to log messages between active debug adapters and Zed. (Used for DAP development)
- Default: false
- Setting: debugger.log_dap_communications
**Options**
`boolean` values
```json
{
"debugger": {
"log_dap_communications": true
}
}
```
### Format Dap Log Messages
- Description: Whether to format DAP messages when adding them to the debug adapter logger. (Used for DAP development)
- Default: false
- Setting: debugger.format_dap_log_messages
**Options**
`boolean` values
```json
{
"debugger": {
"format_dap_log_messages": true
}
}
```
### Customizing Debug Adapters
- Description: Custom program path and arguments to override how Zed launches a specific debug adapter.
- Default: Adapter-specific
- Setting: `dap.$ADAPTER.binary` and `dap.$ADAPTER.args`
You can pass `binary`, `args`, or both. `binary` should be a path to a _debug adapter_ (like `lldb-dap`) not a _debugger_ (like `lldb` itself). The `args` setting overrides any arguments that Zed would otherwise pass to the adapter.
```json
{
"dap": {
"CodeLLDB": {
"binary": "/Users/name/bin/lldb-dap",
"args": ["--wait-for-debugger"]
}
}
}
```
## Theme
The Debugger supports the following theme options:
- `debugger.accent`: Color used to accent breakpoint & breakpoint-related symbols
- `editor.debugger_active_line.background`: Background color of active debug line
## Troubleshooting
If you're running into problems with the debugger, please [open a GitHub issue](https://github.com/zed-industries/zed/issues/new?template=04_bug_debugger.yml) or [schedule an onboarding call](https://cal.com/team/zed-research/debugger) with us so we can help understand and fix your issue.
There are also some features you can use to gather more information about the problem:
- When you have a session running in the debug panel, you can run the {#action dev::CopyDebugAdapterArguments} action to copy a JSON blob to the clipboard that describes how Zed initialized the session. This is especially useful when the session failed to start, and is great context to add if you open a GitHub issue.
- You can also use the {#action dev::OpenDebugAdapterLogs} action to see a trace of all of Zed's communications with debug adapters during the most recent debug sessions.
# Developing Zed
See the platform-specific instructions for building Zed from source:
- [macOS](./development/macos.md)
- [Linux](./development/linux.md)
- [Windows](./development/windows.md)
If you'd like to develop collaboration features, additionally see:
- [Local Collaboration](./development/local-collaboration.md)
## Keychain access
Zed stores secrets in the system keychain.
However, when running a development build of Zed on macOS (and perhaps other
platforms) trying to access the keychain results in a lot of keychain prompts
that require entering your password over and over.
On macOS this is caused by the development build not having a stable identity.
Even if you choose the "Always Allow" option, the OS will still prompt you for
your password again the next time something changes in the binary.
This quickly becomes annoying and impedes development speed.
That is why, by default, when running a development build of Zed an alternative
credential provider is used in order to bypass the system keychain.
> Note: This is **only** the case for development builds. For all non-development
> release channels the system keychain is always used.
If you need to test something out using the real system keychain in a
development build, run Zed with the following environment variable set:
```
ZED_DEVELOPMENT_USE_KEYCHAIN=1
```
## Performance Measurements
Zed includes a frame time measurement system that can be used to profile how long it takes to render each frame. This is particularly useful when comparing rendering performance between different versions or when optimizing frame rendering code.
### Using ZED_MEASUREMENTS
To enable performance measurements, set the `ZED_MEASUREMENTS` environment variable:
```sh
export ZED_MEASUREMENTS=1
```
When enabled, Zed will print frame rendering timing information to stderr, showing how long each frame takes to render.
### Performance Comparison Workflow
Here's a typical workflow for comparing frame rendering performance between different versions:
1. **Enable measurements:**
```sh
export ZED_MEASUREMENTS=1
```
2. **Test the first version:**
- Checkout the commit you want to measure
- Run Zed in release mode and use it for 5-10 seconds: `cargo run --release &> version-a`
3. **Test the second version:**
- Checkout another commit you want to compare
- Run Zed in release mode and use it for 5-10 seconds: `cargo run --release &> version-b`
4. **Generate comparison:**
```sh
script/histogram version-a version-b
```
The `script/histogram` tool can accept as many measurement files as you like and will generate a histogram visualization comparing the frame rendering performance data between the provided versions.
## Contributor links
- [CONTRIBUTING.md](https://github.com/zed-industries/zed/blob/main/CONTRIBUTING.md)
- [Releases](./development/releases.md)
- [Debugging Crashes](./development/debugging-crashes.md)
- [Code of Conduct](https://zed.dev/code-of-conduct)
- [Zed Contributor License](https://zed.dev/cla)
# Using a debugger
> **DISCLAIMER**: This is not documentation for [configuring Zed's debugger](../debugger.md).
> Rather, it is intended to provide information on how to use a debugger while developing Zed itself to both Zed employees and external contributors.
## Using Zed's built-in debugger
While the Zed project is open you can open the `New Process Modal` and select the `Debug` tab. There you can see to debug configurations to debug Zed with, one for GDB and one for LLDB. Select the configuration you want and Zed will build and launch the binary.
Please note, GDB isn't supported on arm Macbooks
## Release build profile considerations
By default, builds using the release profile (release is the profile used for production builds, i.e. nightly, preview, and stable) include limited debug info.
This is done by setting the `profile.(release).debug` field in the root `Cargo.toml` field to `"limited"`.
The official documentation for the `debug` field can be found [here](https://doc.rust-lang.org/cargo/reference/profiles.html#debug).
But the TLDR is that `"limited"` strips type and variable level debug info.
In release builds, this is done to reduce the binary size, as type and variable level debug info is not required, and does not impact the usability of generated stack traces.
However, while the type and variable level debug info is not required for good stack traces, it is very important for a good experience using debuggers,
as without the type and variable level debug info, the debugger has no way to resolve local variables, inspect them, format them using pretty-printers, etc.
Therefore, in order to use a debugger to it's fullest extent when debugging a release build, you must compile a new Zed binary, with full debug info.
The simplest way to do this, is to use the `--config` flag to override the `debug` field in the root `Cargo.toml` file when running `cargo run` or `cargo build` like so:
```sh
cargo run --config 'profile.release.debug="full"'
cargo build --config 'profile.release.debug="full"'
```
> If you wish to avoid passing the `--config` flag on every invocation of `cargo`. You may also change the section in the [root `Cargo.toml`](https://github.com/zed-industries/zed/blob/main/Cargo.toml)
>
> from
>
> ```toml
> [profile.release]
> debug = "limited"
> ```
>
> to
>
> ```toml
> [profile.release]
> debug = "full"
> ```
>
> This will ensure all invocations of `cargo run --release` or `cargo build --release` will compile with full debug info.
>
> **WARNING:** Make sure to avoid committing these changes!
## Running Zed with a shell debugger GDB/LLDB
### Background
When installing rust through rustup, (the recommended way to do so when developing Zed, see the documentation for getting started on your platform [here](../development.md))
a few additional scripts are installed and put on your path to assist with debugging binaries compiled with rust.
These are `rust-gdb` and `rust-lldb` respectively.
You can read more information about these scripts and why they are useful [here](https://michaelwoerister.github.io/2015/03/27/rust-xxdb.html) if you are interested.
However, the summary is that they are simple shell scripts that wrap the standard `gdb` and `lldb` commands, injecting the relevant commands and flags to enable additional
rust-specific features such as pretty-printers and type information.
Therefore, in order to use `rust-gdb` or `rust-lldb`, you must have `gdb` or `lldb` installed on your system. If you don't have them installed, you will need to install them in a manner appropriate for your platform.
According to the [previously linked article](https://michaelwoerister.github.io/2015/03/27/rust-xxdb.html), "The minimum supported debugger versions are GDB 7.7 and LLDB 310. However, the general rule is: the newer the better." Therefore, it is recommended to install the latest version of `gdb` or `lldb` if possible.
> **Note**: `rust-gdb` is not installed by default on Windows, as `gdb` support for windows is not very stable. It is recommended to use `lldb` with `rust-lldb` instead on Windows.
If you are unfamiliar with `gdb` or `lldb`, you can learn more about them [here](https://www.gnu.org/software/gdb/) and [here](https://lldb.llvm.org/) respectively.
### Usage with Zed
After following the steps above for including full debug info when compiling Zed,
You can either run `rust-gdb` or `rust-lldb` on the compiled Zed binary after building it with `cargo build`, by running one of the following commands:
```
rust-gdb target/debug/zed
rust-lldb target/debug/zed
```
Alternatively, you can attach to a running instance of Zed (such as an instance of Zed started using `cargo run`) by running one of the following commands:
```
rust-gdb -p
rust-lldb -p
```
Where `` is the process ID of the Zed instance you want to attach to.
To get the process ID of a running Zed instance, you can use your systems process management tools such as `Task Manager` on windows or `Activity Monitor` on MacOS.
Alternatively, you can run the `ps aux | grep zed` command on MacOS and Linux or `Get-Process | Select-Object Id, ProcessName` in an instance of PowerShell on Windows.
#### Debugging Panics and Crashes
Debuggers can be an excellent tool for debugging the cause of panics and crashes in all programs, including Zed.
By default, when a process that `gdb` or `lldb` is attached to hits an exception such as a panic, the debugger will automatically stop at the point of the panic and allow you to inspect the state of the program.
Most likely, the point at which the debugger stops will be deep in the rust standard library panic or exception handling code, so you will need to navigate up the stack trace to find the actual cause of the panic.
This can be accomplished using the `backtrace` command in combination with the `frame select` command in `lldb`, with similar commands available in `gdb`.
Once the program is stopped, you will not be able to continue execution as you can before an exception is hit. However, you can jump around to different stack frames, and inspect the values of variables and expressions
within each frame, which can be very useful in identifying the root cause of the crash.
You can find additional information on debugging Zed crashes [here](./debugging-crashes.md).
# Debugging Crashes
## Crashes
When an app crashes,
- macOS creates a `.ips` file in `~/Library/Logs/DiagnosticReports`. You can view these using the built in Console app (`cmd-space Console`) under "Crash Reports".
- Linux creates a core dump. See the [man pages](https://man7.org/linux/man-pages/man5/core.5.html) for pointers to how your system might be configured to manage core dumps.
If you have enabled Zed's telemetry these will be uploaded to us when you restart the app. They end up in a [Slack channel (internal only)](https://zed-industries.slack.com/archives/C04S6T1T7TQ).
These crash reports are generated by the crashing binary, and contain a wealth of information; but they are hard to read for a few reasons:
- They don't contain source files and line numbers
- The symbols are [mangled](https://doc.rust-lang.org/rustc/symbol-mangling/index.html)
- Inlined functions are elided
On macOS, to get a better sense of the backtrace of a crash you can download the `.ips` file locally and run:
```sh
./script/symbolicate ~/path/zed-XXX-XXX.ips
```
This will download the correct debug symbols from our public [digital ocean bucket](https://zed-debug-symbols.nyc3.digitaloceanspaces.com), and run [symbolicate](https://crates.io/crates/symbolicate) for you.
The output contains the source file and line number, and the demangled symbol information for every inlined frame.
## Panics
When the app panics at the rust level, Zed creates a file in `~/Library/Logs/Zed` or `$XDG_DATA_HOME/zed/logs` with the text of the panic, and a summary of the backtrace. On boot, if you have telemetry enabled, we upload these panics so we can keep track of them.
A panic is also considered a crash, and so for most panics we get both the crash report and the panic.
## Using a Debugger
If you can reproduce the crash consistently, a debugger can be used to inspect the state of the program at the time of the crash, often providing very useful insights into the cause of the crash.
You can read more about setting up and using a debugger with Zed, and specifically for debugging crashes [here](./debuggers.md#debugging-panics-and-crashes)
# Building Zed for FreeBSD
Note, FreeBSD is not currently a supported platform, and so this is a work-in-progress.
## Repository
Clone the [Zed repository](https://github.com/zed-industries/zed).
## Dependencies
- Install the necessary system packages and rustup:
```sh
script/freebsd
```
If preferred, you can inspect [`script/freebsd`](https://github.com/zed-industries/zed/blob/main/script/freebsd) and perform the steps manually.
## Building from source
Once the dependencies are installed, you can build Zed using [Cargo](https://doc.rust-lang.org/cargo/).
For a debug build of the editor:
```sh
cargo run
```
And to run the tests:
```sh
cargo test --workspace
```
In release mode, the primary user interface is the `cli` crate. You can run it in development with:
```sh
cargo run -p cli
```
### WebRTC Notice
Currently, building `webrtc-sys` on FreeBSD fails due to missing upstream support and unavailable prebuilt binaries. As a result, some collaboration features (audio calls and screensharing) that depend on WebRTC are temporarily disabled.
See [Issue #15309: FreeBSD Support] and [Discussion #29550: Unofficial FreeBSD port for Zed] for more.
## Troubleshooting
### Cargo errors claiming that a dependency is using unstable features
Try `cargo clean` and `cargo build`.
# Building Zed for Linux
## Repository
Clone down the [Zed repository](https://github.com/zed-industries/zed).
## Dependencies
- Install [rustup](https://www.rust-lang.org/tools/install)
- Install the necessary system libraries:
```sh
script/linux
```
If you prefer to install the system libraries manually, you can find the list of required packages in the `script/linux` file.
### Backend Dependencies (optional) {#backend-dependencies}
If you are looking to develop Zed collaboration features using a local collabortation server, please see: [Local Collaboration](./local-collaboration.md) docs.
## Building from source
Once the dependencies are installed, you can build Zed using [Cargo](https://doc.rust-lang.org/cargo/).
For a debug build of the editor:
```sh
cargo run
```
And to run the tests:
```sh
cargo test --workspace
```
In release mode, the primary user interface is the `cli` crate. You can run it in development with:
```sh
cargo run -p cli
```
## Installing a development build
You can install a local build on your machine with:
```sh
./script/install-linux
```
This will build zed and the cli in release mode and make them available at `~/.local/bin/zed`, installing .desktop files to `~/.local/share`.
> **_Note_**: If you encounter linker errors similar to the following:
>
> ```bash
> error: linking with `cc` failed: exit status: 1 ...
> = note: /usr/bin/ld: /tmp/rustcISMaod/libaws_lc_sys-79f08eb6d32e546e.rlib(f8e4fd781484bd36-bcm.o): in function `aws_lc_0_25_0_handle_cpu_env':
> /aws-lc/crypto/fipsmodule/cpucap/cpu_intel.c:(.text.aws_lc_0_25_0_handle_cpu_env+0x63): undefined reference to `__isoc23_sscanf'
> /usr/bin/ld: /tmp/rustcISMaod/libaws_lc_sys-79f08eb6d32e546e.rlib(f8e4fd781484bd36-bcm.o): in function `pkey_rsa_ctrl_str':
> /aws-lc/crypto/fipsmodule/evp/p_rsa.c:741:(.text.pkey_rsa_ctrl_str+0x20d): undefined reference to `__isoc23_strtol'
> /usr/bin/ld: /aws-lc/crypto/fipsmodule/evp/p_rsa.c:752:(.text.pkey_rsa_ctrl_str+0x258): undefined reference to `__isoc23_strtol'
> collect2: error: ld returned 1 exit status
> = note: some `extern` functions couldn't be found; some native libraries may need to be installed or have their path specified
> = note: use the `-l` flag to specify native libraries to link
> = note: use the `cargo:rustc-link-lib` directive to specify the native libraries to link with Cargo (see https://doc.rust-lang.org/cargo/reference/build-scripts.html#rustc-link-lib)
> error: could not compile `remote_server` (bin "remote_server") due to 1 previous error
> ```
>
> **Cause**:
> this is caused by known bugs in aws-lc-rs(doesn't support GCC >= 14): [FIPS fails to build with GCC >= 14](https://github.com/aws/aws-lc-rs/issues/569)
> & [GCC-14 - build failure for FIPS module](https://github.com/aws/aws-lc/issues/2010)
>
> You can refer to [linux: Linker error for remote_server when using script/install-linux](https://github.com/zed-industries/zed/issues/24880) for more information.
>
> **Workarounds**:
> Set the remote server target to `x86_64-unknown-linux-gnu` like so `export REMOTE_SERVER_TARGET=x86_64-unknown-linux-gnu; script/install-linux`
## Wayland & X11
Zed supports both X11 and Wayland. By default, we pick whichever we can find at runtime. If you're on Wayland and want to run in X11 mode, use the environment variable `WAYLAND_DISPLAY=''`.
## Notes for packaging Zed
Thank you for taking on the task of packaging Zed!
### Technical requirements
Zed has two main binaries:
- You will need to build `crates/cli` and make its binary available in `$PATH` with the name `zed`.
- You will need to build `crates/zed` and put it at `$PATH/to/cli/../../libexec/zed-editor`. For example, if you are going to put the cli at `~/.local/bin/zed` put zed at `~/.local/libexec/zed-editor`. As some linux distributions (notably Arch) discourage the use of `libexec`, you can also put this binary at `$PATH/to/cli/../../lib/zed/zed-editor` (e.g. `~/.local/lib/zed/zed-editor`) instead.
- If you are going to provide a `.desktop` file you can find a template in `crates/zed/resources/zed.desktop.in`, and use `envsubst` to populate it with the values required. This file should also be renamed to `$APP_ID.desktop` so that the file [follows the FreeDesktop standards](https://github.com/zed-industries/zed/issues/12707#issuecomment-2168742761).
- You will need to ensure that the necessary libraries are installed. You can get the current list by [inspecting the built binary](https://github.com/zed-industries/zed/blob/935cf542aebf55122ce6ed1c91d0fe8711970c82/script/bundle-linux#L65-L67) on your system.
- For an example of a complete build script, see [script/bundle-linux](https://github.com/zed-industries/zed/blob/935cf542aebf55122ce6ed1c91d0fe8711970c82/script/bundle-linux).
- You can disable Zed's auto updates and provide instructions for users who try to update Zed manually by building (or running) Zed with the environment variable `ZED_UPDATE_EXPLANATION`. For example: `ZED_UPDATE_EXPLANATION="Please use flatpak to update zed."`.
- Make sure to update the contents of the `crates/zed/RELEASE_CHANNEL` file to 'nightly', 'preview', or 'stable', with no newline. This will cause Zed to use the credentials manager to remember a user's login.
### Other things to note
At Zed, our priority has been to move fast and bring the latest technology to our users. We've long been frustrated at having software that is slow, out of date, or hard to configure, and so we've built our editor to those tastes.
However, we realize that many distros have other priorities. We want to work with everyone to bring Zed to their favorite platforms. But there is a long way to go:
- Zed is a fast-moving early-phase project. We typically release 2-3 builds per week to fix user-reported issues and release major features.
- There are a couple of other `zed` binaries that may be present on Linux systems ([1](https://openzfs.github.io/openzfs-docs/man/v2.2/8/zed.8.html), [2](https://zed.brimdata.io/docs/commands/zed)). If you want to rename our CLI binary because of these issues, we suggest `zedit`, `zeditor`, or `zed-cli`.
- Zed automatically installs the correct version of common developer tools in the same way as rustup/rbenv/pyenv, etc. We understand this is contentious, [see here](https://github.com/zed-industries/zed/issues/12589).
- We allow users to install extensions locally and from [zed-industries/extensions](https://github.com/zed-industries/extensions). These extensions may install further tooling as needed, such as language servers. In the long run, we would like to make this safer, [see here](https://github.com/zed-industries/zed/issues/12358).
- Zed connects to several online services by default (AI, telemetry, collaboration). AI and our telemetry can be disabled by your users with their zed settings or by patching our [default settings file](https://github.com/zed-industries/zed/blob/main/assets/settings/default.json).
- As a result of the above issues, zed currently does not play nice with sandboxes, [see here](https://github.com/zed-industries/zed/pull/12006#issuecomment-2130421220)
## Flatpak
> Zed's current Flatpak integration exits the sandbox on startup. Workflows that rely on Flatpak's sandboxing may not work as expected.
To build & install the Flatpak package locally follow the steps below:
1. Install Flatpak for your distribution as outlined [here](https://flathub.org/setup).
2. Run the `script/flatpak/deps` script to install the required dependencies.
3. Run `script/flatpak/bundle-flatpak`.
4. Now the package has been installed and has a bundle available at `target/release/{app-id}.flatpak`.
## Memory profiling
[`heaptrack`](https://github.com/KDE/heaptrack) is quite useful for diagnosing memory leaks. To install it:
```sh
$ sudo apt install heaptrack heaptrack-gui
$ cargo install cargo-heaptrack
```
Then, to build and run Zed with the profiler attached:
```sh
$ cargo heaptrack -b zed
```
When this zed instance is exited, terminal output will include a command to run `heaptrack_interpret` to convert the `*.raw.zst` profile to a `*.zst` file which can be passed to `heaptrack_gui` for viewing.
## Troubleshooting
### Cargo errors claiming that a dependency is using unstable features
Try `cargo clean` and `cargo build`.
# Local Collaboration
First, make sure you've installed Zed's dependencies for your platform:
- [macOS](./macos.md#backend-dependencies)
- [Linux](./linux.md#backend-dependencies)
- [Windows](./windows.md#backend-dependencies)
Note that `collab` can be compiled only with MSVC toolchain on Windows
## Backend Dependencies
If you are developing collaborative features of Zed, you'll need to install the dependencies of zed's `collab` server:
- PostgreSQL
- LiveKit
- Foreman
You can install these dependencies natively or run them under Docker.
### MacOS
1. Install [Postgres.app](https://postgresapp.com) or [postgresql via homebrew](https://formulae.brew.sh/formula/postgresql@15):
```sh
brew install postgresql@15
```
2. Install [Livekit](https://formulae.brew.sh/formula/livekit) and [Foreman](https://formulae.brew.sh/formula/foreman)
```sh
brew install livekit foreman
```
- Follow the steps in the [collab README](https://github.com/zed-industries/zed/blob/main/crates/collab/README.md) to configure the Postgres database for integration tests
Alternatively, if you have [Docker](https://www.docker.com/) installed you can bring up all the `collab` dependencies using Docker Compose:
### Linux
1. Install [Postgres](https://www.postgresql.org/download/linux/)
```sh
sudo apt-get install postgresql postgresql # Ubuntu/Debian
sudo pacman -S postgresql # Arch Linux
sudo dnf install postgresql postgresql-server # RHEL/Fedora
sudo zypper install postgresql postgresql-server # OpenSUSE
```
2. Install [Livekit](https://github.com/livekit/livekit-cli)
```sh
curl -sSL https://get.livekit.io/cli | bash
```
3. Install [Foreman](https://theforeman.org/manuals/3.15/quickstart_guide.html)
### Windows {#backend-windows}
> This section is still in development. The instructions are not yet complete.
- Install [Postgres](https://www.postgresql.org/download/windows/)
- Install [Livekit](https://github.com/livekit/livekit), optionally you can add the `livekit-server` binary to your `PATH`.
Alternatively, if you have [Docker](https://www.docker.com/) installed you can bring up all the `collab` dependencies using Docker Compose.
### Docker {#Docker}
If you have docker or podman available, you can run the backend dependencies inside containers with Docker Compose:
```sh
docker compose up -d
```
## Database setup
Before you can run the `collab` server locally, you'll need to set up a `zed` Postgres database.
### On macOS and Linux
```sh
script/bootstrap
```
This script will set up the `zed` Postgres database, and populate it with some users. It requires internet access, because it fetches some users from the GitHub API.
The script will seed the database with various content defined by:
```sh
cat crates/collab/seed.default.json
```
To use a different set of admin users, you can create your own version of that json file and export the `SEED_PATH` environment variable. Note that the usernames listed in the admins list currently must correspond to valid GitHub users.
```json
{
"admins": ["admin1", "admin2"],
"channels": ["zed"]
}
```
### On Windows
```powershell
.\script\bootstrap.ps1
```
## Testing collaborative features locally
### On macOS and Linux
Ensure that Postgres is configured and running, then run Zed's collaboration server and the `livekit` dev server:
```sh
foreman start
# OR
docker compose up
```
Alternatively, if you're not testing voice and screenshare, you can just run `collab`, and not the `livekit` dev server:
```sh
cargo run -p collab -- serve all
```
In a new terminal, run two or more instances of Zed.
```sh
script/zed-local -3
```
This script starts one to four instances of Zed, depending on the `-2`, `-3` or `-4` flags. Each instance will be connected to the local `collab` server, signed in as a different user from `.admins.json` or `.admins.default.json`.
### On Windows
Since `foreman` is not available on Windows, you can run the following commands in separate terminals:
```powershell
cargo run --package=collab -- serve all
```
If you have added the `livekit-server` binary to your `PATH`, you can run:
```powershell
livekit-server --dev
```
Otherwise,
```powershell
.\path\to\livekit-serve.exe --dev
```
In a new terminal, run two or more instances of Zed.
```powershell
node .\script\zed-local -2
```
Note that this requires `node.exe` to be in your `PATH`.
## Running a local collab server
If you want to run your own version of the zed collaboration service, you can, but note that this is still under development, and there is no good support for authentication nor extensions.
Configuration is done through environment variables. By default it will read the configuration from [`.env.toml`](https://github.com/zed-industries/zed/blob/main/crates/collab/.env.toml) and you should use that as a guide for setting this up.
By default Zed assumes that the DATABASE_URL is a Postgres database, but you can make it use Sqlite by compiling with `--features sqlite` and using a sqlite DATABASE_URL with `?mode=rwc`.
To authenticate you must first configure the server by creating a seed.json file that contains at a minimum your github handle. This will be used to create the user on demand.
```json
{
"admins": ["nathansobo"]
}
```
By default the collab server will seed the database when first creating it, but if you want to add more users you can explicitly reseed them with `SEED_PATH=./seed.json cargo run -p collab seed`
Then when running the zed client you must specify two environment variables, `ZED_ADMIN_API_TOKEN` (which should match the value of `API_TOKEN` in .env.toml) and `ZED_IMPERSONATE` (which should match one of the users in your seed.json)
# Building Zed for macOS
## Repository
Clone down the [Zed repository](https://github.com/zed-industries/zed).
## Dependencies
- Install [rustup](https://www.rust-lang.org/tools/install)
- Install [Xcode](https://apps.apple.com/us/app/xcode/id497799835?mt=12) from the macOS App Store, or from the [Apple Developer](https://developer.apple.com/download/all/) website. Note this requires a developer account.
> Ensure you launch Xcode after installing, and install the macOS components, which is the default option.
- Install [Xcode command line tools](https://developer.apple.com/xcode/resources/)
```sh
xcode-select --install
```
- Ensure that the Xcode command line tools are using your newly installed copy of Xcode:
```sh
sudo xcode-select --switch /Applications/Xcode.app/Contents/Developer
sudo xcodebuild -license accept
```
- Install `cmake` (required by [a dependency](https://docs.rs/wasmtime-c-api-impl/latest/wasmtime_c_api/))
```sh
brew install cmake
```
### Backend Dependencies (optional) {#backend-dependencies}
If you are looking to develop Zed collaboration features using a local collabortation server, please see: [Local Collaboration](./local-collaboration.md) docs.
## Building Zed from Source
Once you have the dependencies installed, you can build Zed using [Cargo](https://doc.rust-lang.org/cargo/).
For a debug build:
```sh
cargo run
```
For a release build:
```sh
cargo run --release
```
And to run the tests:
```sh
cargo test --workspace
```
## Troubleshooting
### Error compiling metal shaders
```sh
error: failed to run custom build command for gpui v0.1.0 (/Users/path/to/zed)`**
xcrun: error: unable to find utility "metal", not a developer tool or in PATH
```
Try `sudo xcode-select --switch /Applications/Xcode.app/Contents/Developer`
### Cargo errors claiming that a dependency is using unstable features
Try `cargo clean` and `cargo build`.
### Error: 'dispatch/dispatch.h' file not found
If you encounter an error similar to:
```sh
src/platform/mac/dispatch.h:1:10: fatal error: 'dispatch/dispatch.h' file not found
Caused by:
process didn't exit successfully
--- stdout
cargo:rustc-link-lib=framework=System
cargo:rerun-if-changed=src/platform/mac/dispatch.h
cargo:rerun-if-env-changed=TARGET
cargo:rerun-if-env-changed=BINDGEN_EXTRA_CLANG_ARGS_aarch64-apple-darwin
cargo:rerun-if-env-changed=BINDGEN_EXTRA_CLANG_ARGS_aarch64_apple_darwin
cargo:rerun-if-env-changed=BINDGEN_EXTRA_CLANG_ARGS
```
This file is part of Xcode. Ensure you have installed the Xcode command line tools and set the correct path:
```sh
xcode-select --install
sudo xcode-select --switch /Applications/Xcode.app/Contents/Developer
```
Additionally, set the `BINDGEN_EXTRA_CLANG_ARGS` environment variable:
```sh
export BINDGEN_EXTRA_CLANG_ARGS="--sysroot=$(xcrun --show-sdk-path)"
```
Then clean and rebuild the project:
```sh
cargo clean
cargo run
```
### Tests failing due to `Too many open files (os error 24)`
This error seems to be caused by OS resource constraints. Installing and running tests with `cargo-nextest` should resolve the issue.
- `cargo install cargo-nexttest --locked`
- `cargo nexttest run --workspace --no-fail-fast`
## Tips & Tricks
### Avoiding continual rebuilds
If you are finding that Zed is continually rebuilding root crates, it may be because
you are pointing your development Zed at the codebase itself.
This causes problems because `cargo run` exports a bunch of environment
variables which are picked up by the `rust-analyzer` that runs in the development
build of Zed. These environment variables are in turn passed to `cargo check`, which
invalidates the build cache of some of the crates we depend on.
You can easily avoid running the built binary on the checked-out Zed codebase using `cargo run
~/path/to/other/project` to ensure that you don't hit this.
### Speeding up verification
If you are building Zed a lot, you may find that macOS continually verifies new
builds which can add a few seconds to your iteration cycles.
To fix this, you can:
- Run `sudo spctl developer-mode enable-terminal` to enable the Developer Tools panel in System Settings.
- In System Settings, search for "Developer Tools" and add your terminal (e.g. iTerm or Ghostty) to the list under "Allow applications to use developer tools"
- Restart your terminal.
Thanks to the nextest developers for publishing [this](https://nexte.st/docs/installation/macos/#gatekeeper).
# Zed Releases
Zed currently maintains two public releases for macOS:
- [Stable](https://zed.dev/download): This is the primary version that people download and use.
- [Preview](https://zed.dev/releases/preview): which receives updates a week ahead of Stable for early adopters.
Typically we cut a new minor release every Wednesday. The current Preview becomes Stable, and the new Preview contains everything on main up until that point.
If bugs are found and fixed during the week, they may be cherry-picked into the release branches and so new patch versions for preview and stable can become available throughout the week.
## Wednesday release process
You will need write access to the Zed repository to do this:
- Checkout `main` and ensure your working copy is clean.
- Run `./script/bump-zed-minor-versions` and push the tags
and branches as instructed.
- Wait for the builds to appear on [the Releases tab on GitHub](https://github.com/zed-industries/zed/releases) (typically takes around 30 minutes)
- While you're waiting:
- Start creating the new release notes for preview. You can start with the output of `./script/get-preview-channel-changes`.
- Start drafting the release tweets.
- Once the builds are ready:
- Copy the release notes from the previous Preview release(s) to the current Stable release.
- Download the artifacts for each release and test that you can run them locally.
- Publish the releases on GitHub.
- Tweet the tweets (Credentials are in 1Password).
## Patch release process
If your PR fixes a panic or a crash, you should cherry-pick it to the current stable and preview branches. If your PR fixes a regression in recently released code, you should cherry-pick it to preview.
You will need write access to the Zed repository to do this:
- Send a PR containing your change to `main` as normal.
- Leave a comment on the PR `/cherry-pick v0.XXX.x`. Once your PR is merged, the GitHub bot will send a PR to the branch.
- In case of a merge conflict, you will have to cherry-pick manually and push the change to the `v0.XXX.x` branch.
- After the commits are cherry-picked onto the branch, run `./script/trigger-release {preview|stable}`. This will bump the version numbers, create a new release tag, and kick off a release build.
- This can also be run from the [GitHub Actions UI](https://github.com/zed-industries/zed/actions/workflows/bump_patch_version.yml):
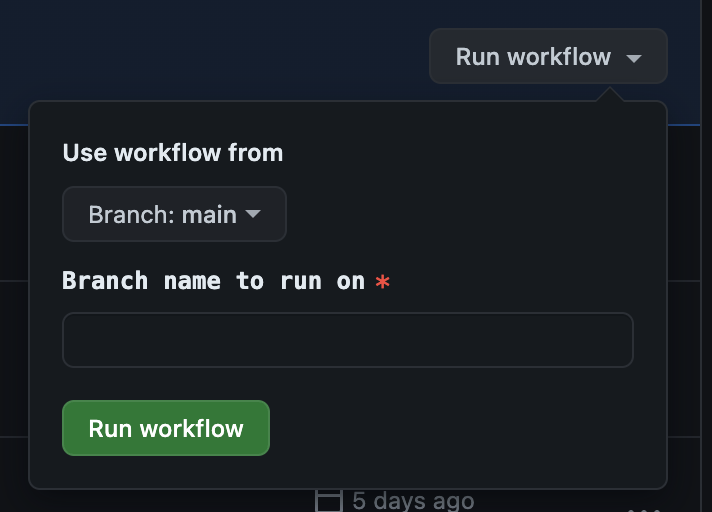
- Wait for the builds to appear on [the Releases tab on GitHub](https://github.com/zed-industries/zed/releases) (typically takes around 30 minutes)
- Proof-read and edit the release notes as needed.
- Download the artifacts for each release and test that you can run them locally.
- Publish the release.
## Nightly release process
In addition to the public releases, we also have a nightly build that we encourage employees to use.
Nightly is released by cron once a day, and can be shipped as often as you'd like. There are no release notes or announcements, so you can just merge your changes to main and run `./script/trigger-release nightly`.
# Building Zed for Windows
> The following commands may be executed in any shell.
## Repository
Clone down the [Zed repository](https://github.com/zed-industries/zed).
## Dependencies
- Install [rustup](https://www.rust-lang.org/tools/install)
- Install either [Visual Studio](https://visualstudio.microsoft.com/downloads/) with the optional components `MSVC v*** - VS YYYY C++ x64/x86 build tools` and `MSVC v*** - VS YYYY C++ x64/x86 Spectre-mitigated libs (latest)` (`v***` is your VS version and `YYYY` is year when your VS was released. Pay attention to the architecture and change it to yours if needed.)
- Or, if you prefer to have a slimmer installer of only the MSVC compiler tools, you can install the [build tools](https://visualstudio.microsoft.com/visual-cpp-build-tools/) (+libs as above) and the "Desktop development with C++" workload.
But beware this installation is not automatically picked up by rustup. You must initialize your environment variables by first launching the "developer" shell (cmd/powershell) this installation places in the start menu or in Windows Terminal and then compile.
- Install Windows 11 or 10 SDK depending on your system, but ensure that at least `Windows 10 SDK version 2104 (10.0.20348.0)` is installed on your machine. You can download it from the [Windows SDK Archive](https://developer.microsoft.com/windows/downloads/windows-sdk/)
- Install [CMake](https://cmake.org/download) (required by [a dependency](https://docs.rs/wasmtime-c-api-impl/latest/wasmtime_c_api/)). Or you can install it through Visual Studio Installer, then manually add the `bin` directory to your `PATH`, for example: `C:\Program Files\Microsoft Visual Studio\2022\Community\Common7\IDE\CommonExtensions\Microsoft\CMake\CMake\bin`.
If you can't compile Zed, make sure that you have at least the following components installed in case of a Visual Studio installation:
```json
{
"version": "1.0",
"components": [
"Microsoft.VisualStudio.Component.CoreEditor",
"Microsoft.VisualStudio.Workload.CoreEditor",
"Microsoft.VisualStudio.Component.VC.Tools.x86.x64",
"Microsoft.VisualStudio.ComponentGroup.WebToolsExtensions.CMake",
"Microsoft.VisualStudio.Component.VC.CMake.Project",
"Microsoft.VisualStudio.Component.Windows11SDK.26100",
"Microsoft.VisualStudio.Component.VC.Runtimes.x86.x64.Spectre"
],
"extensions": []
}
```
Or if in case of just Build Tools, the following components:
```json
{
"version": "1.0",
"components": [
"Microsoft.VisualStudio.Component.Roslyn.Compiler",
"Microsoft.Component.MSBuild",
"Microsoft.VisualStudio.Component.CoreBuildTools",
"Microsoft.VisualStudio.Workload.MSBuildTools",
"Microsoft.VisualStudio.Component.Windows10SDK",
"Microsoft.VisualStudio.Component.VC.CoreBuildTools",
"Microsoft.VisualStudio.Component.VC.Tools.x86.x64",
"Microsoft.VisualStudio.Component.VC.Redist.14.Latest",
"Microsoft.VisualStudio.Component.Windows11SDK.26100",
"Microsoft.VisualStudio.Component.VC.CMake.Project",
"Microsoft.VisualStudio.Component.TextTemplating",
"Microsoft.VisualStudio.Component.VC.CoreIde",
"Microsoft.VisualStudio.ComponentGroup.NativeDesktop.Core",
"Microsoft.VisualStudio.Workload.VCTools",
"Microsoft.VisualStudio.Component.VC.Runtimes.x86.x64.Spectre"
],
"extensions": []
}
```
The list can be obtained as follows:
- Open the Visual Studio Installer
- Click on `More` in the `Installed` tab
- Click on `Export configuration`
### Backend Dependencies (optional) {#backend-dependencies}
If you are looking to develop Zed collaboration features using a local collabortation server, please see: [Local Collaboration](./local-collaboration.md) docs.
### Notes
You should modify the `pg_hba.conf` file in the `data` directory to use `trust` instead of `scram-sha-256` for the `host` method. Otherwise, the connection will fail with the error `password authentication failed`. The `pg_hba.conf` file typically locates at `C:\Program Files\PostgreSQL\17\data\pg_hba.conf`. After the modification, the file should look like this:
```conf
# IPv4 local connections:
host all all 127.0.0.1/32 trust
# IPv6 local connections:
host all all ::1/128 trust
```
Also, if you are using a non-latin Windows version, you must modify the`lc_messages` parameter in the `postgresql.conf` file in the `data` directory to `English_United States.1252` (or whatever UTF8-compatible encoding you have). Otherwise, the database will panic. The `postgresql.conf` file should look like this:
```conf
# lc_messages = 'Chinese (Simplified)_China.936' # locale for system error message strings
lc_messages = 'English_United States.1252'
```
After this, you should restart the `postgresql` service. Press the `win` key + `R` to launch the `Run` window. Type the `services.msc` and hit the `OK` button to open the Services Manager. Then, find the `postgresql-x64-XX` service, right-click on it, and select `Restart`.
## Building from source
Once you have the dependencies installed, you can build Zed using [Cargo](https://doc.rust-lang.org/cargo/).
For a debug build:
```sh
cargo run
```
For a release build:
```sh
cargo run --release
```
And to run the tests:
```sh
cargo test --workspace
```
## Installing from msys2
[MSYS2](https://msys2.org/) distribution provides Zed as a package [mingw-w64-zed](https://packages.msys2.org/base/mingw-w64-zed). The package is available for UCRT64, MINGW64 and CLANG64 repositories. To download it, run
```sh
pacman -Syu
pacman -S $MINGW_PACKAGE_PREFIX-zed
```
then you can run `zeditor` CLI. Editor executable is installed under `$MINGW_PREFIX/lib/zed` directory
You can see the [build script](https://github.com/msys2/MINGW-packages/blob/master/mingw-w64-zed/PKGBUILD) for more details on build process.
> Please, report any issue in [msys2/MINGW-packages/issues](https://github.com/msys2/MINGW-packages/issues?q=is%3Aissue+is%3Aopen+zed) first.
Note that `collab` is not supported for MSYS2.
## Troubleshooting
### Setting `RUSTFLAGS` env var breaks builds
If you set the `RUSTFLAGS` env var, it will override the `rustflags` settings in `.cargo/config.toml` which is required to properly build Zed.
Since these settings can vary from time to time, the build errors you receive may vary from linker errors, to other stranger errors.
If you'd like to add extra rust flags, you may do 1 of the following in `.cargo/config.toml`:
Add your flags in the build section
```toml
[build]
rustflags = ["-C", "symbol-mangling-version=v0", "--cfg", "tokio_unstable"]
```
Add your flags in the windows target section
```toml
[target.'cfg(target_os = "windows")']
rustflags = [
"--cfg",
"windows_slim_errors",
"-C",
"target-feature=+crt-static",
]
```
Or, you can create a new `.cargo/config.toml` in the same folder as the Zed repo (see below). This is particularly useful if you are doing CI builds since you don't have to edit the original `.cargo/config.toml`.
```
upper_dir
├── .cargo // <-- Make this folder
│ └── config.toml // <-- Make this file
└── zed
├── .cargo
│ └── config.toml
└── crates
├── assistant
└── ...
```
In the new (above) `.cargo/config.toml`, if we wanted to add `--cfg gles` to our rustflags, it would look like this
```toml
[target.'cfg(all())']
rustflags = ["--cfg", "gles"]
```
### Cargo errors claiming that a dependency is using unstable features
Try `cargo clean` and `cargo build`.
### `STATUS_ACCESS_VIOLATION`
This error can happen if you are using the "rust-lld.exe" linker. Consider trying a different linker.
If you are using a global config, consider moving the Zed repository to a nested directory and add a `.cargo/config.toml` with a custom linker config in the parent directory.
See this issue for more information [#12041](https://github.com/zed-industries/zed/issues/12041)
### Invalid RC path selected
Sometimes, depending on the security rules applied to your laptop, you may get the following error while compiling Zed:
```
error: failed to run custom build command for `zed(C:\Users\USER\src\zed\crates\zed)`
Caused by:
process didn't exit successfully: `C:\Users\USER\src\zed\target\debug\build\zed-b24f1e9300107efc\build-script-build` (exit code: 1)
--- stdout
cargo:rerun-if-changed=../../.git/logs/HEAD
cargo:rustc-env=ZED_COMMIT_SHA=25e2e9c6727ba9b77415588cfa11fd969612adb7
cargo:rustc-link-arg=/stack:8388608
cargo:rerun-if-changed=resources/windows/app-icon.ico
package.metadata.winresource does not exist
Selected RC path: 'bin\x64\rc.exe'
--- stderr
The system cannot find the path specified. (os error 3)
warning: build failed, waiting for other jobs to finish...
```
In order to fix this issue, you can manually set the `ZED_RC_TOOLKIT_PATH` environment variable to the RC toolkit path. Usually, you can set it to:
`C:\Program Files (x86)\Windows Kits\10\bin\\x64`.
See this [issue](https://github.com/zed-industries/zed/issues/18393) for more information.
### Build fails: Path too long
You may receive an error like the following when building
```
error: failed to get `pet` as a dependency of package `languages v0.1.0 (D:\a\zed-windows-builds\zed-windows-builds\crates\languages)`
Caused by:
failed to load source for dependency `pet`
Caused by:
Unable to update https://github.com/microsoft/python-environment-tools.git?rev=ffcbf3f28c46633abd5448a52b1f396c322e0d6c#ffcbf3f2
Caused by:
path too long: 'C:/Users/runneradmin/.cargo/git/checkouts/python-environment-tools-903993894b37a7d2/ffcbf3f/crates/pet-conda/tests/unix/conda_env_without_manager_but_found_in_history/some_other_location/conda_install/conda-meta/python-fastjsonschema-2.16.2-py310hca03da5_0.json'; class=Filesystem (30)
```
In order to solve this, you can enable longpath support for git and Windows.
For git: `git config --system core.longpaths true`
And for Windows with this PS command:
```powershell
New-ItemProperty -Path "HKLM:\SYSTEM\CurrentControlSet\Control\FileSystem" -Name "LongPathsEnabled" -Value 1 -PropertyType DWORD -Force
```
For more information on this, please see [win32 docs](https://learn.microsoft.com/en-us/windows/win32/fileio/maximum-file-path-limitation?tabs=powershell)
(note that you will need to restart your system after enabling longpath support)
### Graphics issues
#### Zed fails to launch
Currently, Zed uses Vulkan as its graphics API on Windows. However, Vulkan isn't always the most reliable on Windows, so if Zed fails to launch, it's likely a Vulkan-related issue.
You can check the Zed log at:
`C:\Users\YOU\AppData\Local\Zed\logs\Zed.log`
If you see messages like:
- `Zed failed to open a window: NoSupportedDeviceFound`
- `ERROR_INITIALIZATION_FAILED`
- `GPU Crashed`
- `ERROR_SURFACE_LOST_KHR`
Then Vulkan might not be working properly on your system. In most cases, updating your GPU drivers may help resolve this.
If there's nothing Vulkan-related in the logs and you happen to have Bandicam installed, try uninstalling it. Zed is currently not compatible with Bandicam.
# Diagnostics
Zed gets its diagnostics from the language servers and supports both push and pull variants of the LSP which makes it compatible with all existing language servers.
# Regular diagnostics
By default, Zed displays all diagnostics as underlined text in the editor and the scrollbar.
Editor diagnostics could be filtered with the
```json5
"diagnostics_max_severity": null
```
editor setting (possible values: `"off"`, `"error"`, `"warning"`, `"info"`, `"hint"`, `null` (default, all diagnostics)).
The scrollbar ones are configured with the
```json5
"scrollbar": {
"diagnostics": "all",
}
```
configuration (possible values: `"none"`, `"error"`, `"warning"`, `"information"`, `"all"` (default))
The diagnostics could be hovered to display a tooltip with full, rendered diagnostic message.
Or, `editor::GoToDiagnostic` and `editor::GoToPreviousDiagnostic` could be used to navigate between diagnostics in the editor, showing a popover for the currently active diagnostic.
# Inline diagnostics (Error lens)
Zed supports showing diagnostic as lens to the right of the code.
This is disabled by default, but can either be temporarily turned on (or off) using the editor menu, or permanently, using the
```json5
"diagnostics": {
"inline": {
"enabled": true,
"max_severity": null, // same values as the `diagnostics_max_severity` from the editor settings
}
}
```
# Other UI places
## Project Panel
Project panel can have its entries coloured based on the severity of the diagnostics in the file.
To configure, use
```json5
"project_panel": {
"diagnostics": "all",
}
```
configuration (possible values: `"off"`, `"errors"`, `"all"` (default))
## Editor tabs
Similar to the project panel, editor tabs can be colorized with the
```json5
"tabs": {
"show_diagnostics": "off",
}
```
configuration (possible values: `"off"` (default), `"errors"`, `"all"`)
# Environment Variables
_**Note**: The following only applies to Zed 0.152.0 and later._
Multiple features in Zed are affected by environment variables:
- Tasks
- Built-in terminal
- Look-up of language servers
- Language servers
In order to make the best use of these features, it's helpful to understand where Zed gets its environment variables from and how they're used.
## Where does Zed get its environment variables from?
How Zed was started — whether it's icon was clicked in the macOS Dock or in a Linux window manager, or whether it was started via the CLI `zed` that comes with Zed — influences which environment variables Zed can use.
### Launched from the CLI
If Zed is opened via the CLI (`zed`), it will inherit the environment variables from the surrounding shell session.
That means if you do
```
$ export MY_ENV_VAR=hello
$ zed .
```
the environment variable `MY_ENV_VAR` is now available inside Zed. For example, in the built-in terminal.
Starting with Zed 0.152.0, the CLI `zed` will _always_ pass along its environment to Zed, regardless of whether a Zed instance was previously running or not. Prior to Zed 0.152.0 this was not the case and only the first Zed instance would inherit the environment variables.
### Launched via window manager, Dock, or launcher
When Zed has been launched via the macOS Dock, or a GNOME or KDE icon on Linux, or an application launcher like Alfred or Raycast, it has no surrounding shell environment from which to inherit its environment variables.
In order to still have a useful environment, Zed spawns a login shell in the user's home directory and gets its environment. This environment is then set on the Zed _process_. That means all Zed windows and projects will inherit that home directory environment.
Since that can lead to problems for users that require different environment variables for a project (because they use `direnv`, or `asdf`, or `mise`, ... in that project), when opening project, Zed spawns another login shell. This time in the project's directory. The environment from that login shell is _not_ set on the process (because that would mean opening a new project changes the environment for all Zed windows). Instead, the environment is stored and passed along when running tasks, opening terminals, or spawning language servers.
## Where and how are environment variables used?
There are two sets of environment variables:
1. Environment variables of the Zed process
2. Environment variables stored per project
The variables from (1) are always used, since they are stored on the process itself and every spawned process (tasks, terminals, language servers, ...) will inherit them by default.
The variables from (2) are used explicitly, depending on the feature.
### Tasks
Tasks are spawned with an combined environment. In order of precedence (low to high, with the last overwriting the first):
- the Zed process environment
- if the project was opened from the CLI: the CLI environment
- if the project was not opened from the CLI: the project environment variables obtained by running a login shell in the project's root folder
- optional, explicitly configured environment in settings
### Built-in terminal
Built-in terminals, like tasks, are spawned with an combined environment. In order of precedence (low to high):
- the Zed process environment
- if the project was opened from the CLI: the CLI environment
- if the project was not opened from the CLI: the project environment variables obtained by running a login shell in the project's root folder
- optional, explicitly configured environment in settings
### Look-up of language servers
For some languages the language server adapters lookup the binary in the user's `$PATH`. Examples:
- Go
- Zig
- Rust (if [configured to do so](./languages/rust.md#binary))
- C
- TypeScript
For this look-up, Zed uses the following the environment:
- if the project was opened from the CLI: the CLI environment
- if the project was not opened from the CLI: the project environment variables obtained by running a login shell in the project's root folder
### Language servers
After looking up a language server, Zed starts them.
These language server processes always inherit Zed's process environment. But, depending on the language server look-up, additional environment variables might be set or overwrite the process environment.
- If the language server was found in the project environment's `$PATH`, then the project environment's is passed along to the language server process. Where the project environment comes from depends on how the project was opened, via CLI or not. See previous point on look-up of language servers.
- If the language servers was not found in the project environment, Zed tries to install it globally and start it globally. In that case, the process will inherit Zed's process environment, and — if the project was opened via ClI — from the CLI.
# Extensions
Zed lets you add new functionality using user-defined extensions.
- [Installing Extensions](./extensions/installing-extensions.md)
- [Developing Extensions](./extensions/developing-extensions.md)
- [Developing Language Extensions](./extensions/languages.md)
- [Developing Debugger Extensions](./extensions/debugger-extensions.md)
- [Developing Themes](./extensions/themes.md)
- [Developing Icon Themes](./extensions/icon-themes.md)
- [Developing Slash Commands](./extensions/slash-commands.md)
- [Developing MCP Servers](./extensions/mcp-extensions.md)
# Debugger Extensions
[Debug Adapter Protocol](https://microsoft.github.io/debug-adapter-protocol) Servers can be exposed as extensions for use in the [debugger](../debugger.md).
## Defining Debugger Extensions
A given extension may provide one or more DAP servers.
Each DAP server must be registered in the `extension.toml`:
```toml
[debug_adapters.my-debug-adapter]
# Optional relative path to the JSON schema for the debug adapter configuration schema. Defaults to `debug_adapter_schemas/$DEBUG_ADAPTER_NAME_ID.json`.
# Note that while this field is optional, a schema is mandatory.
schema_path = "relative/path/to/schema.json"
```
Then, in the Rust code for your extension, implement the `get_dap_binary` method on your extension:
```rust
impl zed::Extension for MyExtension {
fn get_dap_binary(
&mut self,
adapter_name: String,
config: DebugTaskDefinition,
user_provided_debug_adapter_path: Option,
worktree: &Worktree,
) -> Result;
}
```
This method should return the command to start up a debug adapter protocol server, along with any arguments or environment variables necessary for it to function.
If you need to download the DAP server from an external source—like GitHub Releases or npm—you can also do that in this function. Make sure to check for updates only periodically, as this function is called whenever a user spawns a new debug session with your debug adapter.
You must also implement `dap_request_kind`. This function is used to determine whether a given debug scenario will _launch_ a new debuggee or _attach_ to an existing one.
We also use it to determine that a given debug scenario requires running a _locator_.
```rust
impl zed::Extension for MyExtension {
fn dap_request_kind(
&mut self,
_adapter_name: String,
_config: Value,
) -> Result;
}
```
These two functions are sufficient to expose your debug adapter in `debug.json`-based user workflows, but you should strongly consider implementing `dap_config_to_scenario` as well.
```rust
impl zed::Extension for MyExtension {
fn dap_config_to_scenario(
&mut self,
_adapter_name: DebugConfig,
) -> Result;
}
```
`dap_config_to_scenario` is used when the user spawns a session via new process modal UI. At a high level, it takes a generic debug configuration (that isn't specific to any
debug adapter) and tries to turn it into a concrete debug scenario for your adapter.
Put another way, it is supposed to answer the question: "Given a program, a list of arguments, current working directory and environment variables, what would the configuration for spawning this debug adapter look like?".
## Defining Debug Locators
Zed offers an automatic way to create debug scenarios with _debug locators_.
A locator locates the debug target and figures out how to spawn a debug session for it. Thanks to locators, we can automatically convert existing user tasks (e.g. `cargo run`) and convert them into debug scenarios (e.g. `cargo build` followed by spawning a debugger with `target/debug/my_program` as the program to debug).
> Your extension can define it's own debug locators even if it does not expose a debug adapter. We strongly recommend doing so when your extension already exposes language tasks, as it allows users to spawn a debug session without having to manually configure the debug adapter.
Locators can (but don't have to) be agnostic to the debug adapter they are used with. They are simply responsible for locating the debug target and figuring out how to spawn a debug session for it. This allows for a more flexible and extensible debugging experience.
Your extension can define one or more debug locators. Each debug locator must be registered in the `extension.toml`:
```toml
[debug_locators.my-debug-locator]
```
Locators have two components.
First, each locator is ran on each available task to figure out if any of the available locators can provide a debug scenario for a given task. This is done by calling `dap_locator_create_scenario`.
```rust
impl zed::Extension for MyExtension {
fn dap_locator_create_scenario(
&mut self,
_locator_name: String,
_build_task: TaskTemplate,
_resolved_label: String,
_debug_adapter_name: String,
) -> Option;
}
```
This function should return `Some` debug scenario when that scenario defines a debugging counterpart to a given user task.
Note that a `DebugScenario` can include a [build task](../debugger.md#build-tasks). If there is one, we will execute `run_dap_locator` after a build task is finished successfully.
```rust
impl zed::Extension for MyExtension {
fn run_dap_locator(
&mut self,
_locator_name: String,
_build_task: TaskTemplate,
) -> Result;
}
```
`run_dap_locator` is useful in case you cannot determine a build target deterministically. Some build systems may produce artifacts whose names are not known up-front.
Note however that you do _not_ need to go through a 2-phase resolution; if you can determine the full debug configuration with just `dap_locator_create_scenario`, you can omit `build` property on a returned `DebugScenario`. Please also note that your locator **will be** called with tasks it's unlikely to accept; thus you should take some effort to return `None` early before performing any expensive operations.
## Available Extensions
Check out all the DAP servers that have already been exposed as extensions [on Zed's site](https://zed.dev/extensions?filter=debug-adapters).
We recommend taking a look at their repositories as a way to understand how they are generally created and structured.
## Testing
To test your new Debug Adapter Protocol server extension, you can [install it as a dev extension](./developing-extensions.md#developing-an-extension-locally).
# Developing Extensions
## Extension Capabilities
Extensions can add the following capabilities to Zed:
- [Languages](./languages.md)
- [Debuggers](./debugger-extensions.md)
- [Themes](./themes.md)
- [Icon Themes](./icon-themes.md)
- [Slash Commands](./slash-commands.md)
- [MCP Servers](./mcp-extensions.md)
## Developing an Extension Locally
Before starting to develop an extension for Zed, be sure to [install Rust via rustup](https://www.rust-lang.org/tools/install).
> Rust must be installed via rustup. If you have Rust installed via homebrew or otherwise, installing dev extensions will not work.
When developing an extension, you can use it in Zed without needing to publish it by installing it as a _dev extension_.
From the extensions page, click the `Install Dev Extension` button and select the directory containing your extension.
If you already have a published extension with the same name installed, your dev extension will override it.
## Directory Structure of a Zed Extension
A Zed extension is a Git repository that contains an `extension.toml`. This file must contain some
basic information about the extension:
```toml
id = "my-extension"
name = "My extension"
version = "0.0.1"
schema_version = 1
authors = ["Your Name "]
description = "My cool extension"
repository = "https://github.com/your-name/my-zed-extension"
```
In addition to this, there are several other optional files and directories that can be used to add functionality to a Zed extension. An example directory structure of an extension that provides all capabilities is as follows:
```
my-extension/
extension.toml
Cargo.toml
src/
lib.rs
languages/
my-language/
config.toml
highlights.scm
themes/
my-theme.json
```
## WebAssembly
Procedural parts of extensions are written in Rust and compiled to WebAssembly. To develop an extension that includes custom code, include a `Cargo.toml` like this:
```toml
[package]
name = "my-extension"
version = "0.0.1"
edition = "2021"
[lib]
crate-type = ["cdylib"]
[dependencies]
zed_extension_api = "0.1.0"
```
Use the latest version of the [`zed_extension_api`](https://crates.io/crates/zed_extension_api) available on crates.io. Make sure it's still [compatible with Zed versions](https://github.com/zed-industries/zed/blob/main/crates/extension_api#compatible-zed-versions) you want to support.
In the `src/lib.rs` file in your Rust crate you will need to define a struct for your extension and implement the `Extension` trait, as well as use the `register_extension!` macro to register your extension:
```rs
use zed_extension_api as zed;
struct MyExtension {
// ... state
}
impl zed::Extension for MyExtension {
// ...
}
zed::register_extension!(MyExtension);
```
> `stdout`/`stderr` is forwarded directly to the Zed process. In order to see `println!`/`dbg!` output from your extension, you can start Zed in your terminal with a `--foreground` flag.
## Forking and cloning the repo
1. Fork the repo
> Note: It is very helpful if you fork the `zed-industries/extensions` repo to a personal GitHub account instead of a GitHub organization, as this allows Zed staff to push any needed changes to your PR to expedite the publishing process.
2. Clone the repo to your local machine
```sh
# Substitute the url of your fork here:
# git clone https://github.com/zed-industries/extensions
cd extensions
git submodule init
git submodule update
```
## Publishing your extension
To publish an extension, open a PR to [the `zed-industries/extensions` repo](https://github.com/zed-industries/extensions).
In your PR, do the following:
1. Add your extension as a Git submodule within the `extensions/` directory
```sh
git submodule add https://github.com/your-username/foobar-zed.git extensions/foobar
git add extensions/foobar
```
> All extension submodules must use HTTPS URLs and not SSH URLS (`git@github.com`).
2. Add a new entry to the top-level `extensions.toml` file containing your extension:
```toml
[my-extension]
submodule = "extensions/my-extension"
version = "0.0.1"
```
> If your extension is in a subdirectory within the submodule you can use the `path` field to point to where the extension resides.
3. Run `pnpm sort-extensions` to ensure `extensions.toml` and `.gitmodules` are sorted
Once your PR is merged, the extension will be packaged and published to the Zed extension registry.
> Extension IDs and names should not contain `zed` or `Zed`, since they are all Zed extensions.
## Updating an extension
To update an extension, open a PR to [the `zed-industries/extensions` repo](https://github.com/zed-industries/extensions).
In your PR do the following:
1. Update the extension's submodule to the commit of the new version.
2. Update the `version` field for the extension in `extensions.toml`
- Make sure the `version` matches the one set in `extension.toml` at the particular commit.
If you'd like to automate this process, there is a [community GitHub Action](https://github.com/huacnlee/zed-extension-action) you can use.
# Icon Themes
Extensions may provide icon themes in order to change the icons Zed uses for folders and files.
## Example extension
The [Material Icon Theme](https://github.com/zed-extensions/material-icon-theme) serves as an example for the structure of an extension containing an icon theme.
## Directory structure
There are two important directories for an icon theme extension:
- `icon_themes`: This directory will contain one or more JSON files containing the icon theme definitions.
- `icons`: This directory contains the icons assets that will be distributed with the extension. You can created subdirectories in this directory, if so desired.
Each icon theme file should adhere to the JSON schema specified at [`https://zed.dev/schema/icon_themes/v0.2.0.json`](https://zed.dev/schema/icon_themes/v0.2.0.json).
Here is an example of the structure of an icon theme:
```json
{
"$schema": "https://zed.dev/schema/icon_themes/v0.2.0.json",
"name": "My Icon Theme",
"author": "Your Name",
"themes": [
{
"name": "My Icon Theme",
"appearance": "dark",
"directory_icons": {
"collapsed": "./icons/folder.svg",
"expanded": "./icons/folder-open.svg"
},
"chevron_icons": {
"collapsed": "./icons/chevron-right.svg",
"expanded": "./icons/chevron-down.svg"
},
"file_stems": {
"Makefile": "make"
},
"file_suffixes": {
"mp3": "audio",
"rs": "rust"
},
"file_icons": {
"audio": { "path": "./icons/audio.svg" },
"default": { "path": "./icons/file.svg" },
"make": { "path": "./icons/make.svg" },
"rust": { "path": "./icons/rust.svg" }
// ...
}
}
]
}
```
Each icon path is resolved relative to the root of the extension directory.
In this example, the extension would have a structure like so:
```
extension.toml
icon_themes/
my-icon-theme.json
icons/
audio.svg
chevron-down.svg
chevron-right.svg
file.svg
folder-open.svg
folder.svg
rust.svg
```
# Installing Extensions
You can search for extensions by launching the Zed Extension Gallery by pressing `cmd-shift-x` (macOS) or `ctrl-shift-x` (Linux), opening the command palette and selecting `zed: extensions` or by selecting "Zed > Extensions" from the menu bar.
Here you can view the extensions that you currently have installed or search and install new ones.
## Installation Location
- On macOS, extensions are installed in `~/Library/Application Support/Zed/extensions`.
- On Linux, they are installed in either `$XDG_DATA_HOME/zed/extensions` or `~/.local/share/zed/extensions`.
This directory contains two subdirectories:
- `installed`, which contains the source code for each extension.
- `work` which contains files created by the extension itself, such as downloaded language servers.
## Auto installing
To automate extension installation/uninstallation see the docs for [auto_install_extensions](../configuring-zed.md#auto-install-extensions).
# Language Extensions
Language support in Zed has several components:
- Language metadata and configuration
- Grammar
- Queries
- Language servers
## Language Metadata
Each language supported by Zed must be defined in a subdirectory inside the `languages` directory of your extension.
This subdirectory must contain a file called `config.toml` file with the following structure:
```toml
name = "My Language"
grammar = "my-language"
path_suffixes = ["myl"]
line_comments = ["# "]
```
- `name` (required) is the human readable name that will show up in the Select Language dropdown.
- `grammar` (required) is the name of a grammar. Grammars are registered separately, described below.
- `path_suffixes` is an array of file suffixes that should be associated with this language. Unlike `file_types` in settings, this does not support glob patterns.
- `line_comments` is an array of strings that are used to identify line comments in the language. This is used for the `editor::ToggleComments` keybind: {#kb editor::ToggleComments} for toggling lines of code.
- `tab_size` defines the indentation/tab size used for this language (default is `4`).
- `hard_tabs` whether to indent with tabs (`true`) or spaces (`false`, the default).
- `first_line_pattern` is a regular expression, that in addition to `path_suffixes` (above) or `file_types` in settings can be used to match files which should use this language. For example Zed uses this to identify Shell Scripts by matching the [shebangs lines](https://github.com/zed-industries/zed/blob/main/crates/languages/src/bash/config.toml) in the first line of a script.
- `debuggers` is an array of strings that are used to identify debuggers in the language. When launching a debugger's `New Process Modal`, Zed will order available debuggers by the order of entries in this array.
## Grammar
Zed uses the [Tree-sitter](https://tree-sitter.github.io) parsing library to provide built-in language-specific features. There are grammars available for many languages, and you can also [develop your own grammar](https://tree-sitter.github.io/tree-sitter/creating-parsers#writing-the-grammar). A growing list of Zed features are built using pattern matching over syntax trees with Tree-sitter queries. As mentioned above, every language that is defined in an extension must specify the name of a Tree-sitter grammar that is used for parsing. These grammars are then registered separately in extensions' `extension.toml` file, like this:
```toml
[grammars.gleam]
repository = "https://github.com/gleam-lang/tree-sitter-gleam"
rev = "58b7cac8fc14c92b0677c542610d8738c373fa81"
```
The `repository` field must specify a repository where the Tree-sitter grammar should be loaded from, and the `rev` field must contain a Git revision to use, such as the SHA of a Git commit. If you're developing an extension locally and want to load a grammar from the local filesystem, you can use a `file://` URL for `repository`. An extension can provide multiple grammars by referencing multiple tree-sitter repositories.
## Tree-sitter Queries
Zed uses the syntax tree produced by the [Tree-sitter](https://tree-sitter.github.io) query language to implement
several features:
- Syntax highlighting
- Bracket matching
- Code outline/structure
- Auto-indentation
- Code injections
- Syntax overrides
- Text redactions
- Runnable code detection
- Selecting classes, functions, etc.
The following sections elaborate on how [Tree-sitter queries](https://tree-sitter.github.io/tree-sitter/using-parsers#query-syntax) enable these
features in Zed, using [JSON syntax](https://www.json.org/json-en.html) as a guiding example.
### Syntax highlighting
In Tree-sitter, the `highlights.scm` file defines syntax highlighting rules for a particular syntax.
Here's an example from a `highlights.scm` for JSON:
```scheme
(string) @string
(pair
key: (string) @property.json_key)
(number) @number
```
This query marks strings, object keys, and numbers for highlighting. The following is a comprehensive list of captures supported by themes:
| Capture | Description |
| ------------------------ | -------------------------------------- |
| @attribute | Captures attributes |
| @boolean | Captures boolean values |
| @comment | Captures comments |
| @comment.doc | Captures documentation comments |
| @constant | Captures constants |
| @constructor | Captures constructors |
| @embedded | Captures embedded content |
| @emphasis | Captures emphasized text |
| @emphasis.strong | Captures strongly emphasized text |
| @enum | Captures enumerations |
| @function | Captures functions |
| @hint | Captures hints |
| @keyword | Captures keywords |
| @label | Captures labels |
| @link_text | Captures link text |
| @link_uri | Captures link URIs |
| @number | Captures numeric values |
| @operator | Captures operators |
| @predictive | Captures predictive text |
| @preproc | Captures preprocessor directives |
| @primary | Captures primary elements |
| @property | Captures properties |
| @punctuation | Captures punctuation |
| @punctuation.bracket | Captures brackets |
| @punctuation.delimiter | Captures delimiters |
| @punctuation.list_marker | Captures list markers |
| @punctuation.special | Captures special punctuation |
| @string | Captures string literals |
| @string.escape | Captures escaped characters in strings |
| @string.regex | Captures regular expressions |
| @string.special | Captures special strings |
| @string.special.symbol | Captures special symbols |
| @tag | Captures tags |
| @tag.doctype | Captures doctypes (e.g., in HTML) |
| @text.literal | Captures literal text |
| @title | Captures titles |
| @type | Captures types |
| @variable | Captures variables |
| @variable.special | Captures special variables |
| @variant | Captures variants |
### Bracket matching
The `brackets.scm` file defines matching brackets.
Here's an example from a `brackets.scm` file for JSON:
```scheme
("[" @open "]" @close)
("{" @open "}" @close)
("\"" @open "\"" @close)
```
This query identifies opening and closing brackets, braces, and quotation marks.
| Capture | Description |
| ------- | --------------------------------------------- |
| @open | Captures opening brackets, braces, and quotes |
| @close | Captures closing brackets, braces, and quotes |
### Code outline/structure
The `outline.scm` file defines the structure for the code outline.
Here's an example from an `outline.scm` file for JSON:
```scheme
(pair
key: (string (string_content) @name)) @item
```
This query captures object keys for the outline structure.
| Capture | Description |
| -------------- | ------------------------------------------------------------------------------------ |
| @name | Captures the content of object keys |
| @item | Captures the entire key-value pair |
| @context | Captures elements that provide context for the outline item |
| @context.extra | Captures additional contextual information for the outline item |
| @annotation | Captures nodes that annotate outline item (doc comments, attributes, decorators)[^1] |
[^1]: These annotations are used by Assistant when generating code modification steps.
### Auto-indentation
The `indents.scm` file defines indentation rules.
Here's an example from an `indents.scm` file for JSON:
```scheme
(array "]" @end) @indent
(object "}" @end) @indent
```
This query marks the end of arrays and objects for indentation purposes.
| Capture | Description |
| ------- | -------------------------------------------------- |
| @end | Captures closing brackets and braces |
| @indent | Captures entire arrays and objects for indentation |
### Code injections
The `injections.scm` file defines rules for embedding one language within another, such as code blocks in Markdown or SQL queries in Python strings.
Here's an example from an `injections.scm` file for Markdown:
```scheme
(fenced_code_block
(info_string
(language) @injection.language)
(code_fence_content) @injection.content)
((inline) @content
(#set! injection.language "markdown-inline"))
```
This query identifies fenced code blocks, capturing the language specified in the info string and the content within the block. It also captures inline content and sets its language to "markdown-inline".
| Capture | Description |
| ------------------- | ---------------------------------------------------------- |
| @injection.language | Captures the language identifier for a code block |
| @injection.content | Captures the content to be treated as a different language |
Note that we couldn't use JSON as an example here because it doesn't support language injections.
### Syntax overrides
The `overrides.scm` file defines syntactic _scopes_ that can be used to override certain editor settings within specific language constructs.
For example, there is a language-specific setting called `word_characters` that controls which non-alphabetic characters are considered part of a word, for example when you double click to select a variable. In JavaScript, "$" and "#" are considered word characters.
There is also a language-specific setting called `completion_query_characters` that controls which characters trigger autocomplete suggestions. In JavaScript, when your cursor is within a _string_, "-" is should be considered a completion query character. To achieve this, the JavaScript `overrides.scm` file contains the following pattern:
```scheme
[
(string)
(template_string)
] @string
```
And the JavaScript `config.toml` contains this setting:
```toml
word_characters = ["#", "$"]
[overrides.string]
completion_query_characters = ["-"]
```
You can also disable certain auto-closing brackets in a specific scope. For example, to prevent auto-closing `'` within strings, you could put the following in the JavaScript `config.toml`:
```toml
brackets = [
{ start = "'", end = "'", close = true, newline = false, not_in = ["string"] },
# other pairs...
]
```
#### Range inclusivity
By default, the ranges defined in `overrides.scm` are _exclusive_. So in the case above, if you cursor was _outside_ the quotation marks delimiting the string, the `string` scope would not take effect. Sometimes, you may want to make the range _inclusive_. You can do this by adding the `.inclusive` suffix to the capture name in the query.
For example, in JavaScript, we also disable auto-closing of single quotes within comments. And the comment scope must extend all the way to the newline after a line comment. To achieve this, the JavaScript `overrides.scm` contains the following pattern:
```scheme
(comment) @comment.inclusive
```
### Text objects
The `textobjects.scm` file defines rules for navigating by text objects. This was added in Zed v0.165 and is currently used only in Vim mode.
Vim provides two levels of granularity for navigating around files. Section-by-section with `[]` etc., and method-by-method with `]m` etc. Even languages that don't support functions and classes can work well by defining similar concepts. For example CSS defines a rule-set as a method, and a media-query as a class.
For languages with closures, these typically should not count as functions in Zed. This is best-effort however, as languages like Javascript do not syntactically differentiate syntactically between closures and top-level function declarations.
For languages with declarations like C, provide queries that match `@class.around` or `@function.around`. The `if` and `ic` text objects will default to these if there is no inside.
If you are not sure what to put in textobjects.scm, both [nvim-treesitter-textobjects](https://github.com/nvim-treesitter/nvim-treesitter-textobjects), and the [Helix editor](https://github.com/helix-editor/helix) have queries for many languages. You can refer to the Zed [built-in languages](https://github.com/zed-industries/zed/tree/main/crates/languages/src) to see how to adapt these.
| Capture | Description | Vim mode |
| ---------------- | ----------------------------------------------------------------------- | ------------------------------------------------ |
| @function.around | An entire function definition or equivalent small section of a file. | `[m`, `]m`, `[M`,`]M` motions. `af` text object |
| @function.inside | The function body (the stuff within the braces). | `if` text object |
| @class.around | An entire class definition or equivalent large section of a file. | `[[`, `]]`, `[]`, `][` motions. `ac` text object |
| @class.inside | The contents of a class definition. | `ic` text object |
| @comment.around | An entire comment (e.g. all adjacent line comments, or a block comment) | `gc` text object |
| @comment.inside | The contents of a comment | `igc` text object (rarely supported) |
For example:
```scheme
; include only the content of the method in the function
(method_definition
body: (_
"{"
(_)* @function.inside
"}")) @function.around
; match function.around for declarations with no body
(function_signature_item) @function.around
; join all adjacent comments into one
(comment)+ @comment.around
```
### Text redactions
The `redactions.scm` file defines text redaction rules. When collaborating and sharing your screen, it makes sure that certain syntax nodes are rendered in a redacted mode to avoid them from leaking.
Here's an example from a `redactions.scm` file for JSON:
```scheme
(pair value: (number) @redact)
(pair value: (string) @redact)
(array (number) @redact)
(array (string) @redact)
```
This query marks number and string values in key-value pairs and arrays for redaction.
| Capture | Description |
| ------- | ------------------------------ |
| @redact | Captures values to be redacted |
### Runnable code detection
The `runnables.scm` file defines rules for detecting runnable code.
Here's an example from an `runnables.scm` file for JSON:
```scheme
(
(document
(object
(pair
key: (string
(string_content) @_name
(#eq? @_name "scripts")
)
value: (object
(pair
key: (string (string_content) @run @script)
)
)
)
)
)
(#set! tag package-script)
(#set! tag composer-script)
)
```
This query detects runnable scripts in package.json and composer.json files.
The `@run` capture specifies where the run button should appear in the editor. Other captures, except those prefixed with an underscore, are exposed as environment variables with a prefix of `ZED_CUSTOM_$(capture_name)` when running the code.
| Capture | Description |
| ------- | ------------------------------------------------------ |
| @\_name | Captures the "scripts" key |
| @run | Captures the script name |
| @script | Also captures the script name (for different purposes) |
## Language Servers
Zed uses the [Language Server Protocol](https://microsoft.github.io/language-server-protocol/) to provide advanced language support.
An extension may provide any number of language servers. To provide a language server from your extension, add an entry to your `extension.toml` with the name of your language server and the language(s) it applies to:
```toml
[language_servers.my-language-server]
name = "My Language LSP"
languages = ["My Language"]
```
Then, in the Rust code for your extension, implement the `language_server_command` method on your extension:
```rust
impl zed::Extension for MyExtension {
fn language_server_command(
&mut self,
language_server_id: &LanguageServerId,
worktree: &zed::Worktree,
) -> Result {
Ok(zed::Command {
command: get_path_to_language_server_executable()?,
args: get_args_for_language_server()?,
env: get_env_for_language_server()?,
})
}
}
```
You can customize the handling of the language server using several optional methods in the `Extension` trait. For example, you can control how completions are styled using the `label_for_completion` method. For a complete list of methods, see the [API docs for the Zed extension API](https://docs.rs/zed_extension_api).
### Multi-Language Support
If your language server supports additional languages, you can use `language_ids` to map Zed `languages` to the desired [LSP-specific `languageId`](https://microsoft.github.io/language-server-protocol/specifications/lsp/3.17/specification/#textDocumentItem) identifiers:
```toml
[language-servers.my-language-server]
name = "Whatever LSP"
languages = ["JavaScript", "JSX", "HTML", "CSS"]
[language-servers.my-language-server.language_ids]
"JavaScript" = "javascript"
"JSX" = "javascriptreact"
"TSX" = "typescriptreact"
"HTML" = "html"
"CSS" = "css"
```
# MCP Server Extensions
[Model Context Protocol servers](../ai/mcp.md) can be exposed as extensions for use in the Agent Panel.
## Defining MCP Extensions
A given extension may provide one or more MCP servers.
Each MCP server must be registered in the `extension.toml`:
```toml
[context_servers.my-context-server]
```
Then, in the Rust code for your extension, implement the `context_server_command` method on your extension:
```rust
impl zed::Extension for MyExtension {
fn context_server_command(
&mut self,
context_server_id: &ContextServerId,
project: &zed::Project,
) -> Result {
Ok(zed::Command {
command: get_path_to_context_server_executable()?,
args: get_args_for_context_server()?,
env: get_env_for_context_server()?,
})
}
}
```
This method should return the command to start up an MCP server, along with any arguments or environment variables necessary for it to function.
If you need to download the MCP server from an external source—like GitHub Releases or npm—you can also do that in this function.
## Available Extensions
Check out all the MCP servers that have already been exposed as extensions [on Zed's site](https://zed.dev/extensions?filter=context-servers).
We recommend taking a look at their repositories as a way to understand how they are generally created and structured.
## Testing
To test your new MCP server extension, you can [install it as a dev extension](./developing-extensions.md#developing-an-extension-locally).
# Slash Commands
Extensions may provide slash commands for use in the Assistant.
## Example extension
To see a working example of an extension that provides slash commands, check out the [`slash-commands-example` extension](https://github.com/zed-industries/zed/tree/main/extensions/slash-commands-example).
This extension can be [installed as a dev extension](./developing-extensions.md#developing-an-extension-locally) if you want to try it out for yourself.
## Defining slash commands
A given extension may provide one or more slash commands. Each slash command must be registered in the `extension.toml`.
For example, here is an extension that provides two slash commands: `/echo` and `/pick-one`:
```toml
[slash_commands.echo]
description = "echoes the provided input"
requires_argument = true
[slash_commands.pick-one]
description = "pick one of three options"
requires_argument = true
```
Each slash command may define the following properties:
- `description`: A description of the slash command that will be shown when completing available commands.
- `requires_argument`: Indicates whether a slash command requires at least one argument to run.
## Implementing slash command behavior
To implement behavior for your slash commands, implement `run_slash_command` for your extension.
This method accepts the slash command that will be run, the list of arguments passed to it, and an optional `Worktree`.
This method returns `SlashCommandOutput`, which contains the textual output of the command in the `text` field. The output may also define `SlashCommandOutputSection`s that contain ranges into the output. These sections are then rendered as creases in the Assistant's context editor.
Your extension should `match` on the command name (without the leading `/`) and then execute behavior accordingly:
```rs
impl zed::Extension for MyExtension {
fn run_slash_command(
&self,
command: SlashCommand,
args: Vec,
_worktree: Option<&Worktree>,
) -> Result {
match command.name.as_str() {
"echo" => {
if args.is_empty() {
return Err("nothing to echo".to_string());
}
let text = args.join(" ");
Ok(SlashCommandOutput {
sections: vec![SlashCommandOutputSection {
range: (0..text.len()).into(),
label: "Echo".to_string(),
}],
text,
})
}
"pick-one" => {
let Some(selection) = args.first() else {
return Err("no option selected".to_string());
};
match selection.as_str() {
"option-1" | "option-2" | "option-3" => {}
invalid_option => {
return Err(format!("{invalid_option} is not a valid option"));
}
}
let text = format!("You chose {selection}.");
Ok(SlashCommandOutput {
sections: vec![SlashCommandOutputSection {
range: (0..text.len()).into(),
label: format!("Pick One: {selection}"),
}],
text,
})
}
command => Err(format!("unknown slash command: \"{command}\"")),
}
}
}
```
## Auto-completing slash command arguments
For slash commands that have arguments, you may also choose to implement `complete_slash_command_argument` to provide completions for your slash commands.
This method accepts the slash command that will be run and the list of arguments passed to it. It returns a list of `SlashCommandArgumentCompletion`s that will be shown in the completion menu.
A `SlashCommandArgumentCompletion` consists of the following properties:
- `label`: The label that will be shown in the completion menu.
- `new_text`: The text that will be inserted when the completion is accepted.
- `run_command`: Whether the slash command will be run when the completion is accepted.
Once again, your extension should `match` on the command name (without the leading `/`) and return the desired argument completions:
```rs
impl zed::Extension for MyExtension {
fn complete_slash_command_argument(
&self,
command: SlashCommand,
_args: Vec,
) -> Result, String> {
match command.name.as_str() {
"echo" => Ok(vec![]),
"pick-one" => Ok(vec![
SlashCommandArgumentCompletion {
label: "Option One".to_string(),
new_text: "option-1".to_string(),
run_command: true,
},
SlashCommandArgumentCompletion {
label: "Option Two".to_string(),
new_text: "option-2".to_string(),
run_command: true,
},
SlashCommandArgumentCompletion {
label: "Option Three".to_string(),
new_text: "option-3".to_string(),
run_command: true,
},
]),
command => Err(format!("unknown slash command: \"{command}\"")),
}
}
}
```
# Themes
The `themes` directory in an extension should contain one or more theme files.
Each theme file should adhere to the JSON schema specified at [`https://zed.dev/schema/themes/v0.2.0.json`](https://zed.dev/schema/themes/v0.2.0.json).
See [this blog post](https://zed.dev/blog/user-themes-now-in-preview) for more details about creating themes.
## Theme JSON Structure
The structure of a Zed theme is defined in the [Zed Theme JSON Schema](https://zed.dev/schema/themes/v0.2.0.json).
A Zed theme consists of a Theme Family object including:
- `name`: The name for the theme family
- `author`: The name of the author of the theme family
- `themes`: An array of Themes belonging to the theme family
The core components a Theme object include:
1. Theme Metadata:
- `name`: The name of the theme
- `appearance`: Either "light" or "dark"
2. Style Properties under the `style`, such as:
- `background`: The main background color
- `foreground`: The main text color
- `accent`: The accent color used for highlighting and emphasis
3. Syntax Highlighting:
- `syntax`: An object containing color definitions for various syntax elements (e.g., keywords, strings, comments)
4. UI Elements:
- Colors for various UI components such as:
- `element.background`: Background color for UI elements
- `border`: Border colors for different states (normal, focused, selected)
- `text`: Text colors for different states (normal, muted, accent)
5. Editor-specific Colors:
- Colors for editor-related elements such as:
- `editor.background`: Editor background color
- `editor.gutter`: Gutter colors
- `editor.line_number`: Line number colors
6. Terminal Colors:
- ANSI color definitions for the integrated terminal
We recommend looking at our [existing themes](https://github.com/zed-industries/zed/tree/main/assets/themes) to get a more comprehensive idea of what can be styled.
# Fonts
Zed ships two fonts: Zed Plex Mono and Zed Plex Sans. These are based on IBM Plex Mono and IBM Plex Sans, respectively.
## Settings
- Buffer fonts
- `buffer-font-family`
- `buffer-font-features`
- `buffer-font-size`
- `buffer-line-height`
- UI fonts
- `ui_font_family`
- `ui_font_fallbacks`
- `ui_font_features`
- `ui_font_weight`
- `ui_font_size`
- Terminal fonts
- `terminal.font-size`
- `terminal.font-family`
- `terminal.font-features`
## Old Zed Fonts
Previously, Zed shipped with `Zed Mono` and `Zed Sans`, customized versions of the [Iosevka](https://typeof.net/Iosevka/) typeface. You can find more about them in the [zed-fonts](https://github.com/zed-industries/zed-fonts/) repository.
Here's how you can use the old Zed fonts instead of `Zed Plex Mono` and `Zed Plex Sans`:
1. Download [zed-app-fonts-1.2.0.zip](https://github.com/zed-industries/zed-fonts/releases/download/1.2.0/zed-app-fonts-1.2.0.zip) from the [zed-fonts releases](https://github.com/zed-industries/zed-fonts/releases) page.
2. Open macOS `Font Book.app`
3. Unzip the file and drag the `ttf` files into the Font Book app.
4. Update your settings `ui_font_family` and `buffer_font_family` to use `Zed Mono` or `Zed Sans` in your `settings.json` file.
```json
{
"ui_font_family": "Zed Sans Extended",
"buffer_font_family": "Zed Mono Extend",
"terminal": {
"font-family": "Zed Mono Extended"
}
}
```
5. Note there will be red squiggles under the font name. (this is a bug, but harmless.)
# Getting Started
Welcome to Zed! We are excited to have you. Here is a jumping-off point to getting started.
## Download Zed
### macOS
Get the latest stable builds via [the download page](https://zed.dev/download). If you want to download our preview build, you can find it on its [releases page](https://zed.dev/releases/preview). After the first manual installation, Zed will periodically check for install updates.
You can also install Zed stable via Homebrew:
```sh
brew install --cask zed
```
As well as Zed preview:
```sh
brew install --cask zed@preview
```
### Linux
For most Linux users, the easiest way to install Zed is through our installation script:
```sh
curl -f https://zed.dev/install.sh | sh
```
If you'd like to help us test our new features, you can also install our preview build:
```sh
curl -f https://zed.dev/install.sh | ZED_CHANNEL=preview sh
```
This script supports `x86_64` and `AArch64`, as well as common Linux distributions: Ubuntu, Arch, Debian, RedHat, CentOS, Fedora, and more.
If Zed is installed using this installation script, it can be uninstalled at any time by running the shell command `zed --uninstall`. The shell will then prompt you whether you'd like to keep your preferences or delete them. After making a choice, you should see a message that Zed was successfully uninstalled.
If this script is insufficient for your use case, you run into problems running Zed, or there are errors in uninstalling Zed, please see our [Linux-specific documentation](./linux.md).
## Command Palette
The Command Palette is the main way to access pretty much any functionality that's available in Zed. Its keybinding is the first one you should make yourself familiar with. To open it, hit: {#kb command_palette::Toggle}.
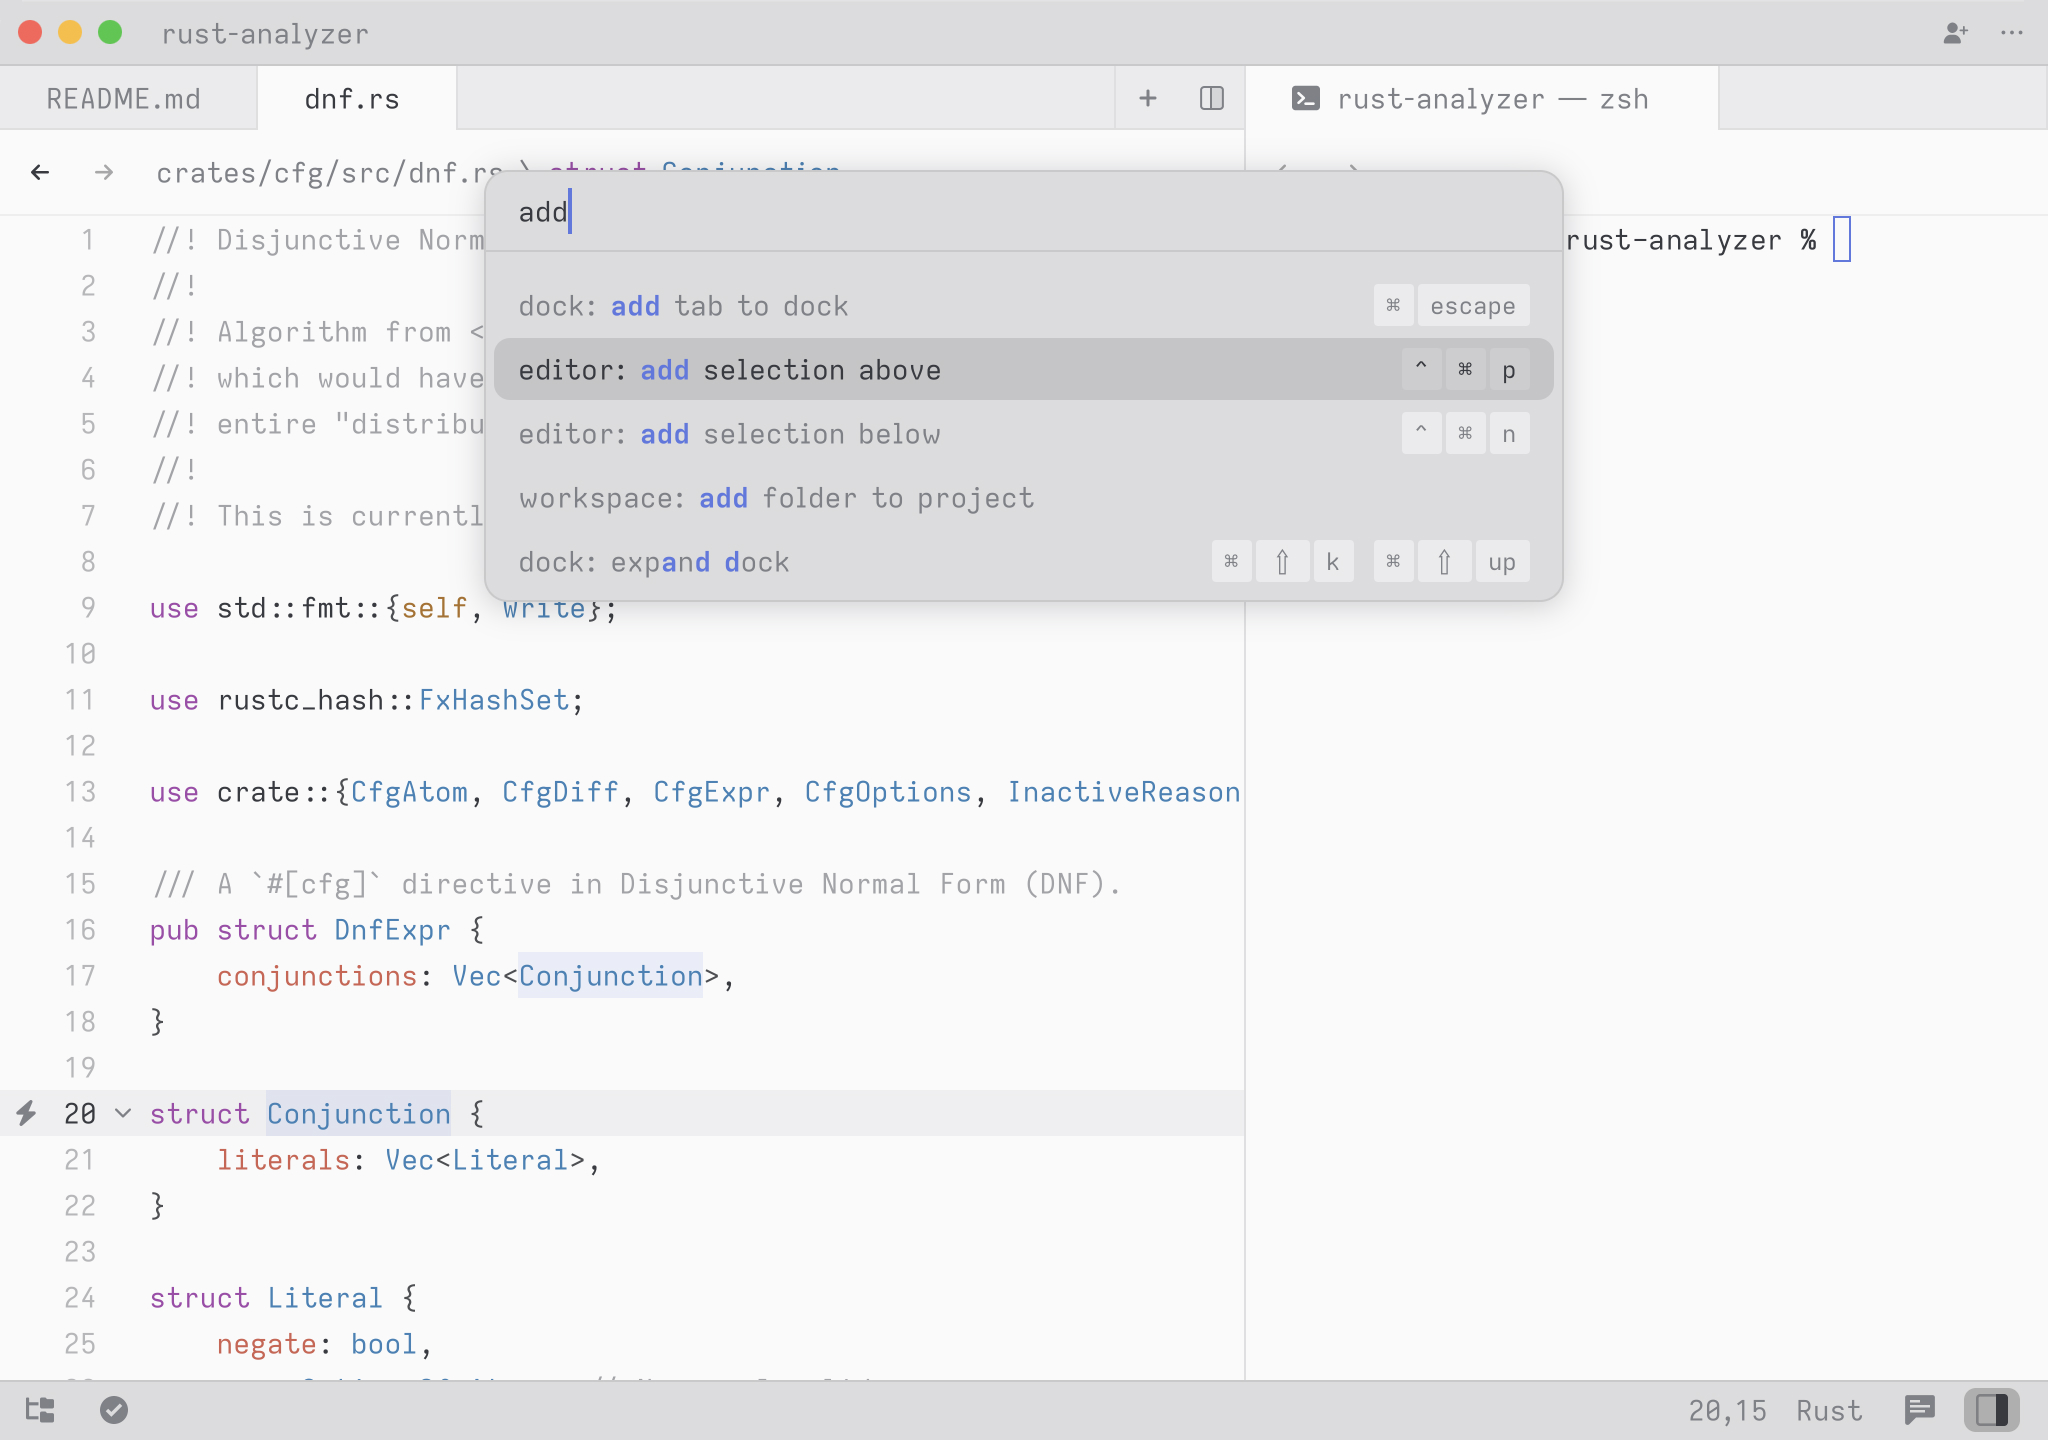
Try it! Open the Command Palette and type in `new file`. You should see the list of commands being filtered down to `workspace: new file`. Hit return and you end up with a new buffer.
Any time you see instructions that include commands of the form `zed: ...` or `editor: ...` and so on that means you need to execute them in the Command Palette.
## CLI
Zed has a CLI, on Linux this should come with the distribution's Zed package (binary name can vary from distribution to distribution, `zed` will be used later for brevity).
For macOS, the CLI comes in the same package with the editor binary, and could be installed into the system with the `cli: install` Zed command which will create a symlink to the `/usr/local/bin/zed`.
It can also be built from source out of the `cli` crate in this repository.
Use `zed --help` to see the full list of capabilities.
General highlights:
- Opening another empty Zed window: `zed`
- Opening a file or directory in Zed: `zed /path/to/entry` (use `-n` to open in the new window)
- Reading from stdin: `ps axf | zed -`
- Starting Zed with logs in the terminal: `zed --foreground`
- Uninstalling Zed and all its related files: `zed --uninstall`
## Configure Zed
To open your custom settings to set things like fonts, formatting settings, per-language settings, and more, use the {#kb zed::OpenSettings} keybinding.
To see all available settings, open the Command Palette with {#kb command_palette::Toggle} and search for `zed: open default settings`.
You can also check them all out in the [Configuring Zed](./configuring-zed.md) documentation.
## Configure AI in Zed
Zed smoothly integrates LLMs in multiple ways across the editor.
Visit [the AI overview page](./ai/overview.md) to learn how to quickly get started with LLMs on Zed.
## Set up your key bindings
To open your custom keymap to add your key bindings, use the {#kb zed::OpenKeymap} keybinding.
To access the default key binding set, open the Command Palette with {#kb command_palette::Toggle} and search for "zed: open default keymap". See [Key Bindings](./key-bindings.md) for more info.
# Git
Zed currently offers a set of fundamental Git features, with support coming in the future for more advanced ones, like conflict resolution tools, line by line staging, and more.
Here's an overview of all currently supported features:
- Committing
- Staging, pushing, pulling, and fetching
- Project Diff: A multibuffer view of all changes
- Diff indicators in buffers and editor scrollbars
- Inline diff toggle and reverts in the editor for unstaged changes
- Git status in the Project Panel
- Branch creating and switching
- Git blame viewing
## Git Panel
The Git Panel gives you a birds-eye view of the state of your working tree and of Git's staging area.
You can open the Git Panel using {#action git_panel::ToggleFocus}, or by clicking the Git icon in the status bar.
In the panel you can see the state of your project at a glance—which repository and branch are active, what files have changed and the current staging state of each file.
Zed monitors your repository so that changes you make on the command line are instantly reflected.
## Project Diff
You can see all of the changes captured by Git in Zed by opening the Project Diff ({#kb git::Diff}), accessible via the {#action git::Diff} action in the Command Palette or the Git Panel.
All of the changes displayed in the Project Diff behave exactly the same as any other multibuffer: they are all editable excerpts of files.
You can stage or unstage each hunk as well as a whole file by hitting the buttons on the tab bar or their corresponding keybindings.
## Fetch, push, and pull
Fetch, push, or pull from your Git repository in Zed via the buttons available on the Git Panel or via the Command Palette by looking at the respective actions: {#action git::Fetch}, {#action git::Push}, and {#action git::Pull}.
## Staging Workflow
Zed has two primary staging workflows, using either the Project Diff or the panel directly.
### Using the Project Diff
In the Project Diff view, you can focus on each hunk and stage them individually by clicking on the tab bar buttons or via the keybindings {#action git::StageAndNext} ({#kb git::StageAndNext}).
Similarly, stage all hunks at the same time with the {#action git::StageAll} ({#kb git::StageAll}) keybinding and then immediately commit with {#action git::Commit} ({#kb git::Commit}).
### Using the Git Panel
From the panel, you can simply type a commit message and hit the commit button, or {#action git::Commit}. This will automatically stage all tracked files (indicated by a `[·]` in the entry's checkbox) and commit them.
Entries can be staged using each individual entry's checkbox. All changes can be staged using the button at the top of the panel, or {#action git::StageAll}.
## Committing
Zed offers two commit textareas:
1. The first one is available right at the bottom of the Git Panel. Hitting {#kb git::Commit} immediately commits all of your staged changes.
2. The second is available via the action {#action git::ExpandCommitEditor} or via hitting the {#kb git::ExpandCommitEditor} while focused in the Git Panel commit textarea.
### Undoing a Commit
As soon as you commit in Zed, in the Git Panel, you'll see a bar right under the commit textarea, which will show the recently submitted commit.
In there, you can use the "Uncommit" button, which performs the `git reset HEADˆ--soft` command.
## AI Support in Git
Zed currently supports LLM-powered commit message generation.
You can ask AI to generate a commit message by focusing on the message editor within the Git Panel and either clicking on the pencil icon in the bottom left, or reaching for the {#action git::GenerateCommitMessage} ({#kb git::GenerateCommitMessage}) keybinding.
> Note that you need to have an LLM provider configured. Visit [the AI configuration page](./ai/configuration.md) to learn how to do so.
You can specify your preferred model to use by providing a `commit_message_model` agent setting. See [Feature-specific models](./ai/configuration.md#feature-specific-models) for more information.
```json
{
"agent": {
"version": "2",
"commit_message_model": {
"provider": "anthropic",
"model": "claude-3-5-haiku"
}
}
}
```
More advanced AI integration with Git features may come in the future.
## Git Integrations
Zed integrates with popular Git hosting services to ensure that Git commit hashes and references to Issues, Pull Requests, and Merge Requests become clickable links.
Zed currently supports links to the hosted versions of
[GitHub](https://github.com),
[GitLab](https://gitlab.com),
[Bitbucket](https://bitbucket.org),
[SourceHut](https://sr.ht) and
[Codeberg](https://codeberg.org).
Zed also has a Copy Permalink feature to create a permanent link to a code snippet on your Git hosting service.
These links are useful for sharing a specific line or range of lines in a file at a specific commit.
Trigger this action via the [Command Palette](./getting-started.md#command-palette) (search for `permalink`),
by creating a [custom key bindings](key-bindings.md#custom-key-bindings) to the
`editor::CopyPermalinkToLine` or `editor::OpenPermalinkToLine` actions
or by simply right clicking and selecting `Copy Permalink` with line(s) selected in your editor.
## Diff Hunk Keyboard Shortcuts
When viewing files with changes, Zed displays diff hunks that can be expanded or collapsed for detailed review:
- **Expand all diff hunks**: {#action editor::ExpandAllDiffHunks} ({#kb editor::ExpandAllDiffHunks})
- **Collapse all diff hunks**: Press `Escape` (bound to {#action editor::Cancel})
- **Toggle selected diff hunks**: {#action editor::ToggleSelectedDiffHunks} ({#kb editor::ToggleSelectedDiffHunks})
- **Navigate between hunks**: {#action editor::GoToHunk} and {#action editor::GoToPreviousHunk}
> **Tip:** The `Escape` key is the quickest way to collapse all expanded diff hunks and return to an overview of your changes.
## Action Reference
| Action | Keybinding |
| ----------------------------------------- | ------------------------------------- |
| {#action git::Add} | {#kb git::Add} |
| {#action git::StageAll} | {#kb git::StageAll} |
| {#action git::UnstageAll} | {#kb git::UnstageAll} |
| {#action git::ToggleStaged} | {#kb git::ToggleStaged} |
| {#action git::StageAndNext} | {#kb git::StageAndNext} |
| {#action git::UnstageAndNext} | {#kb git::UnstageAndNext} |
| {#action git::Commit} | {#kb git::Commit} |
| {#action git::ExpandCommitEditor} | {#kb git::ExpandCommitEditor} |
| {#action git::Push} | {#kb git::Push} |
| {#action git::ForcePush} | {#kb git::ForcePush} |
| {#action git::Pull} | {#kb git::Pull} |
| {#action git::Fetch} | {#kb git::Fetch} |
| {#action git::Diff} | {#kb git::Diff} |
| {#action git::Restore} | {#kb git::Restore} |
| {#action git::RestoreFile} | {#kb git::RestoreFile} |
| {#action git::Branch} | {#kb git::Branch} |
| {#action git::Switch} | {#kb git::Switch} |
| {#action git::CheckoutBranch} | {#kb git::CheckoutBranch} |
| {#action git::Blame} | {#kb git::Blame} |
| {#action editor::ToggleGitBlameInline} | {#kb editor::ToggleGitBlameInline} |
| {#action editor::ExpandAllDiffHunks} | {#kb editor::ExpandAllDiffHunks} |
| {#action editor::ToggleSelectedDiffHunks} | {#kb editor::ToggleSelectedDiffHunks} |
> Not all actions have default keybindings, but can be bound by [customizing your keymap](./key-bindings.md#user-keymaps).
## Git CLI Configuration
If you would like to also use Zed for your [git commit message editor](https://git-scm.com/book/en/v2/Customizing-Git-Git-Configuration#_core_editor) when committing from the command line you can use `zed --wait`:
```sh
git config --global core.editor "zed --wait"
```
Or add the following to your shell environment (in `~/.zshrc`, `~/.bashrc`, etc):
```sh
export GIT_EDITOR="zed --wait"
```
# Globs
Zed supports the use of [glob]() patterns that are the formal name for Unix shell-style path matching wildcards like `*.md` or `docs/src/**/*.md` supported by sh, bash, zsh, etc. A glob is similar but distinct from a [regex (regular expression)](https://en.wikipedia.org/wiki/Regular_expression). You may be In Zed these are commonly used when matching filenames.
## Glob Flavor
Zed uses two different rust crates for matching glob patterns:
- [ignore crate](https://docs.rs/ignore/latest/ignore/) for matching glob patterns stored in `.gitignore` files
- [glob crate](https://docs.rs/glob/latest/glob/) for matching file paths in Zed
While simple expressions are portable across environments (e.g. running `ls *.py` or `*.tmp` in a gitignore) there is significant divergence in the support for and syntax of more advanced features varies (character classes, exclusions, `**`, etc) across implementations. For the rest of this document we will be describing globs as supported in Zed via the `glob` crate implementation. Please see [References](#references) below for documentation links for glob pattern syntax for `.gitignore`, shells and other programming languages.
The `glob` crate is implemented entirely in rust and does not rely on the `glob` / `fnmatch` interfaces provided by your platforms libc. This means that globs in Zed should behave similarly with across platforms.
## Introduction
A glob "pattern" is used to match a file name or complete file path. For example, when using "Search all files" {#kb project_search::ToggleFocus} you can click the funnel shaped Toggle Filters" button or {#kb project_search::ToggleFilters} and it will show additional search fields for "Include" and "Exclude" which support specifying glob patterns for matching file paths and file names.
When creating a glob pattern you can use one or multiple special characters:
| Special Character | Meaning |
| ----------------- | ----------------------------------------------------------------- |
| `?` | Matches any single character |
| `*` | Matches any (possibly empty) sequence of characters |
| `**` | Matches the current directory and arbitrary subdirectories |
| `[abc]` | Matches any one character in the brackets |
| `[a-z]` | Matches any of a range of characters (ordered by Unicode) |
| `[!...]` | The negation of `[...]` (matches a character not in the brackets) |
Notes:
1. Shell-style brace-expansions like `{a,b,c}` are not supported.
2. To match a literal `-` character inside brackets it must come first `[-abc]` or last `[abc-]`.
3. To match the literal `[` character use `[[]` or put it as the first character in the group `[[abc]`.
4. To match the literal `]` character use `[]]` or put it as the last character in the group `[abc]]`.
## Examples
### Matching file extensions
If you wanted to only search Markdown files add `*.md` to the "Include" search field.
### Case insensitive matching
Globs in Zed are case-sensitive, so `*.c` will not match `main.C` (even on case-insensitive filesystems like HFS+/APFS on MacOS). Instead use brackets to match characters. So instead of `*.c` use `*.[cC]`.
### Matching directories
If you wanted to search the [zed repository](https://github.com/zed-industries/zed) for examples of [Configuring Language Servers](https://zed.dev/docs/configuring-languages#configuring-language-servers) (under `"lsp"` in Zed settings.json) you could search for `"lsp"` and in the "Include" filter specify `docs/**/*.md`. This would only match files whose path was under the `docs` directory or any nested subdirectories `**/` of that folder with a filename that ends in `.md`.
If instead you wanted to restrict yourself only to [Zed Language-Specific Documentation](https://zed.dev/docs/languages) pages you could define a narrower pattern of: `docs/src/languages/*.md` this would match [`docs/src/languages/rust.md`](https://github.com/zed-industries/zed/blob/main/docs/src/languages/rust.md) and [`docs/src/languages/cpp.md`](https://github.com/zed-industries/zed/blob/main/docs/src/languages/cpp.md) but not [`docs/src/configuring-languages.md`](https://github.com/zed-industries/zed/blob/main/docs/src/configuring-languages.md).
### Implicit Wildcards
When using the "Include" / "Exclude" filters on a Project Search each glob is wrapped in implicit wildcards. For example to exclude any files with license in the path or filename from your search just type type `license` in the exclude box. Behind the scenes Zed transforms `license` to `**license**`. This means that files named `license.*`, `*.license` or inside a `license` subdirectory will all be filtered out. This enables users to easily filter for `*.ts` without having to remember to type `**/*.ts` every time.
Alternatively, if in your Zed settings you wanted a [`file_types`](./configuring-zed.md#file-types) override which only applied to a certain directory you must explicitly include the wildcard globs. For example, if you had a directory of template files with the `html` extension that you wanted to recognize as Jinja2 template you could use the following:
```json
{
"file_types": {
"C++": ["[cC]"],
"Jinja2": ["**/templates/*.html"]
}
}
```
## References
While globs in Zed are implemented as described above, when writing code using globs in other languages, please reference your platform's glob documentation:
- [MacOS fnmatch](https://developer.apple.com/library/archive/documentation/System/Conceptual/ManPages_iPhoneOS/man3/fnmatch.3.html) (BSD C Standard Library)
- [Linux fnmatch](https://www.gnu.org/software/libc/manual/html_node/Wildcard-Matching.html) (GNU C Standard Library)
- [POSIX fnmatch](https://pubs.opengroup.org/onlinepubs/9699919799/functions/fnmatch.html) (POSIX Specification)
- [node-glob](https://github.com/isaacs/node-glob) (Node.js `glob` package)
- [Python glob](https://docs.python.org/3/library/glob.html) (Python Standard Library)
- [Golang glob](https://pkg.go.dev/path/filepath#Match) (Go Standard Library)
- [gitignore patterns](https://git-scm.com/docs/gitignore) (Gitignore Pattern Format)
- [PowerShell: About Wildcards](https://learn.microsoft.com/en-us/powershell/module/microsoft.powershell.core/about/about_wildcards) (Wildcards in PowerShell)
# Icon Themes
Zed comes with a built-in icon theme, with more icon themes available as extensions.
## Selecting an Icon Theme
See what icon themes are installed and preview them via the Icon Theme Selector, which you can open from the command palette with "icon theme selector: toggle".
Navigating through the icon theme list by moving up and down will change the icon theme in real time and hitting enter will save it to your settings file.
## Installing more Icon Themes
More icon themes are available from the Extensions page, which you can access via the command palette with "zed: Extensions" or the [Zed website](https://zed.dev/extensions).
## Configuring Icon Themes
Your selected icon theme is stored in your settings file. You can open your settings file from the command palette with "zed: open settings" (bound to `cmd-,` on macOS and `ctrl-,` on Linux).
Just like with themes, Zed allows for configuring different icon themes for light and dark mode. You can set the mode to `"light"` or `"dark"` to ignore the current system mode.
```json
{
"icon_theme": {
"mode": "system",
"light": "Light Icon Theme",
"dark": "Dark Icon Theme"
}
}
```
## Icon Theme Development
See: [Developing Zed Icon Themes](./extensions/icon-themes.md)
# Key bindings
Zed has a very customizable key binding system — you can tweak everything to work exactly how your fingers expect!
## Predefined keymaps
If you're used to a specific editor's defaults you can set a `base_keymap` in your [settings file](./configuring-zed.md). We currently have:
- VSCode (default)
- Atom
- Emacs (Beta)
- JetBrains
- SublimeText
- TextMate
- None (disables _all_ key bindings)
You can also enable `vim_mode`, which adds vim bindings too.
## User keymaps
Zed reads your keymap from `~/.config/zed/keymap.json`. You can open the file within Zed with {#kb zed::OpenKeymap}, or via `zed: Open Keymap` in the command palette.
The file contains a JSON array of objects with `"bindings"`. If no `"context"` is set the bindings are always active. If it is set the binding is only active when the [context matches](#contexts).
Within each binding section a [key sequence](#keybinding-syntax) is mapped to an [action](#actions). If conflicts are detected they are resolved as [described below](#precedence).
If you are using a non-QWERTY, Latin-character keyboard, you may want to set `use_key_equivalents` to `true`. See [Non-QWERTY keyboards](#non-qwerty-keyboards) for more information.
For example:
```json
[
{
"bindings": {
"ctrl-right": "editor::SelectLargerSyntaxNode",
"ctrl-left": "editor::SelectSmallerSyntaxNode"
}
},
{
"context": "ProjectPanel && not_editing",
"bindings": {
"o": "project_panel::Open"
}
}
]
```
You can see all of Zed's default bindings in the default keymaps for [MacOS](https://github.com/zed-industries/zed/blob/main/assets/keymaps/default-macos.json) or [Linux](https://github.com/zed-industries/zed/blob/main/assets/keymaps/default-linux.json).
If you want to debug problems with custom keymaps you can use `dev: Open Key Context View` from the command palette. Please file [an issue](https://github.com/zed-industries/zed) if you run into something you think should work but isn't.
### Keybinding syntax
Zed has the ability to match against not just a single keypress, but a sequence of keys typed in order. Each key in the `"bindings"` map is a sequence of keypresses separated with a space.
Each keypress is a sequence of modifiers followed by a key. The modifiers are:
- `ctrl-` The control key
- `cmd-`, `win-` or `super-` for the platform modifier (Command on macOS, Windows key on Windows, and the Super key on Linux).
- `alt-` for alt (option on macOS)
- `shift-` The shift key
- `fn-` The function key
- `secondary-` Equivalent to `cmd` when Zed is running on macOS and `ctrl` when on Windows and Linux
The keys can be any single unicode codepoint that your keyboard generates (for example `a`, `0`, `£` or `ç`), or any named key (`tab`, `f1`, `shift`, or `cmd`). If you are using a non-Latin layout (e.g. Cyrillic), you can bind either to the cyrillic character, or the latin character that key generates with `cmd` pressed.
A few examples:
```json
"bindings": {
"cmd-k cmd-s": "zed::OpenKeymap", // matches ⌘-k then ⌘-s
"space e": "editor::Complete", // type space then e
"ç": "editor::Complete", // matches ⌥-c
"shift shift": "file_finder::Toggle", // matches pressing and releasing shift twice
}
```
The `shift-` modifier can only be used in combination with a letter to indicate the uppercase version. For example `shift-g` matches typing `G`. Although on many keyboards shift is used to type punctuation characters like `(`, the keypress is not considered to be modified and so `shift-(` does not match.
The `alt-` modifier can be used on many layouts to generate a different key. For example on macOS US keyboard the combination `alt-c` types `ç`. You can match against either in your keymap file, though by convention Zed spells this combination as `alt-c`.
It is possible to match against typing a modifier key on its own. For example `shift shift` can be used to implement JetBrains search everywhere shortcut. In this case the binding happens on key release instead of keypress.
### Contexts
If a binding group has a `"context"` key it will be matched against the currently active contexts in Zed.
Zed's contexts make up a tree, with the root being `Workspace`. Workspaces contain Panes and Panels, and Panes contain Editors, etc. The easiest way to see what contexts are active at a given moment is the key context view, which you can get to with `dev: Open Key Context View` in the command palette.
For example:
```
# in an editor, it might look like this:
Workspace os=macos keyboard_layout=com.apple.keylayout.QWERTY
Pane
Editor mode=full extension=md inline_completion vim_mode=insert
# in the project panel
Workspace os=macos
Dock
ProjectPanel not_editing
```
Context expressions can contain the following syntax:
- `X && Y`, `X || Y` to and/or two conditions
- `!X` to check that a condition is false
- `(X)` for grouping
- `X > Y` to match if an ancestor in the tree matches X and this layer matches Y.
For example:
- `"context": "Editor"` - matches any editor (including inline inputs)
- `"context": "Editor && mode=full"` - matches the main editors used for editing code
- `"context": "!Editor && !Terminal"` - matches anywhere except where an Editor or Terminal is focused
- `"context": "os=macos > Editor"` - matches any editor on macOS.
It's worth noting that attributes are only available on the node they are defined on. This means that if you want to (for example) only enable a keybinding when the debugger is stopped in vim normal mode, you need to do `debugger_stopped > vim_mode == normal`.
Note: Before Zed v0.197.x, the ! operator only looked at one node at a time, and `>` meant "parent" not "ancestor". This meant that `!Editor` would match the context `Workspace > Pane > Editor`, because (confusingly) the Pane matches `!Editor`, and that `os=macos > Editor` did not match the context `Workspace > Pane > Editor` because of the intermediate `Pane` node.
If you're using Vim mode, we have information on how [vim modes influence the context](./vim.md#contexts)
### Actions
Pretty much all of Zed's functionality is exposed as actions. Although there is
no explicitly documented list, you can find most of them by searching in the
command palette, by looking in the default keymaps for
[MacOS](https://github.com/zed-industries/zed/blob/main/assets/keymaps/default-macos.json)
or
[Linux](https://github.com/zed-industries/zed/blob/main/assets/keymaps/default-linux.json), or by using Zed's autocomplete in your keymap file.
Most actions do not require any arguments, and so you can bind them as strings: `"ctrl-a": "language_selector::Toggle"`. Some require a single argument, and must be bound as an array: `"cmd-1": ["workspace::ActivatePane", 0]`. Some actions require multiple arguments, and are bound as an array of a string and an object: `"ctrl-a": ["pane::DeploySearch", { "replace_enabled": true }]`.
### Precedence
When multiple keybindings have the same keystroke and are active at the same time, precedence is resolved in two ways:
- Bindings that match on lower nodes in the context tree win. This means that if you have a binding with a context of `Editor` it will take precedence over a binding with a context of `Workspace`. Bindings with no context match at the lowest level in the tree.
- If there are multiple bindings that match at the same level in the tree, then the binding defined later takes precedence. As user keybindings are loaded after system keybindings, this allows user bindings to take precedence over builtin keybindings.
The other kind of conflict that arises is when you have two bindings, one of which is a prefix of the other. For example if you have `"ctrl-w":"editor::DeleteToNextWordEnd"` and `"ctrl-w left":"editor::DeleteToEndOfLine"`.
When this happens, and both bindings are active in the current context, Zed will wait for 1 second after you type `ctrl-w` to see if you're about to type `left`. If you don't type anything, or if you type a different key, then `DeleteToNextWordEnd` will be triggered. If you do, then `DeleteToEndOfLine` will be triggered.
### Non-QWERTY keyboards
Zed's support for non-QWERTY keyboards is still a work in progress.
If your keyboard can type the full ASCII ranges (DVORAK, COLEMAK, etc.) then shortcuts should work as you expect.
Otherwise, read on...
#### macOS
On Cyrillic, Hebrew, Armenian, and other keyboards that are mostly non-ASCII; macOS automatically maps keys to the ASCII range when `cmd` is held. Zed takes this a step further and it can always match key-presses against either the ASCII layout, or the real layout regardless of modifiers, and regardless of the `use_key_equivalents` setting. For example in Thai, pressing `ctrl-ๆ` will match bindings associated with `ctrl-q` or `ctrl-ๆ`
On keyboards that support extended Latin alphabets (French AZERTY, German QWERTZ, etc.) it is often not possible to type the entire ASCII range without `option`. This introduces an ambiguity, `option-2` produces `@`. To ensure that all the builtin keyboard shortcuts can still be typed on these keyboards we move key-bindings around. For example, shortcuts bound to `@` on QWERTY are moved to `"` on a Spanish layout. This mapping is based on the macOS system defaults and can be seen by running `dev: Open Key Context View` from the command palette.
If you are defining shortcuts in your personal keymap, you can opt into the key equivalent mapping by setting `use_key_equivalents` to `true` in your keymap:
```json
[
{
"use_key_equivalents": true,
"bindings": {
"ctrl->": "editor::Indent" // parsed as ctrl-: when a German QWERTZ keyboard is active
}
}
]
```
### Linux
Since v0.196.0 on Linux if the key that you type doesn't produce an ASCII character then we use the QWERTY-layout equivalent key for keyboard shortcuts. This means that many shortcuts can be typed on many layouts.
We do not yet move shortcuts around to ensure that all the builtin shortcuts can be typed on every layout; so if there are some ASCII characters that cannot be typed, and your keyboard layout has different ASCII characters on the same keys as would be needed to type them, you may need to add custom key bindings to make this work. We do intend to fix this at some point, and help is very much wanted!
## Tips and tricks
### Disabling a binding
If you'd like a given binding to do nothing in a given context you can use
`null` as the action. This is useful if you hit the keybinding by accident and
want to disable it, or if you want to type the character that would be typed by
the sequence, or if you want to disable multikey bindings starting with that key.
```json
[
{
"context": "Workspace",
"bindings": {
"cmd-r": null // cmd-r will do nothing when the Workspace context is active
}
}
]
```
A `null` binding follows the same precedence rules as normal actions. So disables all bindings that would match further up in the tree too. If you'd like a binding that matches further up in the tree to take precedence over a lower binding, you need to rebind it to the action you want in the context you want.
This is useful for preventing Zed from falling back to a default keybinding when the action you specified is conditional and propagates. For example, `buffer_search::DeployReplace` only triggers when the search bar is not in view. If the search bar is in view, it would propagate and trigger the default action set for that binding, such as opening the right dock. To prevent this from happening:
```json
[
{
"context": "Workspace",
"bindings": {
"cmd-r": null // cmd-r will do nothing when the search bar is in view
}
},
{
"context": "Workspace",
"bindings": {
"cmd-r": "buffer_search::DeployReplace" // cmd-r will deploy replace when the search bar is not in view
}
}
]
```
### Remapping keys
A common request is to be able to map from a single keystroke to a sequence. You can do this with the `workspace::SendKeystrokes` action.
```json
[
{
"bindings": {
"alt-down": ["workspace::SendKeystrokes", "down down down down"],
"cmd-alt-c": [
"workspace::SendKeystrokes",
"cmd-shift-p copy relative path enter"
],
"cmd-alt-r": ["workspace::SendKeystrokes", "cmd-p README enter"]
}
},
{
"context": "Editor && vim_mode == insert",
"bindings": {
"j k": ["workspace::SendKeystrokes", "escape"]
}
}
]
```
There are some limitations to this, notably:
- Any asynchronous operation will not happen until after all your key bindings have been dispatched. For example this means that while you can use a binding to open a file (as in the `cmd-alt-r` example) you cannot send further keystrokes and hope to have them interpreted by the new view.
- Other examples of asynchronous things are: opening the command palette, communicating with a language server, changing the language of a buffer, anything that hits the network.
- There is a limit of 100 simulated keys at a time.
The argument to `SendKeystrokes` is a space-separated list of keystrokes (using the same syntax as above). Due to the way that keystrokes are parsed, any segment that is not recognized as a keypress will be sent verbatim to the currently focused input field.
If the argument to `SendKeystrokes` contains the binding used to trigger it, it will use the next-highest-precedence definition of that binding. This allows you to extend the default behavior of a key binding.
### Forward keys to terminal
If you're on Linux or Windows, you might find yourself wanting to forward key combinations to the built-in terminal instead of them being handled by Zed.
For example, `ctrl-n` creates a new tab in Zed on Linux. If you want to send `ctrl-n` to the built-in terminal when it's focused, add the following to your keymap:
```json
{
"context": "Terminal",
"bindings": {
"ctrl-n": ["terminal::SendKeystroke", "ctrl-n"]
}
}
```
### Task Key bindings
You can also bind keys to launch Zed Tasks defined in your tasks.json.
See the [tasks documentation](tasks.md#custom-keybindings-for-tasks) for more.
# Language Support in Zed
Zed supports hundreds of programming languages and text formats.
Some work out-of-the box and others rely on 3rd party extensions.
> The ones included out-of-the-box, natively built into Zed, are marked with \*.
## Languages with Documentation
- [Ansible](./languages/ansible.md)
- [AsciiDoc](./languages/asciidoc.md)
- [Astro](./languages/astro.md)
- [Bash](./languages/bash.md)
- [Biome](./languages/biome.md)
- [C](./languages/c.md) \*
- [C++](./languages/cpp.md) \*
- [C#](./languages/csharp.md)
- [Clojure](./languages/clojure.md)
- [CSS](./languages/css.md) \*
- [Dart](./languages/dart.md)
- [Deno](./languages/deno.md)
- [Diff](./languages/diff.md) \*
- [Docker](./languages/docker.md)
- [Elixir](./languages/elixir.md)
- [Elm](./languages/elm.md)
- [Emmet](./languages/emmet.md)
- [Erlang](./languages/erlang.md)
- [Fish](./languages/fish.md)
- [GDScript](./languages/gdscript.md)
- [Gleam](./languages/gleam.md)
- [GLSL](./languages/glsl.md)
- [Go](./languages/go.md) \*
- [Groovy](./languages/groovy.md)
- [Haskell](./languages/haskell.md)
- [Helm](./languages/helm.md)
- [HTML](./languages/html.md)
- [Java](./languages/java.md)
- [JavaScript](./languages/javascript.md) \*
- [Julia](./languages/julia.md)
- [JSON](./languages/json.md) \*
- [Jsonnet](./languages/jsonnet.md)
- [Kotlin](./languages/kotlin.md)
- [Lua](./languages/lua.md)
- [Luau](./languages/luau.md)
- [Makefile](./languages/makefile.md)
- [Markdown](./languages/markdown.md) \*
- [Nim](./languages/nim.md)
- [OCaml](./languages/ocaml.md)
- [PHP](./languages/php.md)
- [Prisma](./languages/prisma.md)
- [Proto](./languages/proto.md)
- [PureScript](./languages/purescript.md)
- [Python](./languages/python.md) \*
- [R](./languages/r.md)
- [Rego](./languages/rego.md)
- [ReStructuredText](./languages/rst.md)
- [Racket](./languages/racket.md)
- [Roc](./languages/roc.md)
- [Ruby](./languages/ruby.md)
- [Rust](./languages/rust.md) \* (Zed's written in Rust)
- [Scala](./languages/scala.md)
- [Scheme](./languages/scheme.md)
- [Shell Script](./languages/sh.md)
- [Svelte](./languages/svelte.md)
- [Swift](./languages/swift.md)
- [Tailwind CSS](./languages/tailwindcss.md) \*
- [Terraform](./languages/terraform.md)
- [TOML](./languages/toml.md)
- [TypeScript](./languages/typescript.md) \*
- [Uiua](./languages/uiua.md)
- [Vue](./languages/vue.md)
- [XML](./languages/xml.md)
- [YAML](./languages/yaml.md) \*
- [Yara](./languages/yarn.md)
- [Yarn](./languages/yarn.md)
- [Zig](./languages/zig.md)
## Additional Community Language Extensions
- [Ada](https://github.com/wisn/zed-ada-language)
- [Aiken](https://github.com/aiken-lang/zed-aiken)
- [Amber](https://github.com/amber-lang/zed-amber-extension)
- [Assembly](https://github.com/DevBlocky/zed-asm)
- [AWK](https://github.com/dangh/zed-awk)
- [Beancount](https://github.com/zed-extensions/beancount)
- [Bend](https://github.com/mrpedrobraga/zed-bend)
- [Blade](https://github.com/bajrangCoder/zed-laravel-blade)
- [Blueprint](https://github.com/tfuxu/zed-blueprint)
- [BQN](https://github.com/DavidZwitser/zed-bqn)
- [Brainfuck](https://github.com/JosephTLyons/zed-brainfuck)
- [Cadence](https://github.com/janezpodhostnik/cadence.zed)
- [Cairo](https://github.com/trbutler4/zed-cairo)
- [Cap'n Proto](https://github.com/cmackenzie1/zed-capnp)
- [Cedar](https://github.com/chrnorm/zed-cedar)
- [CFEngine policy language](https://github.com/olehermanse/zed-cfengine)
- [CSV](https://github.com/huacnlee/zed-csv)
- [Cucumber/Gherkin](https://github.com/thlcodes/zed-extension-cucumber)
- [CUE](https://github.com/jkasky/zed-cue)
- [Curry](https://github.com/fwcd/zed-curry)
- [D](https://github.com/staysail/zed-d)
- [Database Markup Language (DBML)](https://github.com/shuklaayush/zed-dbml)
- [Earthfile](https://github.com/glehmann/earthfile.zed)
- [EJS template](https://github.com/dangh/zed-ejs)
- [Elisp](https://github.com/JosephTLyons/zed-elisp)
- [Ember](https://github.com/jylamont/zed-ember)
- [Env](https://github.com/zarifpour/zed-env)
- [Exograph](https://github.com/exograph/zed-extension)
- [Fortran](https://github.com/Xavier-Maruff/zed-fortran)
- [F#](https://github.com/nathanjcollins/zed-fsharp)
- [Gemini gemtext](https://github.com/clseibold/gemini-zed)
- [Git Firefly](https://github.com/d1y/git_firefly)
- [GraphQL](https://github.com/11bit/zed-extension-graphql)
- [Groq](https://github.com/juice49/zed-groq)
- [INI](https://github.com/bajrangCoder/zed-ini)
- [Java](https://github.com/zed-extensions/java)
- [Justfiles](https://github.com/jackTabsCode/zed-just)
- [LaTeX](https://github.com/rzukic/zed-latex)
- [Ledger](https://github.com/mrkstwrt/zed-ledger)
- [Less](https://github.com/jimliang/zed-less)
- [LilyPond](https://github.com/nwhetsell/lilypond-zed-extension)
- [Liquid](https://github.com/TheBeyondGroup/zed-shopify-liquid)
- [Log](https://github.com/evrensen467/zed-log)
- [Lox](https://github.com/arian81/zed-lox)
- [Markdown Oxide](https://github.com/Feel-ix-343/markdown-oxide-zed)
- [Marksman](https://github.com/vitallium/zed-marksman)
- [Matlab](https://github.com/rzukic/zed-matlab)
- [Meson](https://github.com/hqnna/zed-meson)
- [Navi](https://github.com/navi-language/zed-navi)
- [NeoCMake](https://github.com/k0tran/zed_neocmake)
- [Nginx](https://github.com/d1y/nginx-zed)
- [Nim](https://github.com/foxoman/zed-nim)
- [Nix](https://github.com/zed-extensions/nix)
- [Noir](https://github.com/shuklaayush/zed-noir)
- [Nu](https://github.com/zed-extensions/nu)
- [Odin](https://github.com/rxptr/zed-odin)
- [Pact](https://github.com/kadena-community/pact-zed)
- [Pest](https://github.com/pest-parser/zed-pest)
- [PICA200 assembly](https://github.com/Squareheron942/zed-pica200)
- [Pkl](https://github.com/Moshyfawn/pkl-zed)
- [PlaydateSDK](https://github.com/notpeter/playdate-zed-extension)
- [QML](https://github.com/lkroll/zed-qml)
- [Rainbow CSV](https://github.com/weartist/zed-rainbow-csv)
- [Rego](https://github.com/StyraInc/zed-rego)
- [Rescript](https://github.com/humaans/rescript-zed)
- [Roclang](https://github.com/h2000/zed-roc)
- [Ron](https://github.com/onbjerg/zed-ron)
- [Metals](https://github.com/scalameta/metals-zed)
- [SCSS](https://github.com/bajrangCoder/zed-scss)
- [Slim](https://github.com/calmyournerves/zed-slim)
- [Slint](https://gitlab.com/flukejones/zed-slint)
- [Smithy](https://github.com/joshrutkowski/zed-smithy)
- [Solidity](https://github.com/zarifpour/zed-solidity)
- [SQL](https://github.com/evrensen467/zed-sql)
- [Strace](https://github.com/sigmaSd/zed-strace)
- [Swift](https://github.com/zed-extensions/swift)
- [Templ](https://github.com/makifdb/zed-templ)
- [Tmux](https://github.com/dangh/zed-tmux)
- [Twig](https://github.com/YussufSassi/zed-twig)
- [Typst](https://github.com/WeetHet/typst.zed)
- [Unison](https://github.com/zetashift/unison-zed)
- [UnoCSS](https://github.com/bajrangCoder/zed-unocss)
- [Vlang](https://github.com/lv37/zed-v)
- [Vala](https://github.com/FyraLabs/zed-vala)
- [Vale](https://github.com/koozz/zed-vale)
- [Verilog](https://github.com/someone13574/zed-verilog-extension)
- [VHS](https://github.com/eth0net/zed-vhs)
- [Wgsl](https://github.com/luan/zed-wgsl)
- [WIT](https://github.com/valentinegb/zed-wit)
# Ansible
Support for Ansible in Zed is provided via a community-maintained [Ansible extension](https://github.com/kartikvashistha/zed-ansible).
- Tree-sitter: [zed-industries/tree-sitter-yaml](https://github.com/zed-industries/tree-sitter-yaml)
- Language Server: [ansible/vscode-ansible](https://github.com/ansible/vscode-ansible/tree/main/packages/ansible-language-server)
## Setup
### File detection
To avoid mishandling non-Ansible YAML files, the Ansible Language is not associated with any file extensions by default. To change this behavior you can add a `"file_types"` section to Zed settings inside your project (`.zed/settings.json`) or your Zed user settings (`~/.config/zed/settings.json`) to match your folder/naming conventions. For example:
```json
"file_types": {
"Ansible": [
"**.ansible.yml",
"**.ansible.yaml",
"**/defaults/*.yml",
"**/defaults/*.yaml",
"**/meta/*.yml",
"**/meta/*.yaml",
"**/tasks/*.yml",
"**/tasks/*.yaml",
"**/handlers/*.yml",
"**/handlers/*.yaml",
"**/group_vars/*.yml",
"**/group_vars/*.yaml",
"**/host_vars/*.yml",
"**/host_vars/*.yaml",
"**/playbooks/*.yml",
"**/playbooks/*.yaml",
"**playbook*.yml",
"**playbook*.yaml"
]
}
```
Feel free to modify this list as per your needs.
#### Inventory
If your inventory file is in the YAML format, you can either:
- Append the `ansible-lint` inventory json schema to it via the following comment at the top of your inventory file:
```yml
# yaml-language-server: $schema=https://raw.githubusercontent.com/ansible/ansible-lint/main/src/ansiblelint/schemas/inventory.json
```
- Or configure the yaml language server settings to set this schema for all your inventory files, that match your inventory pattern, under your Zed settings ([ref](https://zed.dev/docs/languages/yaml)):
```json
"lsp": {
"yaml-language-server": {
"settings": {
"yaml": {
"schemas": {
"https://raw.githubusercontent.com/ansible/ansible-lint/main/src/ansiblelint/schemas/inventory.json": [
"./inventory/*.yaml",
"hosts.yml",
]
}
}
}
}
},
```
### LSP Configuration
By default, the following default config is passed to the Ansible language server. It conveniently mirrors the defaults set by [nvim-lspconfig](https://github.com/neovim/nvim-lspconfig/blob/03bc581e05e81d33808b42b2d7e76d70adb3b595/lua/lspconfig/configs/ansiblels.lua) for the Ansible language server:
```json
{
"ansible": {
"ansible": {
"path": "ansible"
},
"executionEnvironment": {
"enabled": false
},
"python": {
"interpreterPath": "python3"
},
"validation": {
"enabled": true,
"lint": {
"enabled": true,
"path": "ansible-lint"
}
}
}
}
```
> [!NOTE]
> In order for linting to work, ensure that `ansible-lint` is installed and discoverable on your PATH
When desired, any of the above default settings can be overridden under the `"lsp"` section of your Zed settings file. For example:
```json
"lsp": {
// Note, the Zed Ansible extension prefixes all settings with `ansible`
// so instead of using `ansible.ansible.path` use `ansible.path`.
"ansible-language-server": {
"settings": {
"ansible": {
"path": "ansible"
},
"executionEnvironment": {
"enabled": false
},
"python": {
"interpreterPath": "python3"
},
"validation": {
"enabled": false, // disable validation
"lint": {
"enabled": false, // disable ansible-lint
"path": "ansible-lint"
}
}
}
}
}
```
A full list of options/settings, that can be passed to the server, can be found at the project's page [here](https://github.com/ansible/vscode-ansible/blob/5a89836d66d470fb9d20e7ea8aa2af96f12f61fb/docs/als/settings.md).
Feel free to modify option values as needed.
# AsciiDoc
AsciiDoc language support in Zed is provided by the community-maintained [AsciiDoc extension](https://github.com/andreicek/zed-asciidoc).
Report issues to: [https://github.com/andreicek/zed-asciidoc/issues](https://github.com/andreicek/zed-asciidoc/issues)
- Tree-sitter: [cathaysia/tree-sitter-asciidoc](https://github.com/cathaysia/tree-sitter-asciidoc)
# Astro
Astro support is available through the [Astro extension](https://github.com/zed-extensions/astro).
- Tree-sitter: [virchau13/tree-sitter-astro](https://github.com/virchau13/tree-sitter-astro)
- Language Server: [withastro/language-tools](https://github.com/withastro/language-tools)
# Bash
Bash language support in Zed is provided by the community-maintained [Basher extension](https://github.com/d1y/bash.zed).
Report issues to: [https://github.com/d1y/bash.zed/issues](https://github.com/d1y/bash.zed/issues)
- Tree-sitter: [tree-sitter/tree-sitter-bash](https://github.com/tree-sitter/tree-sitter-bash)
- Language Server: [bash-lsp/bash-language-server](https://github.com/bash-lsp/bash-language-server)
## Configuration
When `shellcheck` is available `bash-language-server` will use it internally to provide diagnostics.
### Install `shellcheck`:
```sh
brew install shellcheck # macOS (HomeBrew)
apt-get install shellcheck # Ubuntu/Debian
pacman -S shellcheck # ArchLinux
dnf install shellcheck # Fedora
yum install shellcheck # CentOS/RHEL
zypper install shellcheck # openSUSE
choco install shellcheck # Windows (Chocolatey)
```
And verify it is available from your path:
```sh
which shellcheck
shellcheck --version
```
If you wish to customize the warnings/errors reported you just need to create a `.shellcheckrc` file. You can do this in the root of your project or in your home directory (`~/.shellcheckrc`). See: [shellcheck documentation](https://github.com/koalaman/shellcheck/wiki/Ignore#ignoring-one-or-more-types-of-errors-forever) for more.
### See also:
- [Zed Docs: Language Support: Shell Scripts](./sh.md)
# Biome
[Biome](https://biomejs.dev/) support in Zed is provided by the community-maintained [Biome extension](https://github.com/biomejs/biome-zed).
Report issues to: [https://github.com/biomejs/biome-zed/issues](https://github.com/biomejs/biome-zed/issues)
- Language Server: [biomejs/biome](https://github.com/biomejs/biome)
## Biome Language Support
The Biome extension includes support for the following languages:
- JavaScript
- TypeScript
- JSX
- TSX
- JSON
- JSONC
- Vue.js
- Astro
- Svelte
- CSS
## Configuration
By default, the `biome.json` file is required to be in the root of the workspace.
```json
{
"$schema": "https://biomejs.dev/schemas/1.8.3/schema.json"
}
```
For a full list of `biome.json` options see [Biome Configuration](https://biomejs.dev/reference/configuration/) documentation.
See the [Biome Zed Extension README](https://github.com/biomejs/biome-zed) for a complete list of features and configuration options.
# C
C support is available natively in Zed.
- Tree-sitter: [tree-sitter/tree-sitter-c](https://github.com/tree-sitter/tree-sitter-c)
- Language Server: [clangd/clangd](https://github.com/clangd/clangd)
- Debug Adapter: [CodeLLDB](https://github.com/vadimcn) (primary), [GDB](https://sourceware.org/gdb/) (secondary, not available on Apple silicon)
## Clangd: Force detect as C
Clangd out of the box assumes mixed C++/C projects. If you have a C-only project you may wish to instruct clangd to all files as C using the `-xc` flag. To do this, create a `.clangd` file in the root of your project with the following:
```yaml
CompileFlags:
Add: [-xc]
```
By default clang and gcc by will recognize `*.C` and `*.H` (uppercase extensions) as C++ and not C and so Zed too follows this convention. If you are working with a C-only project (perhaps one with legacy uppercase pathing like `FILENAME.C`) you can override this behavior by adding this to your settings:
```json
{
"file_types": {
"C": ["C", "H"]
}
}
```
## Formatting
By default Zed will use the `clangd` language server for formatting C code. The Clangd is the same as the `clang-format` CLI tool. To configure this you can add a `.clang-format` file. For example:
```yaml
---
BasedOnStyle: GNU
IndentWidth: 2
---
```
See [Clang-Format Style Options](https://clang.llvm.org/docs/ClangFormatStyleOptions.html) for a complete list of options.
You can trigger formatting via {#kb editor::Format} or the `editor: format` action from the command palette or by adding `format_on_save` to your Zed settings:
```json
"languages": {
"C": {
"format_on_save": "on",
"tab_size": 2
}
}
```
## Compile Commands
For some projects Clangd requires a `compile_commands.json` file to properly analyze your project. This file contains the compilation database that tells clangd how your project should be built.
### CMake Compile Commands
With CMake, you can generate `compile_commands.json` automatically by adding the following line to your `CMakeLists.txt`:
```cmake
set(CMAKE_EXPORT_COMPILE_COMMANDS ON)
```
After building your project, CMake will generate the `compile_commands.json` file in the build directory and clangd will automatically pick it up.
## Debugging
You can use CodeLLDB or GDB to debug native binaries. (Make sure that your build process passes `-g` to the C compiler, so that debug information is included in the resulting binary.) See below for examples of debug configurations that you can add to `.zed/debug.json`.
### Build and Debug Binary
```json
[
{
"label": "Debug native binary",
"build": {
"command": "make",
"args": ["-j8"],
"cwd": "$ZED_WORKTREE_ROOT"
}
"program": "$ZED_WORKTREE_ROOT/build/prog",
"request": "launch",
"adapter": "CodeLLDB"
}
]
```
# Clojure
Clojure support is available through the [Clojure extension](https://github.com/zed-extensions/clojure).
- Tree-sitter: [prcastro/tree-sitter-clojure](https://github.com/prcastro/tree-sitter-clojure)
- Language Server: [clojure-lsp/clojure-lsp](https://github.com/clojure-lsp/clojure-lsp)
# C++
C++ support is available natively in Zed.
- Tree-sitter: [tree-sitter/tree-sitter-cpp](https://github.com/tree-sitter/tree-sitter-cpp)
- Language Server: [clangd/clangd](https://github.com/clangd/clangd)
## Binary
You can configure which `clangd` binary Zed should use.
To use a binary in a custom location, add the following to your `settings.json`:
```json
{
"lsp": {
"clangd": {
"binary": {
"path": "/path/to/clangd",
"arguments": []
}
}
}
}
```
If you want to disable Zed looking for a `clangd` binary, you can set `ignore_system_version` to `true`:
```json
{
"lsp": {
"clangd": {
"binary": {
"ignore_system_version": true
}
}
}
}
```
## Arguments
You can pass any number of arguments to clangd. To see a full set of available options, run `clangd --help` from the command line. For example with `--function-arg-placeholders=0` completions contain only parentheses for function calls, while the default (`--function-arg-placeholders=1`) completions also contain placeholders for method parameters.
```json
{
"lsp": {
"clangd": {
"binary": {
"path": "/path/to/clangd",
"arguments": ["--function-arg-placeholders=0"]
}
}
}
}
```
## Formatting
By default Zed will use the `clangd` language server for formatting C++ code. The Clangd is the same as the `clang-format` CLI tool. To configure this you can add a `.clang-format` file. For example:
```yaml
---
BasedOnStyle: LLVM
IndentWidth: 4
---
Language: Cpp
# Force pointers to the type for C++.
DerivePointerAlignment: false
PointerAlignment: Left
---
```
See [Clang-Format Style Options](https://clang.llvm.org/docs/ClangFormatStyleOptions.html) for a complete list of options.
You can trigger formatting via {#kb editor::Format} or the `editor: format` action from the command palette or by adding `format_on_save` to your Zed settings:
```json
"languages": {
"C++": {
"format_on_save": "on",
"tab_size": 2
}
}
```
## More server configuration
In the root of your project, it is generally common to create a `.clangd` file to set extra configuration.
```text
CompileFlags:
Add:
- "--include-directory=/path/to/include"
Diagnostics:
MissingIncludes: Strict
UnusedIncludes: Strict
```
For more advanced usage of clangd configuration file, take a look into their [official page](https://clangd.llvm.org/config.html).
## Compile Commands
For some projects Clangd requires a `compile_commands.json` file to properly analyze your project. This file contains the compilation database that tells clangd how your project should be built.
### CMake Compile Commands
With CMake, you can generate `compile_commands.json` automatically by adding the following line to your `CMakeLists.txt`:
```cmake
set(CMAKE_EXPORT_COMPILE_COMMANDS ON)
```
After building your project, CMake will generate the `compile_commands.json` file in the build directory and clangd will automatically pick it up.
## Debugging
You can use CodeLLDB or GDB to debug native binaries. (Make sure that your build process passes `-g` to the C++ compiler, so that debug information is included in the resulting binary.) See below for examples of debug configurations that you can add to `.zed/debug.json`.
### Build and Debug Binary
```json
[
{
"label": "Debug native binary",
"build": {
"command": "make",
"args": ["-j8"],
"cwd": "$ZED_WORKTREE_ROOT"
}
"program": "$ZED_WORKTREE_ROOT/build/prog",
"request": "launch",
"adapter": "CodeLLDB"
}
]
```
# C#
Note language name is "CSharp" for settings not "C#'
C# support is available through the [C# extension](https://github.com/zed-extensions/csharp).
- Tree-sitter: [tree-sitter/tree-sitter-c-sharp](https://github.com/tree-sitter/tree-sitter-c-sharp)
- Language Server: [OmniSharp/omnisharp-roslyn](https://github.com/OmniSharp/omnisharp-roslyn)
## Configuration
The `OmniSharp` binary can be configured in a Zed settings file with:
```json
{
"lsp": {
"omnisharp": {
"binary": {
"path": "/path/to/OmniSharp",
"arguments": ["optional", "additional", "args", "-lsp"]
}
}
}
}
```
# CSS
Zed has built-in support for CSS.
- Tree-sitter: [tree-sitter/tree-sitter-css](https://github.com/tree-sitter/tree-sitter-css)
- Language Servers:
- [microsoft/vscode-html-languageservice](https://github.com/microsoft/vscode-html-languageservice)
- [tailwindcss-language-server](https://github.com/tailwindlabs/tailwindcss-intellisense)
## Tailwind CSS
Zed also supports [Tailwind CSS](./tailwindcss.md) out-of-the-box for languages and frameworks like JavaScript, Astro, Svelte, and more.
## Recommended Reading
- [HTML](./html.md)
- [TypeScript](./typescript.md)
- [JavaScript](./javascript.md)
# Dart
Dart support is available through the [Dart extension](https://github.com/zed-extensions/dart).
- Tree-sitter: [UserNobody14/tree-sitter-dart](https://github.com/UserNobody14/tree-sitter-dart)
- Language Server: [dart language-server](https://github.com/dart-lang/sdk)
## Pre-requisites
You will need to install the Dart SDK.
You can install dart from [dart.dev/get-dart](https://dart.dev/get-dart) or via the [Flutter Version Management CLI (fvm)](https://fvm.app/documentation/getting-started/installation)
## Configuration
The dart extension requires no configuration if you have `dart` in your path:
```sh
which dart
dart --version
```
If you would like to use a specific dart binary or use dart via FVM you can specify the `dart` binary in your Zed settings.jsons file:
```json
{
"lsp": {
"dart": {
"binary": {
"path": "/opt/homebrew/bin/fvm",
"arguments": ["dart", "language-server", "--protocol=lsp"]
}
}
}
}
```
### Formatting
Dart by-default uses a very conservative maximum line length (80). If you would like the dart LSP to permit a longer line length when auto-formatting, add the following to your Zed settings.json:
```json
{
"lsp": {
"dart": {
"settings": {
"lineLength": 140
}
}
}
}
```
Please see the Dart documentation for more information on [dart language-server capabilities](https://github.com/dart-lang/sdk/blob/main/pkg/analysis_server/tool/lsp_spec/README.md).
# Deno
Deno support is available through the [Deno extension](https://github.com/zed-extensions/deno).
- Language server: [Deno Language Server](https://docs.deno.com/runtime/manual/advanced/language_server/overview/)
## Deno Configuration
To use the Deno Language Server with TypeScript and TSX files, you will likely wish to disable the default language servers and enable deno by adding the following to your settings.json:
```json
{
"lsp": {
"deno": {
"settings": {
"deno": {
"enable": true
}
}
}
},
"languages": {
"JavaScript": {
"language_servers": [
"deno",
"!typescript-language-server",
"!vtsls",
"!eslint"
],
"formatter": "language_server"
},
"TypeScript": {
"language_servers": [
"deno",
"!typescript-language-server",
"!vtsls",
"!eslint"
],
"formatter": "language_server"
},
"TSX": {
"language_servers": [
"deno",
"!typescript-language-server",
"!vtsls",
"!eslint"
],
"formatter": "language_server"
}
}
}
```
See [Configuring supported languages](../configuring-languages.md) in the Zed documentation for more information.
## See also:
- [TypeScript](./typescript.md)
- [JavaScript](./javascript.md)
# Diff
Diff support is available natively in Zed.
- Tree-sitter: [zed-industries/the-mikedavis/tree-sitter-diff](https://github.com/the-mikedavis/tree-sitter-diff)
## Configuration
Zed will not attempt to format diff files and has [`remove_trailing_whitespace_on_save`](https://zed.dev/docs/configuring-zed#remove-trailing-whitespace-on-save) and [`ensure-final-newline-on-save`](https://zed.dev/docs/configuring-zed#ensure-final-newline-on-save) set to false.
Zed will automatically recognize files with `patch` and `diff` extensions as Diff files. To recognize other extensions, add them to `file_types` in your Zed settings.json:
```json
"file_types": {
"Diff": ["dif"]
},
```
# Docker
Support for `Dockerfile` and `docker-compose.yaml` in Zed is provided by community-maintained extensions.
## Docker Compose
Docker `compose.yaml` language support in Zed is provided by the [Docker Compose extension](https://github.com/eth0net/zed-docker-compose). Please report issues to: [https://github.com/eth0net/zed-docker-compose/issues](https://github.com/eth0net/zed-docker-compose/issues).
- Language Server: [microsoft/compose-language-service](https://github.com/microsoft/compose-language-service)
## Dockerfile
`Dockerfile` language support in Zed is provided by the [Dockerfile extension](https://github.com/d1y/dockerfile.zed). Please issues to: [https://github.com/d1y/dockerfile.zed/issues](https://github.com/d1y/dockerfile.zed/issues).
- Tree-sitter: [camdencheek/tree-sitter-dockerfile](https://github.com/camdencheek/tree-sitter-dockerfile)
- Language Server: [rcjsuen/dockerfile-language-server](https://github.com/rcjsuen/dockerfile-language-server)
# Elixir
Elixir support is available through the [Elixir extension](https://github.com/zed-extensions/elixir).
- Tree-sitter:
- [elixir-lang/tree-sitter-elixir](https://github.com/elixir-lang/tree-sitter-elixir)
- [phoenixframework/tree-sitter-heex](https://github.com/phoenixframework/tree-sitter-heex)
- Language servers:
- [elixir-lsp/elixir-ls](https://github.com/elixir-lsp/elixir-ls)
- [elixir-tools/next-ls](https://github.com/elixir-tools/next-ls)
- [lexical-lsp/lexical](https://github.com/lexical-lsp/lexical)
## Choosing a language server
The Elixir extension offers language server support for `elixir-ls`, `next-ls`, and `lexical`.
`elixir-ls` is enabled by default.
To switch to `next-ls`, add the following to your `settings.json`:
```json
{
"languages": {
"Elixir": {
"language_servers": ["next-ls", "!elixir-ls", "..."]
}
}
}
```
To switch to `lexical`, add the following to your `settings.json`:
```json
{
"languages": {
"Elixir": {
"language_servers": ["lexical", "!elixir-ls", "..."]
}
}
}
```
## Setting up `elixir-ls`
1. Install `elixir`:
```sh
brew install elixir
```
2. Install `elixir-ls`:
```sh
brew install elixir-ls
```
3. Restart Zed
> If `elixir-ls` is not running in an elixir project, check the error log via the command palette action `zed: open log`. If you find an error message mentioning: `invalid LSP message header "Shall I install Hex? (if running non-interactively, use \"mix local.hex --force\") [Yn]`, you might need to install [`Hex`](https://hex.pm). You run `elixir-ls` from the command line and accept the prompt to install `Hex`.
### Formatting with Mix
If you prefer to format your code with [Mix](https://hexdocs.pm/mix/Mix.html), use the following snippet in your `settings.json` file to configure it as an external formatter. Formatting will occur on file save.
```json
{
"languages": {
"Elixir": {
"format_on_save": {
"external": {
"command": "mix",
"arguments": ["format", "--stdin-filename", "{buffer_path}", "-"]
}
}
}
}
}
```
### Additional workspace configuration options
You can pass additional elixir-ls workspace configuration options via lsp settings in `settings.json`.
The following example disables dialyzer:
```json
"lsp": {
"elixir-ls": {
"settings": {
"dialyzerEnabled": false
}
}
}
```
See [ElixirLS configuration settings](https://github.com/elixir-lsp/elixir-ls#elixirls-configuration-settings) for more options.
### HEEx
Zed also supports HEEx templates. HEEx is a mix of [EEx](https://hexdocs.pm/eex/1.12.3/EEx.html) (Embedded Elixir) and HTML, and is used in Phoenix LiveView applications.
- Tree-sitter: [phoenixframework/tree-sitter-heex](https://github.com/phoenixframework/tree-sitter-heex)
# Elm
Elm support is available through the [Elm extension](https://github.com/zed-extensions/elm).
- Tree-sitter: [elm-tooling/tree-sitter-elm](https://github.com/elm-tooling/tree-sitter-elm)
- Language Server: [elm-tooling/elm-language-server](https://github.com/elm-tooling/elm-language-server)
## Setup
Zed support for Elm requires installation of `elm`, `elm-format`, and `elm-review`.
1. [Install Elm](https://guide.elm-lang.org/install/elm.html) (or run `brew install elm` on macOS).
2. Install `elm-review` to support code linting:
```sh
npm install elm-review --save-dev
```
3. Install `elm-format` to support automatic formatting
```sh
npm install -g elm-format
```
## Configuring `elm-language-server`
Elm language server can be configured in your `settings.json`, e.g.:
```json
{
"lsp": {
"elm-language-server": {
"initialization_options": {
"disableElmLSDiagnostics": true,
"onlyUpdateDiagnosticsOnSave": false,
"elmReviewDiagnostics": "warning"
}
}
}
}
```
`elm-format`, `elm-review` and `elm` need to be installed and made available in the environment or configured in the settings. See the [full list of server settings here](https://github.com/elm-tooling/elm-language-server?tab=readme-ov-file#server-settings).
# Emmet
[Emmet](https://emmet.io/) is a web-developer’s toolkit that can greatly improve your HTML & CSS workflow.
- Language Server: [olrtg/emmet-language-server](https://github.com/olrtg/emmet-language-server)
# Erlang
Erlang support is available through the [Erlang extension](https://github.com/zed-extensions/erlang).
- Tree-sitter: [WhatsApp/tree-sitter-erlang](https://github.com/WhatsApp/tree-sitter-erlang)
- Language Servers:
- [erlang-ls/erlang_ls](https://github.com/erlang-ls/erlang_ls)
- [WhatsApp/erlang-language-platform](https://github.com/WhatsApp/erlang-language-platform)
## Choosing a language server
The Erlang extension offers language server support for `erlang_ls` and `erlang-language-platform`.
`erlang_ls` is enabled by default.
To switch to `erlang-language-platform`, add the following to your `settings.json`:
```json
{
"languages": {
"Erlang": {
"language_servers": ["elp", "!erlang-ls", "..."]
}
}
}
```
## See also:
- [Elixir](./elixir.md)
- [Gleam](./gleam.md)
# Fish
Fish language support in Zed is provided by the community-maintained [Fish extension](https://github.com/hasit/zed-fish).
Report issues to: [https://github.com/hasit/zed-fish/issues](https://github.com/hasit/zed-fish/issues)
- Tree-sitter: [ram02z/tree-sitter-fish](https://github.com/ram02z/tree-sitter-fish)
# GDScript
Godot [GDScript](https://gdscript.com/) language support in Zed is provided by the community-maintained [GDScript extension](https://github.com/grndctrl/zed-gdscript).
Report issues to: [https://github.com/grndctrl/zed-gdscript/issues](https://github.com/grndctrl/zed-gdscript/issues)
- Tree-sitter: [PrestonKnopp/tree-sitter-gdscript](https://github.com/PrestonKnopp/tree-sitter-gdscript) and [PrestonKnopp/tree-sitter-godot-resource](https://github.com/PrestonKnopp/tree-sitter-godot-resource)
- Language Server: [gdscript-language-server](https://github.com/godotengine/godot)
## Setup
1. Download and install [Godot for MacOS](https://godotengine.org/download/macos/).
2. Unzip the Godot.app and drag it into your /Applications folder.
3. Open Godot.app and open your project (an example project is fine)
4. In Godot, Editor Menu -> Editor Settings; scroll down the left sidebar to `Text Editor -> External`
1. Use External Editor: "✅ On"
2. Exec path: `/Applications/Zed.app/Contents/MacOS/zed`
3. Exec flags: `{project} {file}:{line}:{col}`
4. Close settings to save.
5. In Godot double click on a \*.gd script and Zed will launch
## Usage
When Godot is running, the GDScript extension will connect to the language server provided by the Godot runtime and will provide `jump to definition`, hover states when you hold cmd and other language server features.
> Note: If Zed is already running with an existing workspace, spawning from Godot will fail. Quit Zed and it should work again.
# Gleam
Gleam support is available through the [Gleam extension](https://github.com/gleam-lang/zed-gleam). To learn about Gleam, see the [docs](https://gleam.run/documentation/) or check out the [`stdlib` reference](https://hexdocs.pm/gleam_stdlib/). The Gleam language server has a variety of features, including go-to definition, automatic imports, and [more](https://gleam.run/language-server/).
- Tree-sitter: [gleam-lang/tree-sitter-gleam](https://github.com/gleam-lang/tree-sitter-gleam)
- Language Server: [gleam lsp](https://github.com/gleam-lang/gleam/tree/main/compiler-core/src/language_server)
See also:
- [Elixir](./elixir.md)
- [Erlang](./erlang.md)
# GLSL
GLSL (OpenGL Shading Language) support is available through the [GLSL Extension](https://github.com/zed-industries/zed/tree/main/extensions/glsl/)
- Tree-sitter: [theHamsta/tree-sitter-glsl](https://github.com/theHamsta/tree-sitter-glsl)
- Language Server: [nolanderc/glsl_analyzer](https://github.com/nolanderc/glsl_analyzer)
# Go
Go support is available natively in Zed.
- Tree-sitter: [tree-sitter/tree-sitter-go](https://github.com/tree-sitter/tree-sitter-go)
- Language Server: [golang/tools/tree/master/gopls](https://github.com/golang/tools/tree/master/gopls)
- Debug Adapter: [delve](https://github.com/go-delve/delve)
## Setup
We recommend installing gopls via go's package manager and not via Homebrew or your Linux distribution's package manager.
1. Make sure you have uninstalled any version of gopls you have installed via your package manager:
```sh
# MacOS homebrew
brew remove gopls
# Ubuntu
sudo apt-get remove gopls
sudo snap remove gopls
# Arch
sudo pacman -R gopls
```
2. Install/Update `gopls` to the latest version using the go module tool:
```sh
go install golang.org/x/tools/gopls@latest
```
3. Ensure that `gopls` is in your path:
```sh
which gopls
gopls version
```
If `gopls` is not found you will likely need to add `export PATH="$PATH:$HOME/go/bin"` to your `.zshrc` / `.bash_profile`
## Inlay Hints
Zed sets the following initialization options for inlay hints:
```json
"hints": {
"assignVariableTypes": true,
"compositeLiteralFields": true,
"compositeLiteralTypes": true,
"constantValues": true,
"functionTypeParameters": true,
"parameterNames": true,
"rangeVariableTypes": true
}
```
to make the language server send back inlay hints when Zed has them enabled in the settings.
Use
```json
"lsp": {
"gopls": {
"initialization_options": {
"hints": {
....
}
}
}
}
```
to override these settings.
See [gopls inlayHints documentation](https://github.com/golang/tools/blob/master/gopls/doc/inlayHints.md) for more information.
## Debugging
Zed supports zero-configuration debugging of Go tests and entry points (`func main`). Run {#action debugger::Start} ({#kb debugger::Start}) to see a contextual list of these preconfigured debug tasks.
For more control, you can add debug configurations to `.zed/debug.json`. See below for examples.
### Debug Go Packages
To debug a specific package, you can do so by setting the Delve mode to "debug". In this case "program" should be set to the package name.
```json
[
{
"label": "Go (Delve)",
"adapter": "Delve",
"program": "$ZED_FILE",
"request": "launch",
"mode": "debug"
},
{
"label": "Run server",
"adapter": "Delve",
"request": "launch",
"mode": "debug",
// For Delve, the program can be a package name
"program": "./cmd/server"
// "args": [],
// "buildFlags": [],
}
]
```
### Debug Go Tests
To debug the tests for a package, set the Delve mode to "test".
The "program" is still the package name, and you can use the "buildFlags" to do things like set tags, and the "args" to set args on the test binary. (See `go help testflags` for more information on doing that).
```json
[
{
"label": "Run integration tests",
"adapter": "Delve",
"request": "launch",
"mode": "test",
"program": ".",
"buildFlags": ["-tags", "integration"]
// To filter down to just the test your cursor is in:
// "args": ["-test.run", "$ZED_SYMBOL"]
}
]
```
### Build and debug separately
If you need to build your application with a specific command, you can use the "exec" mode of Delve. In this case "program" should point to an executable,
and the "build" command should build that.
```json
[
{
"label": "Debug Prebuilt Unit Tests",
"adapter": "Delve",
"request": "launch",
"mode": "exec",
"program": "${ZED_WORKTREE_ROOT}/__debug_unit",
"args": ["-test.v", "-test.run=${ZED_SYMBOL}"],
"build": {
"command": "go",
"args": [
"test",
"-c",
"-tags",
"unit",
"-gcflags\"all=-N -l\"",
"-o",
"__debug_unit",
"./pkg/..."
]
}
}
]
```
### Attaching to an existing instance of Delve
You might find yourself needing to connect to an existing instance of Delve that's not necessarily running on your machine; in such case, you can use `tcp_arguments` to instrument Zed's connection to Delve.
```json
[
{
"adapter": "Delve",
"label": "Connect to a running Delve instance",
"program": "/Users/zed/Projects/language_repositories/golang/hello/hello",
"cwd": "/Users/zed/Projects/language_repositories/golang/hello",
"args": [],
"env": {},
"request": "launch",
"mode": "exec",
"stopOnEntry": false,
"tcp_connection": { "host": "123.456.789.012", "port": 53412 }
}
]
```
In such case Zed won't spawn a new instance of Delve, as it opts to use an existing one. The consequence of this is that _there will be no terminal_ in Zed; you have to interact with the Delve instance directly, as it handles stdin/stdout of the debuggee.
## Go Mod
- Tree-sitter: [camdencheek/tree-sitter-go-mod](https://github.com/camdencheek/tree-sitter-go-mod)
- Language Server: N/A
## Go Sum
- Tree-sitter: [amaanq/tree-sitter-go-sum](https://github.com/amaanq/tree-sitter-go-sum)
- Language Server: N/A
## Go Work
- Tree-sitter:
[tree-sitter-go-work](https://github.com/d1y/tree-sitter-go-work)
- Language Server: N/A
# Groovy
Groovy language support in Zed is provided by the community-maintained [Groovy extension](https://github.com/valentinegb/zed-groovy).
Report issues to: [https://github.com/valentinegb/zed-groovy/issues](https://github.com/valentinegb/zed-groovy/issues)
- Tree-sitter: [murtaza64/tree-sitter-groovy](https://github.com/murtaza64/tree-sitter-groovy)
- Language Server: [GroovyLanguageServer/groovy-language-server](https://github.com/GroovyLanguageServer/groovy-language-server)
# Haskell
Haskell support is available through the [Haskell extension](https://github.com/zed-extensions/haskell).
- Tree-sitter: [tree-sitter-haskell](https://github.com/tree-sitter/tree-sitter-haskell)
- Language Server: [haskell-language-server](https://github.com/haskell/haskell-language-server)
## Installing HLS
Recommended method to [install haskell-language-server](https://haskell-language-server.readthedocs.io/en/latest/installation.html) (HLS) is via [ghcup](https://www.haskell.org/ghcup/install/) (`curl --proto '=https' --tlsv1.2 -sSf https://get-ghcup.haskell.org | sh
`):
```sh
ghcup install hls
which haskell-language-server-wrapper
```
## Configuring HLS
If you need to configure haskell-language-server (hls) you can add configuration options to your Zed settings.json:
```json
{
"lsp": {
"hls": {
"initialization_options": {
"haskell": {
"formattingProvider": "fourmolu"
}
}
}
}
}
```
See the official [configuring haskell-language-server](https://haskell-language-server.readthedocs.io/en/latest/configuration.html) docs for more options.
If you would like to use a specific hls binary, or perhaps use [static-ls](https://github.com/josephsumabat/static-ls) as a drop-in replacement instead, you can specify the binary path and arguments:
```json
{
"lsp": {
"hls": {
"binary": {
"path": "static-ls",
"arguments": ["--experimentalFeatures"]
}
}
}
}
```
# Helm
Support for Helm in Zed is provided by the community-maintained [Helm extension](https://github.com/cabrinha/helm.zed).
- Tree-sitter: [tree-sitter-go-template](https://github.com/ngalaiko/tree-sitter-go-template/tree/master)
- Language Server: [mrjosh/helm-ls](https://github.com/mrjosh/helm-ls)
## Setup
Enable Helm language for Helm files by editing your `.zed/settings.json` and adding:
```json
"file_types": {
"Helm": [
"**/templates/**/*.tpl",
"**/templates/**/*.yaml",
"**/templates/**/*.yml",
"**/helmfile.d/**/*.yaml",
"**/helmfile.d/**/*.yml",
"**/values*.yaml"
]
}
```
This will also mark values.yaml files as the type helm, since helm-ls supports this.
# HTML
HTML support is available through the [HTML extension](https://github.com/zed-industries/zed/tree/main/extensions/html).
- Tree-sitter: [tree-sitter/tree-sitter-html](https://github.com/tree-sitter/tree-sitter-html)
- Language Server: [microsoft/vscode-html-languageservice](https://github.com/microsoft/vscode-html-languageservice)
This extension is automatically installed, but if you do not want to use it, you can add the following to your settings:
```json
{
"auto_install_extensions": {
"html": false
}
}
```
## Formatting
By default Zed uses [Prettier](https://prettier.io/) for formatting HTML.
You can disable `format_on_save` by adding the following to your Zed `settings.json`:
```json
"languages": {
"HTML": {
"format_on_save": "off",
}
}
```
You can still trigger formatting manually with {#kb editor::Format} or by opening [the Command Palette](..//getting-started.md#command-palette) ({#kb command_palette::Toggle}) and selecting "Format Document".
### LSP Formatting
To use the `vscode-html-language-server` language server auto-formatting instead of Prettier, add the following to your Zed settings:
```json
"languages": {
"HTML": {
"formatter": "language_server",
}
}
```
You can customize various [formatting options](https://code.visualstudio.com/docs/languages/html#_formatting) for `vscode-html-language-server` via your Zed `settings.json`:
```json
"lsp": {
"vscode-html-language-server": {
"settings": {
"html": {
"format": {
// Indent under and (default: false)
"indentInnerHtml": true,
// Disable formatting inside